















RF262LXSB0 Whirlpool Range - Instructions
Keep searches simple. Use keywords, e.g. "leaking", "pump", "broken" or "fit".
Baking element had burned into

-
Rebecca from LANCASTER, SC
-
Difficulty Level:Very Easy
-
Total Repair Time:Less than 15 mins
-
Tools:Screw drivers
2 of 2 people
found this instruction helpful.
Was this instruction helpful to you?
Thank you for voting!
Bake element was broken
Remove the old part and install the new part.
Parts Used:
-
Alexander from LINCOLN, NE
-
Difficulty Level:Really Easy
-
Total Repair Time:30 - 60 mins
-
Tools:Pliers, Screw drivers
2 of 2 people
found this instruction helpful.
Was this instruction helpful to you?
Thank you for voting!
Old lower element fell apart
1. Unplug the power
2. Unscrew the two screws that hold the element
3. Pull the element out a little to expose the wires.
4. Gently pull off each wire (best done with needle nose) MAKE SURE THE WIRES DONT FALL INTO THE BACK OF THE OVEN.
5. Firmly seat wires back onto new element and replace screws
6. Bake stuff!
2. Unscrew the two screws that hold the element
3. Pull the element out a little to expose the wires.
4. Gently pull off each wire (best done with needle nose) MAKE SURE THE WIRES DONT FALL INTO THE BACK OF THE OVEN.
5. Firmly seat wires back onto new element and replace screws
6. Bake stuff!
Parts Used:
-
Matthew from MIDDLETOWN, CT
-
Difficulty Level:Very Easy
-
Total Repair Time:Less than 15 mins
-
Tools:Pliers, Screw drivers
2 of 2 people
found this instruction helpful.
Was this instruction helpful to you?
Thank you for voting!
Broiler element burned out
After doing a YouTube search. I successfully completed the repair by easily diagnosing the issue with the element.
I watched a video about 5 most common problems with whirlpool broiler elements.
The first being to inspect the element for damage. I found a small section that appeared to be rough and had a raised bump.
I decided to order a new element because the oven is older and it wouldn’t hurt to install a new one even if this wasn’t the issue.
Once the part arrived, which it did quickly, I followed the video instructions. It was easy and straight forward. I completed the task in under thirty minutes. It was very simple and I now have a functional broiler element.
I watched a video about 5 most common problems with whirlpool broiler elements.
The first being to inspect the element for damage. I found a small section that appeared to be rough and had a raised bump.
I decided to order a new element because the oven is older and it wouldn’t hurt to install a new one even if this wasn’t the issue.
Once the part arrived, which it did quickly, I followed the video instructions. It was easy and straight forward. I completed the task in under thirty minutes. It was very simple and I now have a functional broiler element.
Parts Used:

-
chris from HILTON HEAD, SC
-
Difficulty Level:Really Easy
-
Total Repair Time:15 - 30 mins
-
Tools:Screw drivers
3 of 5 people
found this instruction helpful.
Was this instruction helpful to you?
Thank you for voting!
the fastener became loose and dropped into the stove
This is a cook stove that is used 5 months a year. We have not fixed it yet because we are now in Florida the stove is in New York. We ordered that part just before we left NY for FL so the repair will be done in June of 2021.
George Clark
George Clark
Parts Used:
-
George E from OCALA, FL
-
Difficulty Level:Really Easy
-
Total Repair Time:30 - 60 mins
2 of 3 people
found this instruction helpful.
Was this instruction helpful to you?
Thank you for voting!
temp level uneven

-
Paul from HARMONY, MN
-
Difficulty Level:Very Easy
-
Total Repair Time:15 - 30 mins
2 of 3 people
found this instruction helpful.
Was this instruction helpful to you?
Thank you for voting!
the oven temperature was not working right. I installed a new oven sensor. Works get now
-
Rosalind from APOLLO, PA
-
Difficulty Level:Very Easy
-
Total Repair Time:15 - 30 mins
-
Tools:Screw drivers
3 of 6 people
found this instruction helpful.
Was this instruction helpful to you?
Thank you for voting!
Burner didn’t work right
-
Ralph from MARION, OH
-
Difficulty Level:Really Easy
-
Total Repair Time:30 - 60 mins
-
Tools:Screw drivers
2 of 3 people
found this instruction helpful.
Was this instruction helpful to you?
Thank you for voting!
Followup Repair to Install Door Trim
I had to unscrew the handle from the door as well as take out the front glass, put the trim in place (Thank God for the bottom placement nipples on each trimpiece), hold everything together after aligning all the pieces in place while I screwed the handle back on. The reason I was replacing the trim in the first place was that it is fragile plastic that had broken on both sides when I replaced one inner glass piece that had broken.
Parts Used:


-
John from Madison, WI
-
Difficulty Level:Difficult
-
Total Repair Time:30 - 60 mins
-
Tools:Screw drivers
2 of 3 people
found this instruction helpful.
Was this instruction helpful to you?
Thank you for voting!
chemical etching of black painted finish on drawer front panel
took out the drawer by removing two fillips head screws, four more screws removed the drawer front. Two plastic push pins and the front panel was off. Put the new panel on secured it with the pins, attached it back on the drawer front, put in the screws and slid the drawer back in the stove, put the two screws back in, done deal!
Parts Used:
-
michael from mesa, AZ
-
Difficulty Level:Really Easy
-
Total Repair Time:15 - 30 mins
-
Tools:Screw drivers
2 of 3 people
found this instruction helpful.
Was this instruction helpful to you?
Thank you for voting!
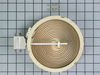
Elements burned wouldn't heat
First I cut electric power off removed the two screws that hold glass top lifted up and removed two screws that hold element in place. I disonnected the wires and then pulled the element out
Parts Used:
-
Jaime from Deltona, FL
-
Difficulty Level:Really Easy
-
Total Repair Time:15 - 30 mins
-
Tools:Nutdriver, Screw drivers
3 of 7 people
found this instruction helpful.
Was this instruction helpful to you?
Thank you for voting!
baking element non operational
removed two screws to faceplate at rear of oven. Disconntected contact wires, installed bake element reconnected contact wires, attached faceplate turned on oven holy hell it works just saved some money on service call thanks!!!
Parts Used:
-
GARY from JACKSON, WY
-
Difficulty Level:Really Easy
-
Total Repair Time:Less than 15 mins
-
Tools:Screw drivers
1 person
found this instruction helpful.
Was this instruction helpful to you?
Thank you for voting!
Worn/Bulb Socket
It was alittle difficult at 1st to remove the clips that held in the socket. But once out everything went smoothly.
Parts Used:

-
JOSEPH from COON RAPIDS, MN
-
Difficulty Level:Really Easy
-
Total Repair Time:Less than 15 mins
-
Tools:Screw drivers
2 of 4 people
found this instruction helpful.
Was this instruction helpful to you?
Thank you for voting!
8" FRONT BURNER STAYED ON HIGH HEAT/WOULD NOT REDUCE TEMPERTURE
REMOVE BACK OF RANGE, REMOVE BURNER KNOB. REMOVE SWITCH CONTROL REMOVE WIRES. REPLACE WIRES ON NEW SWITCH. INSERTED ALL WIRES REPLACE NEW SWITCH RE REPLACE ALL SCREWS. CHECK SWITCH. TURN BRAKER BACK ON. CHECK SWITCH FUNCTION. ALL IS FINE. PUT BACK ON RANGE SCREW IT IN PLACE. MOVE RANGE BACK IN IT POSITION.
Parts Used:
-
RICHARD from DELTONA, FL
-
Difficulty Level:Really Easy
-
Total Repair Time:15 - 30 mins
-
Tools:Screw drivers
1 person
found this instruction helpful.
Was this instruction helpful to you?
Thank you for voting!
Back left burner went out
I found on youtube Also we marked each wire with masking tape 1A and 1B, 2A and 2B. The wires were the same color.
Parts Used:
-
Jane from BRYAN, TX
-
Difficulty Level:Really Easy
-
Total Repair Time:30 - 60 mins
-
Tools:Socket set
1 person
found this instruction helpful.
Was this instruction helpful to you?
Thank you for voting!