















RF198LXMS0 Whirlpool Range - Instructions
Keep searches simple. Use keywords, e.g. "leaking", "pump", "broken" or "fit".
Bottom door trim was rusted
Removed oven door and the 3 screws holding the bottom door trim. Attached new trim piece and reinstalled oven door. Entire job took less than 5 minutes.
Parts Used:

-
Timothy from Terre Haute, IN
-
Difficulty Level:Really Easy
-
Total Repair Time:Less than 15 mins
-
Tools:Screw drivers
11 of 13 people
found this instruction helpful.
Was this instruction helpful to you?
Thank you for voting!
Lighting hit my house and blew the computer board out, the stove top work but oven would not, replacing this part fixed my oven!! $200, compared to replacing for $600. Thanks!
took back of stove off ,total 6 screws, unpluged blown computer 3 plugs, pluged in new!
Parts Used:

-
Laura from Chipley, FL
-
Difficulty Level:Really Easy
-
Total Repair Time:15 - 30 mins
-
Tools:Screw drivers
10 of 11 people
found this instruction helpful.
Was this instruction helpful to you?
Thank you for voting!
Broke glass door on stove while cleaning it
I'm still unsure why it broke ,but it was just a matter of removing two screws that hold the handle in place and sliding in the glass...
Parts Used:

-
Aires from Canton, GA
-
Difficulty Level:Really Easy
-
Total Repair Time:Less than 15 mins
-
Tools:Screw drivers
16 of 29 people
found this instruction helpful.
Was this instruction helpful to you?
Thank you for voting!
Baked on sauce
Used cooktop creme, oven cleaner and Mr. Clean sponges. After many days of working on the surface, we were able to remove 99% of the sauce.
Parts Used:

-
Julie from Newnan, GA
-
Difficulty Level:A Bit Difficult
-
Total Repair Time:More than 2 hours
11 of 15 people
found this instruction helpful.
Was this instruction helpful to you?
Thank you for voting!
Oven light would not work--faulty socket
After removing the back of the stove, the old light socket was fairly easy to remove. The new socket slipped in place and the wires reattached and now the oven has a light again. A very simple process--especially for someone who's not an expert in repairing appliances.
Parts Used:

-
Delores from Warren, MN
-
Difficulty Level:Easy
-
Total Repair Time:15 - 30 mins
-
Tools:Screw drivers, Socket set
10 of 12 people
found this instruction helpful.
Was this instruction helpful to you?
Thank you for voting!
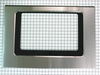
front safety glass broken
-
charles from McDonough, GA
-
Difficulty Level:Easy
-
Total Repair Time:Less than 15 mins
-
Tools:Screw drivers
15 of 27 people
found this instruction helpful.
Was this instruction helpful to you?
Thank you for voting!
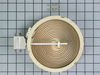
Back heating element stopped working
I had some confusion about the correct series number associated with my stove and called Partselect. They confirmed the part I was looking at was correct in less than 5 minutes. I then completed the order online. Even with standard shipping my order was processed immediately and I received the heating element the next day.
Turned off the breaker. Removed the two screws in the front holding the range top down. Loosened the screws holding the element in place while balancing the range top with my shoulder. Removed the wires from the older element one at a time and attached them to the new element. Put the new element in place and screwed back in place. If I had a little help with the range top I think I could have completed it in 5 minutes but I was at home alone and the other stories of doing this repair made it seem easy enough and it was.
Turned off the breaker. Removed the two screws in the front holding the range top down. Loosened the screws holding the element in place while balancing the range top with my shoulder. Removed the wires from the older element one at a time and attached them to the new element. Put the new element in place and screwed back in place. If I had a little help with the range top I think I could have completed it in 5 minutes but I was at home alone and the other stories of doing this repair made it seem easy enough and it was.
Parts Used:
-
James from Peachtree City, GA
-
Difficulty Level:Really Easy
-
Total Repair Time:15 - 30 mins
-
Tools:Nutdriver
9 of 10 people
found this instruction helpful.
Was this instruction helpful to you?
Thank you for voting!
Broiler element failed
Slide range out,unplug range,remove rear cover to unplug element wires, open door remove screws inside oven remove element
Parts Used:

-
steven from SEDRO WOOLLEY, WA
-
Difficulty Level:Very Easy
-
Total Repair Time:15 - 30 mins
-
Tools:Screw drivers
9 of 10 people
found this instruction helpful.
Was this instruction helpful to you?
Thank you for voting!
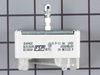
Burner control indicator light
Shut down breaker; remove stove back cover plate (8 screws); remove the control knob; remove knob screws (2); simply remove one wire at a time and replace the coresponding wire to the new control unit; remove the snap ring on the knob bar and snap off to fit the proper length; place the control unit in position and reinstall the 2 screws; reinstall the back panel; position stove and turn throw the stove breaker on; test the burner control.
Parts Used:
-
George from Fredericksburg, PA
-
Difficulty Level:Easy
-
Total Repair Time:Less than 15 mins
-
Tools:Pliers, Screw drivers
10 of 15 people
found this instruction helpful.
Was this instruction helpful to you?
Thank you for voting!
Control panel started beeping and locked-up.
I looked at the symbol codes located at the schematic diagram. Schematic diagram is located at the back of range. I followed step by step troubleshooting procedure on the diagram then ordered part. The control panel is easy to remove and install, just plug and play.
Parts Used:
-
marcelo from jacksonville, FL
-
Difficulty Level:Really Easy
-
Total Repair Time:15 - 30 mins
-
Tools:Screw drivers
8 of 10 people
found this instruction helpful.
Was this instruction helpful to you?
Thank you for voting!
Heating element burned up
It was simple. Unscrewed to screws at the back of the oven. Slipped off the wire connectors then attached the wire connectors to the new part, put the screws back in and we were back in business.
Parts Used:

-
Jerry D from Spring Valley, CA
-
Difficulty Level:Easy
-
Total Repair Time:15 - 30 mins
-
Tools:Screw drivers
8 of 10 people
found this instruction helpful.
Was this instruction helpful to you?
Thank you for voting!
Element Burned out
looked for how to video on you tube. It saved me lots of money. Anyone could do it.
Parts Used:
-
Buford from Sun City Center, FL
-
Difficulty Level:Really Easy
-
Total Repair Time:15 - 30 mins
-
Tools:Nutdriver, Pliers, Screw drivers
9 of 13 people
found this instruction helpful.
Was this instruction helpful to you?
Thank you for voting!
Bottom door trim was rusting
Simply removed three screws that held the door trim in place. Once the screws are removed be carefull because the front door glass is held in place by the bottom door trim. Otherwise an extremely easy repair.
Parts Used:

-
Mike from West Monroe, LA
-
Difficulty Level:Easy
-
Total Repair Time:15 - 30 mins
-
Tools:Screw drivers
7 of 8 people
found this instruction helpful.
Was this instruction helpful to you?
Thank you for voting!
Outer glass of the oven door is broken.
I took out the two screws that held the oven handle in place inserted the glass in the door and replaced the two screw!!! That easy!
Parts Used:
-
Ernestine from baltimore, MD
-
Difficulty Level:Really Easy
-
Total Repair Time:Less than 15 mins
-
Tools:Screw drivers
11 of 20 people
found this instruction helpful.
Was this instruction helpful to you?
Thank you for voting!
Oven wasn't preheating to temperature
Repair of oven sensor easy to install; however, product did not resolve the problem. Returned new sensor and awaiting refund (2 weeks passed so far).
Parts Used:

-
Margaret from WALDORF, MD
-
Difficulty Level:Really Easy
-
Total Repair Time:30 - 60 mins
-
Tools:Screw drivers
8 of 11 people
found this instruction helpful.
Was this instruction helpful to you?
Thank you for voting!