















RB790DT2BB Hotpoint Range - Instructions
Keep searches simple. Use keywords, e.g. "leaking", "pump", "broken" or "fit".
BASE OF BULB BROKE OFF & WELDED TO SOCKET
PULL RANGE OUT FROM WALL & ALSO REMOVED OVEN DOOR BY SLIDING UP. WORKING FROM INSIDE OVEN & ALSO BEHIND I REPLACED PART . ALWAYS " UNPLUG " RANGE BEFORE YOU START.
Parts Used:
-
NEIL from ROCKY POINT, NY
-
Difficulty Level:Easy
-
Total Repair Time:30 - 60 mins
-
Tools:Nutdriver, Pliers
1 person
found this instruction helpful.
Was this instruction helpful to you?
Thank you for voting!
Oven no longer working after running the self clean option. Only Stove top burners worked
I began by turning off the breaker in the panel.
Slide the oven out into the open area.
Removed 3 screws in order to remove rear top panel.
Took 2 pictures of the wiring location on the PCB
Removed all wiring going to the circuit board total of 8.
Removed 4 screws in order to remove bad PCB.
Remove faceplate from bad PCB (you will need to place this faceplate on the new PCB.
To Install.
Reverse steps above
Slide the oven out into the open area.
Removed 3 screws in order to remove rear top panel.
Took 2 pictures of the wiring location on the PCB
Removed all wiring going to the circuit board total of 8.
Removed 4 screws in order to remove bad PCB.
Remove faceplate from bad PCB (you will need to place this faceplate on the new PCB.
To Install.
Reverse steps above
Parts Used:
-
Dominick from THORNWOOD, NY
-
Difficulty Level:Really Easy
-
Total Repair Time:30 - 60 mins
-
Tools:Nutdriver, Pliers, Screw drivers
1 person
found this instruction helpful.
Was this instruction helpful to you?
Thank you for voting!
Replaced stove top burner element
Disconnect stove electrical connection. Removed 2 bolts common to the upper stove top cover. Disconnected 4 wires from burner element along with 2 retaining clips.
Removed burner element and replaced with new element. Reinstalled 4 wires and 2 retaining clips. Lowered stove top cover and reinstalled 2 bolts. Connect stove electrical to wall outlet. Turn on burner element and verify that it works.
Removed burner element and replaced with new element. Reinstalled 4 wires and 2 retaining clips. Lowered stove top cover and reinstalled 2 bolts. Connect stove electrical to wall outlet. Turn on burner element and verify that it works.
Parts Used:
-
Steve from Forest, VA
-
Difficulty Level:Easy
-
Total Repair Time:1- 2 hours
-
Tools:Screw drivers, Socket set
1 person
found this instruction helpful.
Was this instruction helpful to you?
Thank you for voting!
Removal reinstalling
Removal old fashioned oven door handle took time after removing the oven door. New replacement handle was easy to install! Try to reinstall was long and finally got installed after 5 attempts due hinge on right side issue
Parts Used:
-
Thomas from HAMPSTEAD, NH
-
Difficulty Level:A Bit Difficult
-
Total Repair Time:More than 2 hours
-
Tools:Screw drivers, Socket set
1 person
found this instruction helpful.
Was this instruction helpful to you?
Thank you for voting!
Change bulb

-
Louis from LEAGUE CITY, TX
-
Difficulty Level:Really Easy
-
Total Repair Time:30 - 60 mins
-
Tools:Nutdriver
3 of 8 people
found this instruction helpful.
Was this instruction helpful to you?
Thank you for voting!
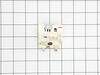
Knob stem broke off.
Pulled stove out to access back panel. Unscrew broken switch/stem. Replaced each wire one at a time to make sure they went in right spot. Screw in new switch. Replaced back panel.
Parts Used:
-
DALE from FREMONT, NE
-
Difficulty Level:Very Easy
-
Total Repair Time:Less than 15 mins
-
Tools:Nutdriver, Pliers, Screw drivers
1 of 2 people
found this instruction helpful.
Was this instruction helpful to you?
Thank you for voting!
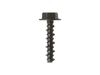
Missing screw to range door handle
The part that was ordered based on the shamanic wasn't the part that was needed for the repair. It was to short. I took the other screw for the other side and that screw was an inch longer than the screw that was ordered thru your company. I then went too a jar that I placed extra screws, nuts and bolts which l keep in my garage . I found a same length screw but a different head and it works perfectly fine. When I ordered the part from your company most of the parts did not have a photo of the part on file, or a description like how long the part is. I still ordered it because it should fit the make and model number that was posted on the shamanic that was showed to me on line.
Parts Used:
-
Stanley from TRENTON, NJ
-
Difficulty Level:Very Easy
-
Total Repair Time:Less than 15 mins
1 of 2 people
found this instruction helpful.
Was this instruction helpful to you?
Thank you for voting!
Light burnt out.
Turned the wire protector to the side. Turned out the old bulb and replaced it with the new. Turned the wire protector back in place and I'm like new.
Parts Used:
-
Roscoe G from ROCHESTER, NY
-
Difficulty Level:Very Easy
-
Total Repair Time:Less than 15 mins
2 of 6 people
found this instruction helpful.
Was this instruction helpful to you?
Thank you for voting!
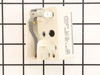
Water dumped over in in my overhead microwave, which dripped down on, & shorted out a burner switch.
My husband had already removed the back plate form the stove and detached the wires from the old burner switch because it was keeping the burner on. He unscrewed the old switch and removed it. He then popped in the new switch, attached the wires to the correct contacts, and put the back plate back on. We plugged in the stove, and that burner works good as new.
Parts Used:
-
Deanna from Buckeye, AZ
-
Difficulty Level:Really Easy
-
Total Repair Time:Less than 15 mins
-
Tools:Pliers, Screw drivers
1 of 3 people
found this instruction helpful.
Was this instruction helpful to you?
Thank you for voting!
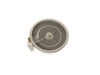
Heating element burned out
-
William from CONCORD, MA
-
Difficulty Level:Very Easy
-
Total Repair Time:30 - 60 mins
-
Tools:Pliers, Screw drivers
1 of 3 people
found this instruction helpful.
Was this instruction helpful to you?
Thank you for voting!
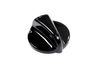
knob would not turn on burner
Found knob cracked simply remove and placed a new knob on burner switch extremely easy.
Parts Used:
-
John from Deltona, FL
-
Difficulty Level:Really Easy
-
Total Repair Time:Less than 15 mins
0 of 1 people
found this instruction helpful.
Was this instruction helpful to you?
Thank you for voting!
fried oven control using raid
replaced oven clock control ref maintenance manual, 4 screws and 8 wires. plugged in new control and op checks good.
Parts Used:
-
Kerry from Loveland, CO
-
Difficulty Level:Really Easy
-
Total Repair Time:15 - 30 mins
-
Tools:Nutdriver, Screw drivers
4 of 13 people
found this instruction helpful.
Was this instruction helpful to you?
Thank you for voting!
burner was inoperative
verified switch operation , checked continuity of burner element found open ordered new part and installed next day
after extremely fast
service from partselect thank you
after extremely fast
service from partselect thank you
Parts Used:
-
bryan from cocoa, FL
-
Difficulty Level:Really Easy
-
Total Repair Time:15 - 30 mins
-
Tools:Nutdriver, Pliers, Screw drivers
0 of 2 people
found this instruction helpful.
Was this instruction helpful to you?
Thank you for voting!
eye wouldnt come on
removed the top section on stove and removed the wires off swtitch and put on new one then put new switch in
Parts Used:
-
daniel from valentines, VA
-
Difficulty Level:Really Easy
-
Total Repair Time:15 - 30 mins
-
Tools:Nutdriver
0 of 2 people
found this instruction helpful.
Was this instruction helpful to you?
Thank you for voting!
Burner not heating.
Isolated to control switch.
Replaced
Replaced
Parts Used:
-
Jack from Greensboro, GA
-
Difficulty Level:Really Easy
-
Total Repair Time:30 - 60 mins
-
Tools:Screw drivers
1 of 5 people
found this instruction helpful.
Was this instruction helpful to you?
Thank you for voting!