















RB753BC1AD Hotpoint Range - Instructions
Keep searches simple. Use keywords, e.g. "leaking", "pump", "broken" or "fit".
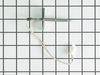
oven continued to get F2, F3 and F5 error messages when ovewn got hot
This repair was quite a bit more difficult then what had been described on the web site. First off, I have a double wall oven that is built in. Sliding it out of the cabinet was difficult and because oven was hard wired, I had to disconnect the actual wiring from the oven back. . Positioning the oven and allowing for it to rest on a support bench was the most difficult part The oven is heavy. Eventually, removing the back and top panels of the oven revealed the sensor connection. I was then able to feed it through the oven and reconnect all the wiring harnesses.. Getting the oven back in the cabinet was equally a challenge. But it did seem to fix the problem with over heating.
Parts Used:
-
Ralph from Redding, CA
-
Difficulty Level:Difficult
-
Total Repair Time:1- 2 hours
-
Tools:Nutdriver, Screw drivers, Socket set
Was this instruction helpful to you?
Thank you for voting!
Element was burned out
Disconnected the plug from the receptacle; removed the 2 screws holding the element in place at the rear of the oven; removed the support bracket at the front (also 2 screws); removed the panel on the back of the range; pulled the wire clips off the element (had to replace one of them); slid the new element in place; reconnected the wires and fastened the element in place; reattached the support bracket and rear panel ... With the assistance of my wife (extra hands) this was an easy job!
Parts Used:

-
William from Franklin, TN
-
Difficulty Level:Really Easy
-
Total Repair Time:15 - 30 mins
-
Tools:Nutdriver, Pliers
Was this instruction helpful to you?
Thank you for voting!
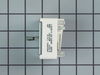
Getting the right stove model number and part number
Difficulty was in determining the right model number and part number of a switch. Noted that the left front burner came on when the switch for the left back burner was turned on. By inspection I found the left front burner switch had become faulty by actually hearing an electric arc in the switch and smelling the oder in the switch. With help from the person I called I was able to determine that the Model Number on the actual stove was wrong. It had an extra 0 between the W and F which she said was a common error in the GE model number. I then gave the switch number I found on the switch to the contact person and she was able to verify the right part number. It was relatively easy to replace the switch by taking off the back upper plate then taking off two screws that held the switch to the stove. The part came quite quickly once ordered. Sears repair wanted $75 just to diagnose then the cost of the part. I got the switch for $69.
Parts Used:
-
Gerald from San Diego, CA
-
Difficulty Level:Difficult
-
Total Repair Time:15 - 30 mins
-
Tools:Nutdriver, Screw drivers
Was this instruction helpful to you?
Thank you for voting!
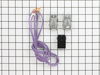
Burner wouldnt heat
Watched video,and used it as guideline.Biggest problem was removing tape from old wires.
Parts Used:
-
Mary from Leon, KS
-
Difficulty Level:Easy
-
Total Repair Time:30 - 60 mins
-
Tools:Nutdriver
Was this instruction helpful to you?
Thank you for voting!
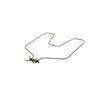
Old bake element burned out
Turned off circuit breaker, removed screws holding old element in with nut drivers, pulled out old element about 3-4" to reach terminals connected to back of element, removed spade lug terminals with needle nose pliers. Reconnected terminals to new element and screwed new element in place with nut drivers. Turned on circuit breaker and oven. New element works perfectly. Took about 8-10 minutes. Very easy to do.
Parts Used:
-
Thomas from Hamilton, VA
-
Difficulty Level:Really Easy
-
Total Repair Time:Less than 15 mins
-
Tools:Nutdriver, Pliers
Was this instruction helpful to you?
Thank you for voting!
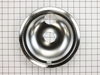
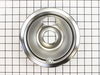
needed "original style" on older stove
I needed to replace all stovetop bowls and found all after-market bowls "just a little off" effecting how flat the burner rested so called PartSelect's hotline and was assured that if I were using the actual model number found on the stove the parts would definitely fit and not almost fit, guaranteed, and they did!
Parts Used:
-
David from N. Fort Myers, FL
-
Difficulty Level:Really Easy
-
Total Repair Time:Less than 15 mins
Was this instruction helpful to you?
Thank you for voting!
Found out Drip Bowls can not be added to self-clean
Dropped in new bowls. I was surprised how in-expensive new ones were.
Parts Used:
-
Gary from Renton, WA
-
Difficulty Level:Really Easy
-
Total Repair Time:Less than 15 mins
Was this instruction helpful to you?
Thank you for voting!
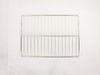
Old dishwasher rack and silverware rack
The whole process was very easy! I just got the model number and bought a new rack and silverware holder on,one. There was no assembly needed so I just popped them in and replaced the old ones! Very easy to do!
Parts Used:
-
Anne Marie from Andover, MA
-
Difficulty Level:Really Easy
-
Total Repair Time:Less than 15 mins
Was this instruction helpful to you?
Thank you for voting!
My drip bowls were rusted and corroded
I ordered new drip bowls and put them in place. They fit just fine.
Parts Used:
-
Glenda L from Lake Placid, FL
-
Difficulty Level:Really Easy
-
Total Repair Time:Less than 15 mins
Was this instruction helpful to you?
Thank you for voting!
Drip Bowels badly stained.
Unplug heating elements and pick up drip bowels and reinstall elements.
Parts Used:
-
Dean from Hill, NH
-
Difficulty Level:Really Easy
-
Total Repair Time:Less than 15 mins
Was this instruction helpful to you?
Thank you for voting!
Bake Element Broke
-
Lesley from LaPlace, LA
-
Difficulty Level:Really Easy
-
Total Repair Time:Less than 15 mins
-
Tools:Nutdriver, Pliers
Was this instruction helpful to you?
Thank you for voting!
needed new drip pans-
replaced pans- what I would like to comment on is the time- I ordered one day at noon and had them the next day at noon- I live in tiny town on northern border of USA- it was awesome- I couldn't believe it was them- 24 hours- super job and excellent price too
Parts Used:
-
Connice from Massena, NY
-
Difficulty Level:Really Easy
-
Total Repair Time:Less than 15 mins
Was this instruction helpful to you?
Thank you for voting!
bake element needed to be replaced
My oven is wired into the wall so I had to cut the power off at the fuse box. The hardest part was pulling the stove/oven away from the wall to see if it was a simple plug in or wired in. I lifted bottom drawer out so I could get leverage and lifted the entire unit so I could put the front feet on the soft pads. It slid away from the wall easily. I found a socket that fit the screws on the plate holding the broken element and unscrewed it, saving the screws. A gently tug on the element pulled the attached ends through the hole. The tip of the ends were attached to the wall wiring by a small sliding metal clip. I carefully pulled the ends apart. One was hard to get apart to I had to push it with the tip of a knife. Once the old was off the new was super easy to put back on. Side the tips to the clips, screw the plate in place and push the oven back in place. Flip your fuses and turn on the oven. Yeah!
Parts Used:
-
Bernadette from Coatesville, PA
-
Difficulty Level:Easy
-
Total Repair Time:15 - 30 mins
-
Tools:Socket set
Was this instruction helpful to you?
Thank you for voting!
element burnt out
ordered part shut electricity off took out 2 screws took of connectors put in new element replaced connectors replaced screws turn on elec started cooking
Parts Used:
-
don from protection, KS
-
Difficulty Level:Really Easy
-
Total Repair Time:15 - 30 mins
-
Tools:Nutdriver
Was this instruction helpful to you?
Thank you for voting!
Bake element not working
Removed element with 1/4 " nut driver, unhooked element,started to install new element and discovered the wires were too short and had to remove cover on the back to replace wires on the new element. The wires on my range were not as long as the ones showed on the video.It was still an easy repair and the delivery time was less than 2 days. excellent service. Thanks
Parts Used:
-
Rodney from Chambersburg, PA
-
Difficulty Level:Easy
-
Total Repair Time:15 - 30 mins
-
Tools:Nutdriver, Screw drivers
Was this instruction helpful to you?
Thank you for voting!