















RB526DH3BB General Electric Range - Instructions
Keep searches simple. Use keywords, e.g. "leaking", "pump", "broken" or "fit".
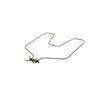
Bake element buned and broken
The repair was somewhat easy. The replacement elements are pushon type. The only thing is that the G.E. Hotpoint wire on the right side of the bake element is short. Be extra careful to not have it go back into the back oven wall or you will have to take the back cover plate (Pull out the range, remove the back cover using a nut driver or a magnetic tip srewdriver with the bit removed works[Wires are right there]. This is as easy a job as can be.
Parts Used:

-
Charles from Pittsburgh, PA
-
Difficulty Level:Easy
-
Total Repair Time:15 - 30 mins
-
Tools:Nutdriver, Pliers, Screw drivers
Was this instruction helpful to you?
Thank you for voting!
none to occasional power to burner elements
Exactly followed the instructional video and my installation was flawless. Now the burners power up and function like new. The whole repair was smooth and easy.
Parts Used:
-
Mohammed from San Jose, CA
-
Difficulty Level:Really Easy
-
Total Repair Time:15 - 30 mins
-
Tools:Nutdriver, Pliers
Was this instruction helpful to you?
Thank you for voting!
broken light socket
The only tool needed was a nutdriver to remove the lamp socket. I needed my head mounted light to see what I was doing, and everything went smoothly from there. Simple job.
Parts Used:
-
James from Monterey, TN
-
Difficulty Level:Easy
-
Total Repair Time:15 - 30 mins
-
Tools:Nutdriver
Was this instruction helpful to you?
Thank you for voting!
Element was burned out
Disconnected the plug from the receptacle; removed the 2 screws holding the element in place at the rear of the oven; removed the support bracket at the front (also 2 screws); removed the panel on the back of the range; pulled the wire clips off the element (had to replace one of them); slid the new element in place; reconnected the wires and fastened the element in place; reattached the support bracket and rear panel ... With the assistance of my wife (extra hands) this was an easy job!
Parts Used:
-
William from Franklin, TN
-
Difficulty Level:Really Easy
-
Total Repair Time:15 - 30 mins
-
Tools:Nutdriver, Pliers
Was this instruction helpful to you?
Thank you for voting!
plastic adapter was broken on end of the block kit
unplugged old block from both sides, ran new wire and plugged new wire to both ends and presto it worked, thanks for making it easy to fix. Thanks- Michael J Dumas
Parts Used:
-
Michael from West Monroe, LA
-
Difficulty Level:Really Easy
-
Total Repair Time:15 - 30 mins
-
Tools:Nutdriver, Screw drivers, Wrench (Adjustable)
Was this instruction helpful to you?
Thank you for voting!
Getting the right stove model number and part number
Difficulty was in determining the right model number and part number of a switch. Noted that the left front burner came on when the switch for the left back burner was turned on. By inspection I found the left front burner switch had become faulty by actually hearing an electric arc in the switch and smelling the oder in the switch. With help from the person I called I was able to determine that the Model Number on the actual stove was wrong. It had an extra 0 between the W and F which she said was a common error in the GE model number. I then gave the switch number I found on the switch to the contact person and she was able to verify the right part number. It was relatively easy to replace the switch by taking off the back upper plate then taking off two screws that held the switch to the stove. The part came quite quickly once ordered. Sears repair wanted $75 just to diagnose then the cost of the part. I got the switch for $69.
Parts Used:
-
Gerald from San Diego, CA
-
Difficulty Level:Difficult
-
Total Repair Time:15 - 30 mins
-
Tools:Nutdriver, Screw drivers
Was this instruction helpful to you?
Thank you for voting!
Broken bake element
-
Marcus from Lagrange, GA
-
Difficulty Level:Really Easy
-
Total Repair Time:Less than 15 mins
-
Tools:Pliers
Was this instruction helpful to you?
Thank you for voting!
slot that heating element fits was worn down and caused burners to be uneven
-
Judith from Broadway, VA
-
Difficulty Level:Really Easy
-
Total Repair Time:Less than 15 mins
Was this instruction helpful to you?
Thank you for voting!
6" and 8" burner bowl replacement
Slide out burner elements. Remove old burner bowls. Insert new burner bowls and reinstall burner elements.
Parts Used:
-
Shawn from Lubbock, TX
-
Difficulty Level:Really Easy
-
Total Repair Time:Less than 15 mins
Was this instruction helpful to you?
Thank you for voting!
Burner bowls had been used and abused for year gone by in this rental.
Replaced them all. Next I want to replace the burners.
Parts Used:
-
Diane from Rio Rancho, NM
-
Difficulty Level:Really Easy
-
Total Repair Time:Less than 15 mins
Was this instruction helpful to you?
Thank you for voting!
Open Switch
Pull knob. Pull wires. Pull two screws. Replace switch
Parts Used:
-
John from Denham Springs, LA
-
Difficulty Level:Really Easy
-
Total Repair Time:Less than 15 mins
-
Tools:Screw drivers
Was this instruction helpful to you?
Thank you for voting!
Oven light wire broken, damaged socket
Remove light bail, glass cover held by two nut screws. Pull socket, removed clips in back, replaced wire connectors, placed new socket in, then glass cover and bail. Wire connected in back, cover plate replaced.
Parts Used:
-
Patricia from Brandenburg, KY
-
Difficulty Level:Really Easy
-
Total Repair Time:Less than 15 mins
-
Tools:Nutdriver, Pliers
Was this instruction helpful to you?
Thank you for voting!
bowls were worn out
-
frances from winston salem, NC
-
Difficulty Level:Really Easy
-
Total Repair Time:Less than 15 mins
Was this instruction helpful to you?
Thank you for voting!
no display
Turned off circuit breaker to stove, remove top panel and then the old control module and installed replacement. Power back on and top panel reinstalled. Easy!!! And Everything works like new!!!
Parts Used:
-
Rebecca from Las Vegas, NV
-
Difficulty Level:Really Easy
-
Total Repair Time:Less than 15 mins
-
Tools:Screw drivers
Was this instruction helpful to you?
Thank you for voting!
GE Electric Range rear left burner quit coming on
Removed the back top cover with 1/4" nutdriver. Removed the burner terminal block with 1/4" nutdriver. Within 15 minutes had the terminal block kit removed and installed and in service.
Parts Used:
-
Richard from Richmond, TX
-
Difficulty Level:Really Easy
-
Total Repair Time:Less than 15 mins
-
Tools:Nutdriver, Pliers
Was this instruction helpful to you?
Thank you for voting!