















PVM2070SMC01 General Electric Microwave - Instructions
Keep searches simple. Use keywords, e.g. "leaking", "pump", "broken" or "fit".
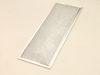
Air/Grease Filters Were Worn Out
Rec'd the parts within a day or two after ordering and simply placed them where the old ones were removed and wala my stove is back filtering. Only problem, the oven won't ignite while the broiler and stove top burners are fine. Go figure.
Parts Used:
-
peter e from far hills, NJ
-
Difficulty Level:Really Easy
-
Total Repair Time:Less than 15 mins
Was this instruction helpful to you?
Thank you for voting!
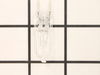
2 bulbs in the lower part of the unit had burned out.
Removal of the bulbs was easy; reinserting was not as easy due to the configuration/placement of the bulbs in the unit. It was interesting that a simple suggestion to keep the bulbs covered with some of the packing material made sense as to not directly handling the bulb itself and causing any contamination of the bulb(s).
Parts Used:
-
Don from Stephens City, VA
-
Difficulty Level:Really Easy
-
Total Repair Time:Less than 15 mins
Was this instruction helpful to you?
Thank you for voting!
replace bottom grease filters
Just pull down on "O" ring tab and filter will release. Install new filter in same position. you may have to pull on "O" ring to complete fit.
Parts Used:
-
Edwin from Easton, PA
-
Difficulty Level:Really Easy
-
Total Repair Time:Less than 15 mins
Was this instruction helpful to you?
Thank you for voting!
Light bulbs had burned out.
I myself had difficulties replacing bulbs, as I have no feelings in my fingers, so I asked my son while holding the bulb in the bubble wrap, He had no problems what so ever.
Parts Used:
-
Margaret from Reno, NV
-
Difficulty Level:A Bit Difficult
-
Total Repair Time:Less than 15 mins
Was this instruction helpful to you?
Thank you for voting!
How to remove microwave first?
The instructions for removing and installing the new bulbs appear to be great; however, nothing tells me how to remove the microwave from the mounting so I can then invert it and take care of the bulb issue.
Parts Used:
-
James K. from Humble, TX
-
Difficulty Level:Very Difficult
-
Total Repair Time:More than 2 hours
-
Tools:Screw drivers
Was this instruction helpful to you?
Thank you for voting!
light bulbs burned out
Used screwdriver, removed cover, took out old bulbs and replaced with new ones. Couldn't get any easier.
Parts Used:
-
Kim from Poway, CA
-
Difficulty Level:Really Easy
-
Total Repair Time:Less than 15 mins
-
Tools:Screw drivers
Was this instruction helpful to you?
Thank you for voting!
glass broken
-
jerry from gulfport, MS
-
Difficulty Level:Really Easy
-
Total Repair Time:Less than 15 mins
-
Tools:Screw drivers
Was this instruction helpful to you?
Thank you for voting!
The light lens was cracked
Had to remove one screw from the light lens metal frame. Then slid the broken glass out and replaced. Pulled out the two prong bulb and put the new one straight in. Put back frame and screw. Very easy
Parts Used:
-
Steven from El Cerrito,, CA
-
Difficulty Level:Really Easy
-
Total Repair Time:Less than 15 mins
-
Tools:Screw drivers
Was this instruction helpful to you?
Thank you for voting!
Burned out bulbs
-
Arthur from Boynton Beach, FL
-
Difficulty Level:Really Easy
-
Total Repair Time:Less than 15 mins
-
Tools:Screw drivers
Was this instruction helpful to you?
Thank you for voting!
Both Nite lights burned out, again.
So simple, unscrew the hatch underneath the microwave oven, pull out old bulbs, and insert new.
Parts Used:
-
Karen from Berea, OH
-
Difficulty Level:Really Easy
-
Total Repair Time:Less than 15 mins
-
Tools:Screw drivers
Was this instruction helpful to you?
Thank you for voting!
Light Bilbao burned out
Simple repair..took off covering with screwdriver removed the halogen bulb and replaced with the one I ordererd..wish all repairs went so well..
Parts Used:
-
Stephen from Kennett Square, PA
-
Difficulty Level:Really Easy
-
Total Repair Time:Less than 15 mins
-
Tools:Screw drivers
Was this instruction helpful to you?
Thank you for voting!
bulb replacement
-
andrew from malta, NY
-
Difficulty Level:Really Easy
-
Total Repair Time:Less than 15 mins
-
Tools:Screw drivers
Was this instruction helpful to you?
Thank you for voting!
replace grease filter
-
Anthony from San Jose, CA
-
Difficulty Level:Really Easy
-
Total Repair Time:Less than 15 mins
Was this instruction helpful to you?
Thank you for voting!
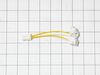
Broken Halogen light socket
There are five Philips screws on the bottom outside cover .one at each corner and one at the front center. Remove all four at the corners .leaving the front center for last. When the last screw is removed ,the cover will hinge down, it is attached to clips at the back that allow it fold down. The wire attached to the light socket is connected by a pull apart plug. Grasp at each end of the hard plastic connector and pull outward ,DO NOT PULL ON THE Wires ! Lift the cover from the back of the microwave place it on a flat surface on a towel keep it from sliding around. Remove the screws holding the porcelain sockets. Reverse procedure to reinstall .Installing new Halogen lamps is suggested. Use a clean tissue or cloth to handle the lamps, finger prints on the lamp will shorten the life .
Parts Used:
-
KENNETH from MEDFORD, MA
-
Difficulty Level:Really Easy
-
Total Repair Time:15 - 30 mins
-
Tools:Screw drivers
Was this instruction helpful to you?
Thank you for voting!
overhead oven light in micro burned out, could not find correct halogen bulbs locally
took of the cover, replaced bulbs then replaced bulbs. One was more difficult to get in than the other but all is ok now. No more stove stop cooking in the dark:)
Parts Used:
-
Andrea from Dennis, MA
-
Difficulty Level:Easy
-
Total Repair Time:15 - 30 mins
-
Tools:Screw drivers
Was this instruction helpful to you?
Thank you for voting!