















PTC22LFDARWW General Electric Refrigerator - Instructions
Keep searches simple. Use keywords, e.g. "leaking", "pump", "broken" or "fit".
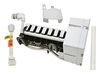
My ice breaker started leaking and making noise anf the stripper broke.
I ended up needing to order a new ice maker because the one I had is discontinued. I'm a 65yr old grandma and I did it myself!!!! The hardest part was finding the tool to loosed the nuts. I took the old one out and just put the new one right in it's place. Easy as pie.
Parts Used:
-
Marie from Elk Grove Village, IL
-
Difficulty Level:Really Easy
-
Total Repair Time:15 - 30 mins
-
Tools:Nutdriver
4 of 6 people
found this instruction helpful.
Was this instruction helpful to you?
Thank you for voting!
Ice maker needed replacement
Unplug refridge then loosened two bolts holding old ice maker. Lower then unplug and removed. Plugged in new harness and tightened two bolts to secure new ice maker. Plug in frig and wait for ice.
Parts Used:
-
James from PLYMOUTH, MA
-
Difficulty Level:Really Easy
-
Total Repair Time:15 - 30 mins
-
Tools:Socket set
3 of 3 people
found this instruction helpful.
Was this instruction helpful to you?
Thank you for voting!
Made ice would not eject from ice holder bin
removed broken bin , slid new ice bin in closed door. I bought the complete part.
Parts Used:
-
Lynn from MOUNTAIN HOME, ID
-
Difficulty Level:Very Easy
-
Total Repair Time:Less than 15 mins
3 of 3 people
found this instruction helpful.
Was this instruction helpful to you?
Thank you for voting!
the icemaker kept opening and closing
First I remove the 4 screw that connect the control board to the icemaker and then removed two more screws hold the control board in place and unpluged the control board and put the new one in and plugged it back up and put all the screws back and it was done I had no more problems
Parts Used:
-
Jennifer from Star City, AR
-
Difficulty Level:Really Easy
-
Total Repair Time:Less than 15 mins
-
Tools:Screw drivers
4 of 6 people
found this instruction helpful.
Was this instruction helpful to you?
Thank you for voting!
freezer compartment worked fine but very little cooling going to refrigerator section.
Freezer worked great but no cooling to refrigerator section. Replaced with part ordered. Phillips head screw driver is all that is needed. Very easy to replace, it's plug and play. New part powered up neither the freezer nor the refrigerator. Went back to old part and atleast freezer still works. New part was no good from factory. The replacement part# matched the original. I attempted to contact PartsSelect but there was no response back.
Parts Used:
-
Lee from OZARK, AR
-
Difficulty Level:Really Easy
-
Total Repair Time:30 - 60 mins
-
Tools:Screw drivers
3 of 3 people
found this instruction helpful.
Was this instruction helpful to you?
Thank you for voting!
The lights were on inside however the the water/ice dispenser did not work and the fridge and freezer side was not cooling
Simply take off the back panel. Remove the old run capacitor which is attached to the compressor by a white part. It pulls right off. You will have to unplug two wires. I took a pic to ensure I plugged the wires back up the correct way. Then I attached the new capacitor to the white part and put on the sleeve that was included, plugged it back into the compressor and zip tied the excess part of the sleeve. Once done plug fridge back up (always unplug electric devices when doing maintenance) to check before replacing back panel. It may take a few minutes before it kicks on.
Parts Used:
-
Rickey from DUMAS, AR
-
Difficulty Level:Really Easy
-
Total Repair Time:30 - 60 mins
-
Tools:Socket set
4 of 6 people
found this instruction helpful.
Was this instruction helpful to you?
Thank you for voting!
Ice maker arm disconnected from frame causing problems.
The icemaker arm disconnected from the metal frame. This caused the icemaker to cycle and the heater to come on and stay on until the plastic parts melted causing a mess and stink. This action melted the ice and then the water fell through the frozen items in the freezer and refreezed in the lower portion. OK, I remover the dead icemaker and tossed it away. I installed the new icemaker and the wiring harness didn't fit right (way to long). I retrieved the old icemaker and removed the wiring harness from it. I removerd the new ice maker and installed the old wiring harness to the new icemaker. I then installed the new icemaker, plugged it in and turned on the power. No water, I ordered the dual solenoid water valve, installed it with difficulty (another story) the turned on the power. I reinstalled the ice bin and found it didn't fit. The icemaker was to low and couldn't be adjusted, 1/4" higher would have been great. I shoved in the bin anyway, I was out of ice for my scotch, and it started making ice.
Parts Used:
-
Kenneth from Callaway, FL
-
Difficulty Level:A Bit Difficult
-
Total Repair Time:1- 2 hours
-
Tools:Pliers, Screw drivers, Wrench (Adjustable)
5 of 10 people
found this instruction helpful.
Was this instruction helpful to you?
Thank you for voting!
water indoor was not working
I received the part after doing what was instructed by process of elimination for the problem.I installed it and it still didn't work. I took the part out and called to return it but was told i couldn't because it was now a used part and your company only sells knew parts. Now, I have a circuit board that I have no use for.
Parts Used:
-
dianne from loxahatchee, FL
-
Difficulty Level:Really Easy
-
Total Repair Time:Less than 15 mins
3 of 4 people
found this instruction helpful.
Was this instruction helpful to you?
Thank you for voting!
water dispenser not working
I replaced the water solenoid kit,control board and a broken dispenser assembly crank.My repair went well, parts came on time,I watched an R&R video on youtube provided by PartSelect and finished the job in ten minutes. I am one happy do it yourself-er customer.
Parts Used:
-
Michael from Olney, MD
-
Difficulty Level:Really Easy
-
Total Repair Time:Less than 15 mins
-
Tools:Nutdriver, Screw drivers
4 of 7 people
found this instruction helpful.
Was this instruction helpful to you?
Thank you for voting!
Ice maker didn't work.
Replaced icemaker assembly. Only 3 Phillips screws to remove the old assembly. Pretty much an exact swap. Was easy to replace but the connecting cable on the new replacement assembly wasn't very easy to make fit. Had to force it into a location that would be out of the way and allow everything to operate properly. That connecting cable should be more flexible and adapt to the fridge a little more friendly.
Parts Used:
-
Amanda from New Albany, MS
-
Difficulty Level:Easy
-
Total Repair Time:15 - 30 mins
-
Tools:Screw drivers
3 of 4 people
found this instruction helpful.
Was this instruction helpful to you?
Thank you for voting!
icemaker stripper fall a part
instalation was very easy - but the part was 3/4 inch to long and a 1/32 inch to wide.Trimmed it with the "faithfull"
Dremel and it works!The instalation part of the "job" was less then 10 min.
Dremel and it works!The instalation part of the "job" was less then 10 min.
Parts Used:
-
Ted from Harrisonburg, VA
-
Difficulty Level:Easy
-
Total Repair Time:15 - 30 mins
-
Tools:Screw drivers
3 of 4 people
found this instruction helpful.
Was this instruction helpful to you?
Thank you for voting!
We found a snap ring and washer in a glass of ice
I took the ice maker tray out and dumped the ice and then removed 4 screws to take the plastic front off the drawer. I then took 4 more screws out to remove auger assembly. I could now unscrew the broken nut and replace it with the new one and put the snap ring and washer back in place and then put everything back together. Done
Had I had my lathe running at the time I would have made this part out of aluminum instead of the new one and original that is out of plastic which is why it did not last.
Had I had my lathe running at the time I would have made this part out of aluminum instead of the new one and original that is out of plastic which is why it did not last.
Parts Used:
-
Randy from Cohasset, AL
-
Difficulty Level:Easy
-
Total Repair Time:15 - 30 mins
-
Tools:Pliers, Screw drivers
3 of 4 people
found this instruction helpful.
Was this instruction helpful to you?
Thank you for voting!
In-Door Ice Dispenser Not Working
The solenoid that opens the ice chute would fire, but the ice auger would not turn in either direction. I verified that the motor was OK by running 120 V to it directly. Changing out the "timer board" was a 15 minute job and did the trick. Ice galore!
Parts Used:
-
Eugene from Houston, TX
-
Difficulty Level:Easy
-
Total Repair Time:15 - 30 mins
-
Tools:Screw drivers
3 of 4 people
found this instruction helpful.
Was this instruction helpful to you?
Thank you for voting!
Ice maker
Remove ice maker out of fridge; remove 3 screws
replace defective part re-install all components 30 minutes later " magic ice again. Very easy repair most important low cost. Thanks "Parts Select"
replace defective part re-install all components 30 minutes later " magic ice again. Very easy repair most important low cost. Thanks "Parts Select"
Parts Used:
-
Eli from Buford, GA
-
Difficulty Level:Really Easy
-
Total Repair Time:15 - 30 mins
-
Tools:Screw drivers
2 of 2 people
found this instruction helpful.
Was this instruction helpful to you?
Thank you for voting!
heavy frost buildup in ice dispenser chute and door
After inspection of the new door recess assembly, I realized that I could use sidecutters (electronic assembly type) and 'clip' off the inward lock tabs of the old recess assembly and disengage it from the crank door arm without any further disassembly of the refrigerator door. It was easy to 'unhitch' the tang from the crank arm and wiggle it out through the external opening of the ice/water dispenser compartment. I reversed the process and inserted the new assembly through the external opening of the compartment. The new door recess assembly snapped into place on the crank arm and fit tightly against the ice chute opening, correcting the issue caused by aging distortion of the old rubber seal cup portion of the door recess assembly.
Parts Used:
-
Robert from Rockford, IL
-
Difficulty Level:Really Easy
-
Total Repair Time:15 - 30 mins
-
Tools:Pliers
2 of 2 people
found this instruction helpful.
Was this instruction helpful to you?
Thank you for voting!