















PGS975DEP2WW General Electric Range - Instructions
Keep searches simple. Use keywords, e.g. "leaking", "pump", "broken" or "fit".
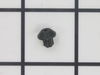
After my housecleaner had been here, I noted that 2 of the little rubber feet were missing from the top grates.
I was pretty upset as the grate wobbled, so I went on line and looked for GE Profile parts. To my amazement, I found the little rubber feet quite easily, and within 2 days they were here at my home. I simply had to stick them in the holes; however, I noted that they did not fit real tight, so I removed them and shot a little glue on them, and they have been in place ever since. Thanks to you guys, I am a happy camper now!!!
Parts Used:
-
Anne from Jacksonville, FL
-
Difficulty Level:Really Easy
-
Total Repair Time:Less than 15 mins
4 of 5 people
found this instruction helpful.
Was this instruction helpful to you?
Thank you for voting!
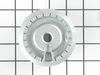
Burner on stove not working correctly
Order parts and installed - no tools needed - completed repairs less than 1 minute
Parts Used:
-
Trevor from Eldersburg, MD
-
Difficulty Level:Really Easy
-
Total Repair Time:Less than 15 mins
4 of 6 people
found this instruction helpful.
Was this instruction helpful to you?
Thank you for voting!
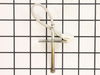
Incorrect oven temperature due to defective temperature sensor.
-
Anthony from FARMINGVILLE, NY
-
Difficulty Level:Really Easy
-
Total Repair Time:Less than 15 mins
-
Tools:Nutdriver
3 of 3 people
found this instruction helpful.
Was this instruction helpful to you?
Thank you for voting!
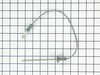
Oven meat probe broken
This item worked as described. I paid more for this 'oem' probe than the generic 1 because i didn't want to chance it not working as others have reported.
- works great. tested it....snaps in, reads correctly, snaps out.
- works great. tested it....snaps in, reads correctly, snaps out.
Parts Used:
-
robert from FAIRFIELD, OH
-
Difficulty Level:Very Easy
-
Total Repair Time:Less than 15 mins
3 of 3 people
found this instruction helpful.
Was this instruction helpful to you?
Thank you for voting!
Gas range igniter was making a clicking sound every 3 to 5 minutes, as if it was trying to ignite one of the burners.
Unplug the range from its wall socket to avoid electric shock. The various range parts that support a pot or frypan are easily lifted off their perches, exposing the small white igniter. The only moderately difficult aspect is wiggling the igniter out of its retainer. The electric wire leading into it then can be pulled out and fed into the new igniter with a push. Replace igniter in its retainer, then replace the range parts you removed to expose the igniter and plug the range back into the wall socket. Piece of cake.
Parts Used:
-
Wesley from FRANKLIN, TN
-
Difficulty Level:Really Easy
-
Total Repair Time:15 - 30 mins
-
Tools:Pliers
3 of 3 people
found this instruction helpful.
Was this instruction helpful to you?
Thank you for voting!
Oven had delayed relite after reaching temp blew oven door open
-
robert from CLINTON, MD
-
Difficulty Level:A Bit Difficult
-
Total Repair Time:30 - 60 mins
-
Tools:Nutdriver, Wrench set
3 of 3 people
found this instruction helpful.
Was this instruction helpful to you?
Thank you for voting!
we had damaged the burner cap

-
Gary from Indio, CA
-
Difficulty Level:Really Easy
-
Total Repair Time:Less than 15 mins
4 of 7 people
found this instruction helpful.
Was this instruction helpful to you?
Thank you for voting!
drwer slide under stove broke off.
recieved part the next day. looked different but I followed instructions and the part worked perfect.
Parts Used:
-
paul from sewell, NJ
-
Difficulty Level:Really Easy
-
Total Repair Time:Less than 15 mins
-
Tools:Screw drivers
3 of 4 people
found this instruction helpful.
Was this instruction helpful to you?
Thank you for voting!
Oven drawer open and close incorrectly
First I removed the oven drawer. Verified that the support clips would rest correctly on rail, then review installation document with supports to locate alternate location for replacement supports. I did have to personally locate 2 fastners not provided with the supports ot complete installation. After installation, oven drawer opens and closes smoothly.
Parts Used:
-
James from Goldsboro, NC
-
Difficulty Level:Easy
-
Total Repair Time:Less than 15 mins
-
Tools:Screw drivers
2 of 2 people
found this instruction helpful.
Was this instruction helpful to you?
Thank you for voting!
Replace Thermostat
Pull oven out away from the wall, unplugged from outlet, removed center cover by removing 5 sheet metal screws. disconnected thermostat sensor from control cable. Opened oven door and removed screw that holds thermostat sensor. Pulled thermostat sensor out replaced with new sensor. Plugged sensor in to control cable. Replace panel and screws. Then my wife made me clean the oven. I recommend making the repair when your wife is not home.
Parts Used:
-
Russell from Morgantown, WV
-
Difficulty Level:Really Easy
-
Total Repair Time:Less than 15 mins
-
Tools:Socket set
2 of 2 people
found this instruction helpful.
Was this instruction helpful to you?
Thank you for voting!
Burner had uneven flames
-
Akshay from Bridgeton, NJ
-
Difficulty Level:Really Easy
-
Total Repair Time:Less than 15 mins
3 of 5 people
found this instruction helpful.
Was this instruction helpful to you?
Thank you for voting!
OVEN LIGHT OUT
REMOVED 2 SCREWS AND LOWERED LIGHT ASSEMBLY. UNPLUGGED THE OLD ONE, AND REPLACED IT WITH THE ITEM SENT TO ME
Parts Used:

-
DANIEL from STAMFORD, NY
-
Difficulty Level:Very Easy
-
Total Repair Time:Less than 15 mins
-
Tools:Socket set
2 of 2 people
found this instruction helpful.
Was this instruction helpful to you?
Thank you for voting!
The eye would not light
-
Solomon A from COLLEGE PARK, GA
-
Difficulty Level:Really Easy
-
Total Repair Time:30 - 60 mins
2 of 2 people
found this instruction helpful.
Was this instruction helpful to you?
Thank you for voting!
The oven igniter failed
The repair is not complete because the two screws that hold the igniter to the oven Burner Assembly tube were frozen in place, probably from the heat over time: One stripped and the other broke, necessitating the removal and purchase of the oven burner tube and screws.
Parts Used:
-
Peter from YONKERS, NY
-
Difficulty Level:Difficult
-
Total Repair Time:30 - 60 mins
-
Tools:Socket set
2 of 2 people
found this instruction helpful.
Was this instruction helpful to you?
Thank you for voting!
Halogen oven light burned out. When trying to remove old bulb, it broke off.
First, I turned off the power. I removed the fixture that held the bulb and gently used narrow type pliers to pull the old pins out and allowed the broken glass to fall upon a shop towel in the bottom of the oven.
The replacement bulb and different type of wiring connections. I cut and formed them to fit the receptacle. I gently inserted the new bulb, placed the glass cover back on. Then, screwed the unit back into the top of the oven.
Happily, when power was turned back on the light shone brightly!
The replacement bulb and different type of wiring connections. I cut and formed them to fit the receptacle. I gently inserted the new bulb, placed the glass cover back on. Then, screwed the unit back into the top of the oven.
Happily, when power was turned back on the light shone brightly!
Parts Used:
-
William from FRANKLIN, OH
-
Difficulty Level:Really Easy
-
Total Repair Time:30 - 60 mins
-
Tools:Nutdriver
2 of 2 people
found this instruction helpful.
Was this instruction helpful to you?
Thank you for voting!