















PFCF1NFCBWW General Electric Refrigerator - Instructions
Keep searches simple. Use keywords, e.g. "leaking", "pump", "broken" or "fit".
Bad tasting ice cubes
Took the old filter out and put the new one in.
Easy Breezy!!
Easy Breezy!!
Parts Used:
-
susan from hartford, WI
-
Difficulty Level:Really Easy
-
Total Repair Time:15 - 30 mins
2 of 4 people
found this instruction helpful.
Was this instruction helpful to you?
Thank you for voting!
Bottom of refrigerator wouldn't coool
I removed the top vent and unplugged the ice machine ,took the back cover off the freezer.Removed the old fan which was pretty easy(unplugged it after I took the housing out for easy access) I plugged the new fan in and put everything back in the order I took off, and yada yada yada we have cooling.
Parts Used:
-
Charles from El Dorado, AR
-
Difficulty Level:Easy
-
Total Repair Time:15 - 30 mins
-
Tools:Nutdriver
2 of 4 people
found this instruction helpful.
Was this instruction helpful to you?
Thank you for voting!
Refrigerator not getting cold
-
Dan from COLUMBIA, SC
-
Difficulty Level:Really Easy
-
Total Repair Time:15 - 30 mins
-
Tools:Pliers, Socket set
1 person
found this instruction helpful.
Was this instruction helpful to you?
Thank you for voting!
my shelf broke
-
Sheri from POCATELLO, ID
-
Difficulty Level:Very Easy
-
Total Repair Time:Less than 15 mins
1 person
found this instruction helpful.
Was this instruction helpful to you?
Thank you for voting!
Light went out in refrigerator
Pop out switch, pull wires, attach wires to new switch and pop back in. Easy smeasy!
Parts Used:

-
Gary from EAST JORDAN, MI
-
Difficulty Level:Really Easy
-
Total Repair Time:Less than 15 mins
-
Tools:Pliers, Screw drivers
1 person
found this instruction helpful.
Was this instruction helpful to you?
Thank you for voting!
The light inside the oven had burned out
0. As a safety precaution, unplug the range or hit the relevant fuse breaker before you start. You might also want to grab a flashlight. Definitely do not try to do this while the oven is hot.
1. Pinch the wire over the light bulb cap to remove it. This is inside the oven at the back.
2. Pop off the hemispherical glass cap.
3. Unscrew the old light bulb, and screw the new light bulb in its place.
4. Put the cap back.
5. Secure the cap by putting the wire back in its slots on the cap.
No tools needed, the cap is just held in place with pressure from the wire.
1. Pinch the wire over the light bulb cap to remove it. This is inside the oven at the back.
2. Pop off the hemispherical glass cap.
3. Unscrew the old light bulb, and screw the new light bulb in its place.
4. Put the cap back.
5. Secure the cap by putting the wire back in its slots on the cap.
No tools needed, the cap is just held in place with pressure from the wire.
Parts Used:

-
Catherine from SEATTLE, WA
-
Difficulty Level:Very Easy
-
Total Repair Time:Less than 15 mins
3 of 7 people
found this instruction helpful.
Was this instruction helpful to you?
Thank you for voting!
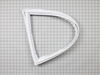
Frayed door gasket
-
Joseph from MATTHEWS, NC
-
Difficulty Level:Very Easy
-
Total Repair Time:Less than 15 mins
1 person
found this instruction helpful.
Was this instruction helpful to you?
Thank you for voting!
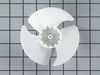
Ice built up around evaporator fan blades and blades chipped and broke. Refrigerator was making loud vibrating noises.
Removed ice bucket, and unplugged ice maker. Removed light cover. Removed ice maker. Pulled fan blades straight up and removed. Pushed new blades on to motor shaft. Fairly easy .
Parts Used:
-
David from KNOXVILLE, TN
-
Difficulty Level:Really Easy
-
Total Repair Time:15 - 30 mins
-
Tools:Nutdriver
1 person
found this instruction helpful.
Was this instruction helpful to you?
Thank you for voting!
Divider broke, lost use of the shelf and icemaker
First, removed all items in the freezer, placed into a cooler. Removed basket and door from the glide rails. Installed new divider using two supplied screws with a nut driver. Be sure to install support bar first and align the divider by loading at an angle, push into place. Reinstalled shelf and icemaker tray, door, and basket. Can be a little tricky to install if you don't do the support bar first, and removing the door seemed necessary for adequate access to the interior of freezer.
Parts Used:
-
Joshua from SUN PRAIRIE, WI
-
Difficulty Level:Really Easy
-
Total Repair Time:15 - 30 mins
-
Tools:Nutdriver
1 person
found this instruction helpful.
Was this instruction helpful to you?
Thank you for voting!
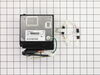
Refrigerator not cooling
1.Google troubleshooting for this issue. Determine the inverter card was bad. Installed new card and correct jumper harness per instructions. Total time to troubleshoot, remove & replace was about 30_45 min. Pretty simple
Parts Used:
-
Donald from Miamisburg, OH
-
Difficulty Level:Really Easy
-
Total Repair Time:15 - 30 mins
-
Tools:Nutdriver, Pliers, Screw drivers
1 person
found this instruction helpful.
Was this instruction helpful to you?
Thank you for voting!
The divider guide in the freezer compartment broke
There were no instructions on how to relpace the divider guide so it took me a while to realize that I had to remove the guide under the ice maker first. Once that was done the metal bar that supports the front of the divider guide and the divider itself could be positioned. It did take a little force to push the guide into its proper vertical position. After that the the guide under the ice maker could be replaced.
In replacing the freezer door I wasn't careful to pull both glides out together so the geared tracking mechanism came apart. Once that was put back together and carefully pulled out the freezer door was able to be replaced.
In replacing the freezer door I wasn't careful to pull both glides out together so the geared tracking mechanism came apart. Once that was put back together and carefully pulled out the freezer door was able to be replaced.
Parts Used:
-
John from FULSHEAR, TX
-
Difficulty Level:A Bit Difficult
-
Total Repair Time:15 - 30 mins
-
Tools:Nutdriver
1 person
found this instruction helpful.
Was this instruction helpful to you?
Thank you for voting!
Light was flicking
-
Stephanie from KEARNY, NJ
-
Difficulty Level:Really Easy
-
Total Repair Time:Less than 15 mins
-
Tools:Screw drivers
1 of 2 people
found this instruction helpful.
Was this instruction helpful to you?
Thank you for voting!
The glass cover for our vegetable pan broke.
So we ordered a replacement "PS2577898 GLASS COVER Vegetable PAN" and they sent us the wrong part. It sort of fits over the vegetable drawers, but our GE Fridge model has curved sides and these guys sent us a glass cover that is a perfect rectangle, which sticks out above the grooves where it's supposed to go. After a month of waiting, though, we just didn't care anymore and decided to use the part that arrived. Asking for the correct replacement may take us into 2021...
Parts Used:

-
Anton from WASHINGTON, DC
-
Difficulty Level:Really Easy
-
Total Repair Time:Less than 15 mins
1 of 2 people
found this instruction helpful.
Was this instruction helpful to you?
Thank you for voting!
Slow water flow from water dispenser.
Took out the MFW filter.
Screwed in the MFW bypass.
Dispensed several gallons of water.
Saw good flow of water.
Removed MFW bypass.
Replaced MFW filter.
Our water flow was back to normal.
Screwed in the MFW bypass.
Dispensed several gallons of water.
Saw good flow of water.
Removed MFW bypass.
Replaced MFW filter.
Our water flow was back to normal.
Parts Used:
-
Don from DYERSBURG, TN
-
Difficulty Level:Very Easy
-
Total Repair Time:Less than 15 mins
1 of 2 people
found this instruction helpful.
Was this instruction helpful to you?
Thank you for voting!
Broken light switch
took a little more effort than the video show to remove old module and replace new. Works fine now.
Parts Used:
-
Ted from SANDWICH, IL
-
Difficulty Level:Easy
-
Total Repair Time:15 - 30 mins
-
Tools:Screw drivers
1 of 2 people
found this instruction helpful.
Was this instruction helpful to you?
Thank you for voting!