















MEW6630CAS Maytag Wall Oven - Instructions
Keep searches simple. Use keywords, e.g. "leaking", "pump", "broken" or "fit".
I needed a broiler pan
I took the broiler pan out of the shipping container and put it in the oven.
Parts Used:
-
Rhoda P. from Secaucus, NJ
-
Difficulty Level:Really Easy
-
Total Repair Time:Less than 15 mins
4 of 9 people
found this instruction helpful.
Was this instruction helpful to you?
Thank you for voting!
No temperature control
Turned off breakers to oven. Removed two screws that held oven in cabinet. Removed oven door by opening slightly and pulling up on door. Pulled oven out 1/3 of way. Took out four screws on top of control panel. Took oven light switch off by unscrewing holding ring. Removed temp knob on right by pulling. Removed start / stop knob same way.Removed glass straight out. Removed four screws that held elecrtonic clock conrtol board. Unpluged three wire plug from right side and the nine wire plug from the left side. Worked board out at and angle. Went backwards to connect and replace board, screws and door.Slid oven back in and tested oven after turning breakers back on, worked like new.
Parts Used:
-
Max from Houston, TX
-
Difficulty Level:Easy
-
Total Repair Time:30 - 60 mins
-
Tools:Screw drivers
2 of 3 people
found this instruction helpful.
Was this instruction helpful to you?
Thank you for voting!
Door hinge
My wife help take the door off. It was a little heavy . The door came apart very easy and went back the same way.We save over $300 by doing it our selfs.
Parts Used:
-
Mr. Mike F from SAN ANTONIO, TX
-
Difficulty Level:Really Easy
-
Total Repair Time:30 - 60 mins
-
Tools:Screw drivers
1 person
found this instruction helpful.
Was this instruction helpful to you?
Thank you for voting!
Oven temperature fluctuates
Replaced the thermostat according to existing videos and had to adjust the thermostat using instuctions in the user manual for model CWE4800ACB.
Parts Used:
-
Larry from SOLON, IA
-
Difficulty Level:Easy
-
Total Repair Time:30 - 60 mins
-
Tools:Screw drivers
1 person
found this instruction helpful.
Was this instruction helpful to you?
Thank you for voting!
F5 fault code kept appearing
I installed the new oven sensor but the problem continued. So I ordered a new relay board and installed it. Still no luck. So I pulled the new board back out and started trouble shooting it using my electronic background. I discovered the new board was using a pin for L2 that had no exit on the backplane, so I removed it and installed it where I believed it should go. Reinstalled the power relay board and presto. My oven is working lie a champ. Louis
Parts Used:
-
Louis Rodriguez from Granbury, TX
-
Difficulty Level:Very Difficult
-
Total Repair Time:More than 2 hours
-
Tools:Nutdriver, Screw drivers
1 person
found this instruction helpful.
Was this instruction helpful to you?
Thank you for voting!
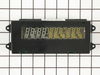
Old display backlight faded out
Took out 7 screws. Removed front panel, unhooking ribbon cables. Used nut driver to remove old display from the panel and then install new display. Replaced the 7 screws.
Parts Used:
-
Ruth from Milford, NH
-
Difficulty Level:Really Easy
-
Total Repair Time:Less than 15 mins
-
Tools:Nutdriver, Screw drivers
1 person
found this instruction helpful.
Was this instruction helpful to you?
Thank you for voting!
display not illuminated
Remove phillips screws from below upper face cover. Unclip wire connections. Use nut driver to remove Electronic display. Reverse operation. Careful on reattachment of flat wires to plastic clip. The explanation from other customers made this very easy.
Parts Used:
-
Dennis from huntington Beach, CA
-
Difficulty Level:Really Easy
-
Total Repair Time:Less than 15 mins
-
Tools:Nutdriver, Screw drivers
1 person
found this instruction helpful.
Was this instruction helpful to you?
Thank you for voting!
LCD Panel went blank
removed the trim bezel housing the controls and clock assy, by removing 3ea phillips head screws on top and 4ea screws on the bottom of the trim bezel. disconnected the wiring harnesses. removed the 4 screws securing the LCD assy to the bezel. Repeated the process in reverse for installing replacement unit. Very simple. One note: Always shut off power to the appliance from the breaker panel. it will ensure proper reset of the panel when the power is turned back on. this is a procedure a 10 year old could handle. very simple and no electrical experience necessary. Saved myself at least $300 for a few minutes of my time....
Parts Used:
-
James from Sun City West, AZ
-
Difficulty Level:Really Easy
-
Total Repair Time:Less than 15 mins
-
Tools:Nutdriver, Screw drivers
1 person
found this instruction helpful.
Was this instruction helpful to you?
Thank you for voting!
Oven would not hold temperature, not turn on, and would shut off during use.
Extremely simple repair to make. Move stove away from wall and disconnect power. Remove the oven racks. Remove the rear sheet metal panel covering the wiring harnesses. Caution: Sharp edges and corners on sheet metal.Sensor is located in upper left corner on rear oven wall. Using a long-shafted #2 Philips screwdriver, remove the two Philips head screws and gently pull the sensor 1" away from the oven wall. At this point, it will help to have an assist from someone while you are behind the range. Have the assistant gently tug on the sensor while you watch for wires moving on the rear of the range. After locating the sensor wires, gently disconnect the plastic connector clip. Note: plastic connectors become brittle with age and exposure to heat Move to front of range and gently remove sensor from rear wall by pulling the wiring through the oven wall. Before inserting the new sensor wire through the oven wall, "dry fit" the wiring connectors to see that the new sensor is a correct connection. Make connection, and secure the sensor to the rear oven wall with the two screws. Install racks, reinstall rear sheet metal panel, and connect the power. Set the oven baking temperature to a moderately low temp, 300 - 350 deg. to test the new sensor.
Parts Used:
-
John from Arvada, CO
-
Difficulty Level:Very Easy
-
Total Repair Time:Less than 15 mins
-
Tools:Nutdriver, Screw drivers
1 person
found this instruction helpful.
Was this instruction helpful to you?
Thank you for voting!
No problem installing the sensor
I removed the two mounting screws and pulled the harness through the opening unsnapped the sensor from the harness and installed the new sensor i didn't have to used the adapters the new sensor fitted
Parts Used:
-
tommy from FAYETTEVILLE, NC
-
Difficulty Level:Very Easy
-
Total Repair Time:Less than 15 mins
-
Tools:Screw drivers
1 person
found this instruction helpful.
Was this instruction helpful to you?
Thank you for voting!
Display Was Dim
I opened the top oven. Then unscrewed the screws below the display unit. Took off the attaching wires. Unscrewed the broken display. Screwed the new display back on. Re-attached the wires. Screwed the support screws back on. It took about 10 minutes.
The only "difficulty" was in removing the wires. One of them is attached in a pressure attachment which isn't immediately obvious (that's the largest attachment in the center). Just be careful when taking that one out.
The only "difficulty" was in removing the wires. One of them is attached in a pressure attachment which isn't immediately obvious (that's the largest attachment in the center). Just be careful when taking that one out.
Parts Used:
-
Edwin from Clovis, CA
-
Difficulty Level:Easy
-
Total Repair Time:Less than 15 mins
-
Tools:Screw drivers
1 person
found this instruction helpful.
Was this instruction helpful to you?
Thank you for voting!
Clock & Oven display too dim to read
(1) Turn off power;
(2) remove 4 phillips screws on the bottom of the control panel (top of the oven door) to allow the control panel to rotate up and out;
(3) remove 2 electrical connectors by releasing locks then pull/wiggle free. (note the cable locks to help orient reassembly) You can now carry the control panel to the kitchen table to continue.
(4) This was a little tricky for my big hands: remove the switch / controls ribbon cable by depressing small tabs inward then releasing a small wedge which squeezes the ribbon into the connector. Gently unhook and separate the ribbon cable from the display module.
(5) remove 4 hex-head screws which mount the clock panel to the control panel assembly.
(6) reverse procedure to reassemble & test.
(2) remove 4 phillips screws on the bottom of the control panel (top of the oven door) to allow the control panel to rotate up and out;
(3) remove 2 electrical connectors by releasing locks then pull/wiggle free. (note the cable locks to help orient reassembly) You can now carry the control panel to the kitchen table to continue.
(4) This was a little tricky for my big hands: remove the switch / controls ribbon cable by depressing small tabs inward then releasing a small wedge which squeezes the ribbon into the connector. Gently unhook and separate the ribbon cable from the display module.
(5) remove 4 hex-head screws which mount the clock panel to the control panel assembly.
(6) reverse procedure to reassemble & test.
Parts Used:
-
daniel from pinckney, MI
-
Difficulty Level:Easy
-
Total Repair Time:Less than 15 mins
-
Tools:Nutdriver, Screw drivers
1 person
found this instruction helpful.
Was this instruction helpful to you?
Thank you for voting!
oven not heating to set temp. 100 degrees too cold
installed part,turned unit on-temp still cold. reset digital control, up 35 degrees, still cold. un-plugged unit,re-connect after 10 min. still cold.
Parts Used:
-
Robert from Funston, GA
-
Difficulty Level:Really Easy
-
Total Repair Time:Less than 15 mins
-
Tools:Screw drivers
2 of 4 people
found this instruction helpful.
Was this instruction helpful to you?
Thank you for voting!
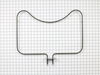
Bottom (bake) is not heating, broiler is working
I replaced the heating element but that didn’t help. So then I replaced the oven sensor and that didn’t work either. Both were pretty easy to do but I’ve now spend $170 and my oven still isn’t working. I called number listed and got a recording that all agents were busy and there was a high call volume so I can’t get any help.
Parts Used:
-
Amy from MCKINNEY, TX
-
Difficulty Level:Really Easy
-
Total Repair Time:15 - 30 mins
-
Tools:Screw drivers
1 person
found this instruction helpful.
Was this instruction helpful to you?
Thank you for voting!
Broken oven door hinge
My daughter & I followed the instructions in your video and had fun repairing the door. The video showed exactly how to do the repair. I hope I don't need any appliance parts very soon but I will certainly pull up your web site if I do. Thanks for an excellent instruction video.
John - Hot Springs Village, AR
John - Hot Springs Village, AR
Parts Used:
-
John from HOT SPRINGS, AR
-
Difficulty Level:Very Easy
-
Total Repair Time:15 - 30 mins
-
Tools:Screw drivers
1 person
found this instruction helpful.
Was this instruction helpful to you?
Thank you for voting!