















MDBD880AWB Maytag Dishwasher - Instructions
Keep searches simple. Use keywords, e.g. "leaking", "pump", "broken" or "fit".
Changed the heating element
I first disconnected power from the dishwaher at the breaker panel. Then, removed 4 screws on the front of the dishwasher and removed the lower panel. I removed the two wires (compression fittings, by hand). Then I used an adjustable wrench to remove the two nuts which retained the element. I opened the diswasher door and extracted the old element. I reused the rubber O-rings from the old element and placed the new element into the dishwasher. I replaced the nuts and wires. I reenergized the circuit and ran the diswasher through a normal cycle. Note: I had plenty of towels on hand just in case the old O-rings did not perform. No problems encountered. I replaced the front cover and loaded have checked under for leaks during the last two wash cycles. Note: be sure not to over tighten the element nuts as they are plastic and will strip out. I used the model number to obtain the new part and all went flawlwssly. Thans!
Parts Used:

-
Ron from Osage Beach, MO
-
Difficulty Level:Really Easy
-
Total Repair Time:15 - 30 mins
-
Tools:Screw drivers, Wrench (Adjustable)
25 of 29 people
found this instruction helpful.
Was this instruction helpful to you?
Thank you for voting!
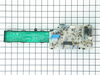
Failing to complete any of the cycles properly, repeated "click" heard from control unit.
It was initially unclear precisely which part I needed. I called PartSelect customer service and the agent was extremely helpful and able to quickly advise me on the correct part.
Installation was straight forwared. I used a torx screw-driver to remove the screws holding the inside-door planel. There are wires attached so this needs to be done with care.
I then removed a thin plastic film cover the control assembly. The control assembly is held firm by a screw and is also "snapped" in place. There are obvious tabs which can be spread to allow the assembly to be lifted out.
Each of the wire harness can then be removed from the control assembly.
With the new control assembly in place, the wires can be reconnected very easily. The assembly board itself is well marked enough to determine where each of the wires connects but really, the connectors for each harness is unique so pretty difficult to not get right.
Replace the plastic film and door cover and you are back in business.
I had previously gotten a quote from Sears to do this work and it was over $200 works of labor. Go through PartSelect I not only saved about $40 dollars on the part itself, I also saved $200 on a fairly easy repair that I could do myself in under 30 minutes.
Installation was straight forwared. I used a torx screw-driver to remove the screws holding the inside-door planel. There are wires attached so this needs to be done with care.
I then removed a thin plastic film cover the control assembly. The control assembly is held firm by a screw and is also "snapped" in place. There are obvious tabs which can be spread to allow the assembly to be lifted out.
Each of the wire harness can then be removed from the control assembly.
With the new control assembly in place, the wires can be reconnected very easily. The assembly board itself is well marked enough to determine where each of the wires connects but really, the connectors for each harness is unique so pretty difficult to not get right.
Replace the plastic film and door cover and you are back in business.
I had previously gotten a quote from Sears to do this work and it was over $200 works of labor. Go through PartSelect I not only saved about $40 dollars on the part itself, I also saved $200 on a fairly easy repair that I could do myself in under 30 minutes.
Parts Used:
-
brian from myersville, MD
-
Difficulty Level:Easy
-
Total Repair Time:15 - 30 mins
-
Tools:Screw drivers
25 of 30 people
found this instruction helpful.
Was this instruction helpful to you?
Thank you for voting!
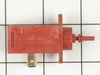
Dispenser lid would not open
The wax motor seemed to work.
At first I thought something was broken and I tried to figure out the "theory of operation" Working the actuator of the wax motor, I COULD NOT GE THE LATCH TO MOVE THE WAY I THOUGHT IT SHOULD. I ASSUMED EITHER IT WAS BROKEN IN SOME WAY I COULD NOT DETECT OR THERE WAS A FLAW IN ITS DESIGN!
It took a long time to figure out the latch would not be worked open unless it was actually holding the lid- this positions the latch at "half mast" and allows the mechanism to "pick it up from there" and open the rest of the way. So once I figured that out, I concluded the failure was really just worn out parts that were out of tolerance for how this "half mast" position and opening was supposed to work. So I ordered all fresh pieces just to be sure, assembled it (very easy) and put it in (easy). It all works fine now.
At first I thought something was broken and I tried to figure out the "theory of operation" Working the actuator of the wax motor, I COULD NOT GE THE LATCH TO MOVE THE WAY I THOUGHT IT SHOULD. I ASSUMED EITHER IT WAS BROKEN IN SOME WAY I COULD NOT DETECT OR THERE WAS A FLAW IN ITS DESIGN!
It took a long time to figure out the latch would not be worked open unless it was actually holding the lid- this positions the latch at "half mast" and allows the mechanism to "pick it up from there" and open the rest of the way. So once I figured that out, I concluded the failure was really just worn out parts that were out of tolerance for how this "half mast" position and opening was supposed to work. So I ordered all fresh pieces just to be sure, assembled it (very easy) and put it in (easy). It all works fine now.
Parts Used:

-
Douglas from Pottstown, PA
-
Difficulty Level:A Bit Difficult
-
Total Repair Time:1- 2 hours
-
Tools:Nutdriver
26 of 33 people
found this instruction helpful.
Was this instruction helpful to you?
Thank you for voting!
float leaking
float was missing palnut and letting the float slide up too much causing small leak around the float
Parts Used:
-
phillip from hodges, AL
-
Difficulty Level:A Bit Difficult
-
Total Repair Time:30 - 60 mins
-
Tools:Nutdriver, Screw drivers, Socket set
27 of 38 people
found this instruction helpful.
Was this instruction helpful to you?
Thank you for voting!
The basket in our dishwasher had many broken parts on the bottom and the silverware kept falling through
We were happy to find the basket we needed listed on your website, even after we could not find it on the Maytag site. It was perfect. I can't believe we lasted almost 2 years with the broken basket we had.
Parts Used:

-
Marge from Cranford, NJ
-
Difficulty Level:Really Easy
-
Total Repair Time:Less than 15 mins
21 of 23 people
found this instruction helpful.
Was this instruction helpful to you?
Thank you for voting!
Door was leaking badly
After performing some maintenance to get the water flowing properly through the system (that's another story) the door was leaking very badly during any test run of the dishwasher.
We thought it was the gasket because the old one was calcified and dried out from years of harder water.
We ordered the new one and in minutes after receiving the new gasket we had a firm seal and our dishwasher was back in action.
We thought it was the gasket because the old one was calcified and dried out from years of harder water.
We ordered the new one and in minutes after receiving the new gasket we had a firm seal and our dishwasher was back in action.
Parts Used:

-
Aimee from Mount Pleasant, MI
-
Difficulty Level:Really Easy
-
Total Repair Time:Less than 15 mins
21 of 24 people
found this instruction helpful.
Was this instruction helpful to you?
Thank you for voting!
Water was pouring out of dishwasher door
I googled the simptoms online, and found that the most common cause for a door leak was the door seal. I purchased the seal online from PartSelect.com. Two days later, the part arrived. I pulled out the old seal and pushed in the new one. No tools required. That fixed the problem. While looking at the parts diagram, I noticed that my dishwasher didn't have the water deflectors installed. I don't know if they were ever there. They were cheap, so I ordered them online and slid them into place in less than 10 seconds. Again, no tools required. Dishwasher runs great, no leaks.
Parts Used:
-
Walt from Woodbridge, VA
-
Difficulty Level:Really Easy
-
Total Repair Time:Less than 15 mins
20 of 24 people
found this instruction helpful.
Was this instruction helpful to you?
Thank you for voting!
Not enough water pressure to wash soap out of dispenser
Our first effort was to replace the lower washer arm that had splits in the sides of this plastic part. While this increased the water pressure in the wash cycle some it was not enough to adequately wash the dishes. We read that someone else had to clean out the filter which was below the lower washer arm assembly. Thus, we took off the loweer arm assembly by screwing off the hold down assembly in the middle of the arm. We then took off the pump cover by removing the 6 screws that hold it in place with a #3 metric allen wrench. When we took of the cover we could see that the pump filter was so covered with deposits that it was not letting the water through to the pump. Rather than spend hours trying to clean the filter and pump cover we decided it was easier to repalce them. Thus, we ordered the parts and replaced them. The dishwaster is now working fine. We appreciated the information that others had shared that helped us find and fix the problem.
Parts Used:
-
Duane from Las Vegas, NV
-
Difficulty Level:A Bit Difficult
-
Total Repair Time:30 - 60 mins
-
Tools:Pliers, Screw drivers, Wrench (Adjustable)
18 of 18 people
found this instruction helpful.
Was this instruction helpful to you?
Thank you for voting!
water was dripping from the bottom of the front loading door. Over time this had seeped into the insulation foam strip and formed a solid encrustation within the foam strip.
The real cause of the leak had nothing to do with the foam strip. The latch for the front loading door at the top needed to be adjusted to hold the door in tighter to the rubber door seal. This simple adjustment stopped the leak but since the foam seal was all encrusted with dried detergent from probably years of absorbing the leak, I replaced it with your new foam strip. I used a screw driver with torx bit and removed the stainless screws holding the inner door to the outer door. Once these were separated I removed the old foam strip using a putty knife and lacquer thinner. Placing the new strip onto these cleaned surfaces was the easiest part of the whole repair.
Parts Used:

-
Dan from Clarkston, MI
-
Difficulty Level:Really Easy
-
Total Repair Time:15 - 30 mins
-
Tools:Screw drivers
18 of 19 people
found this instruction helpful.
Was this instruction helpful to you?
Thank you for voting!
Pump gasket had deteriorated with age and causing odors.
The dishwasher is well engineered to perform this work.
Remove the bottom two panels to provide access and visibility to base of pump motor.
Locate plastic pump locking lever and push toward rear of DW to unlock pump from DW.
Inside the DW remove basketsand spray arms. Revove screws holding cover over pump motor and remove cover.
From below raise pump motor and support with block (piece of 2x4 worked well).
insde DW, removre old gasket, clean well around pump and botom of DW, install new gasket.
From below remove block to drop pump motro back into place, and re-tighten locking lever by pull toward you.
re-assemble inside componets, run through a rinse cycle to test for leaks and replace bottom panels.
I
Remove the bottom two panels to provide access and visibility to base of pump motor.
Locate plastic pump locking lever and push toward rear of DW to unlock pump from DW.
Inside the DW remove basketsand spray arms. Revove screws holding cover over pump motor and remove cover.
From below raise pump motor and support with block (piece of 2x4 worked well).
insde DW, removre old gasket, clean well around pump and botom of DW, install new gasket.
From below remove block to drop pump motro back into place, and re-tighten locking lever by pull toward you.
re-assemble inside componets, run through a rinse cycle to test for leaks and replace bottom panels.
I
Parts Used:

-
Kenneth from Brooks, GA
-
Difficulty Level:Easy
-
Total Repair Time:30 - 60 mins
-
Tools:Screw drivers, Socket set
17 of 17 people
found this instruction helpful.
Was this instruction helpful to you?
Thank you for voting!
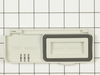
Detergent cup lid not opening during cycle
Suspecting the problem was a sticky gasket on the old detergent cup lid, I replaced the lid.
First remove the old lid by pushing one of the hinge pins (the one without a spring) out of the cylinder hole in the dishwasher door. Important: before completely removing the lid, note how the spring is installed on the other pin. Then, simply install the new lid and spring and push the non-spring pin back into the cylinder hole in the DW door.
My dishwasher now works fine! :-)
First remove the old lid by pushing one of the hinge pins (the one without a spring) out of the cylinder hole in the dishwasher door. Important: before completely removing the lid, note how the spring is installed on the other pin. Then, simply install the new lid and spring and push the non-spring pin back into the cylinder hole in the DW door.
My dishwasher now works fine! :-)
Parts Used:
-
Francis from Palo Alto, CA
-
Difficulty Level:Easy
-
Total Repair Time:15 - 30 mins
-
Tools:Pliers
20 of 28 people
found this instruction helpful.
Was this instruction helpful to you?
Thank you for voting!
silverware basket broken - replaced with new one
I was able to remove the old handle and place it on the new basket - using only a screw driver.
Parts Used:
-
Linda from Owasso, OK
-
Difficulty Level:Really Easy
-
Total Repair Time:Less than 15 mins
-
Tools:Screw drivers
15 of 16 people
found this instruction helpful.
Was this instruction helpful to you?
Thank you for voting!
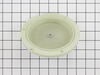
Machine began making noise as if something had let go and was beating on the machine
I removed the plastic retainer that held the lower spray arm in place. After removing the lower spray arm I was able to remove the 6 hex screws that held the cover over the filter screen and the discharge housing assembly. I was then able to remove the bolts that held the upper part of the discharge housing assembly, and replaced it with the new part that I received. The rest of the job was simply putting it back together.
Note: While repairing the broken part, I noticed a small leak under the machine around the float assembly. This was simple to fix. Remove the small lock ring on the bottom of the float. Pull the float out and clean the grease and soap scum out of it. Put it back in and attach the lock ring. No more leak and the water gets turned off when the float activates the switch. Something that everyone should check periodically.
Note: While repairing the broken part, I noticed a small leak under the machine around the float assembly. This was simple to fix. Remove the small lock ring on the bottom of the float. Pull the float out and clean the grease and soap scum out of it. Put it back in and attach the lock ring. No more leak and the water gets turned off when the float activates the switch. Something that everyone should check periodically.
Parts Used:
-
Michael from Lost Creek, WV
-
Difficulty Level:Easy
-
Total Repair Time:15 - 30 mins
-
Tools:Nutdriver, Pliers, Screw drivers
15 of 17 people
found this instruction helpful.
Was this instruction helpful to you?
Thank you for voting!
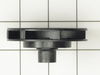
Dishwasher had weak drainingf pressure, turned out to be the drain impeller.
After I ruled out a hose blockage I looked in the washer.
Took the washer assembly apart, pretty straight forward, used the parts diagrams on this site for help. Found the drain impellor was jammed with glass and had lost a lot of its fins.
Found exactly what I needed here. Had it back together in less than an hour, and it seems to be working like new.
Took the washer assembly apart, pretty straight forward, used the parts diagrams on this site for help. Found the drain impellor was jammed with glass and had lost a lot of its fins.
Found exactly what I needed here. Had it back together in less than an hour, and it seems to be working like new.
Parts Used:


-
William from Beaverton, OR
-
Difficulty Level:A Bit Difficult
-
Total Repair Time:More than 2 hours
-
Tools:Nutdriver, Pliers, Screw drivers
14 of 17 people
found this instruction helpful.
Was this instruction helpful to you?
Thank you for voting!
Leaking under door during wash and rinse cycles
Removed old gasket and foam strip. Cleaned area. Installed door gasket. Trimmed foam strip to fit and installed.
Leak has stopped!
Leak has stopped!
Parts Used:
-
James from Gulf Breeze, FL
-
Difficulty Level:Really Easy
-
Total Repair Time:30 - 60 mins
14 of 18 people
found this instruction helpful.
Was this instruction helpful to you?
Thank you for voting!