















LNC6741A71 (14) Admiral Washer - Instructions
Keep searches simple. Use keywords, e.g. "leaking", "pump", "broken" or "fit".
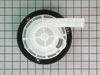
washing machine was making alot of noise
I found the water pump bearings were going bad from humidity. I replaced the pump with a new one and it runs quiet again.
Parts Used:
-
David from Boca Raton, FL
-
Difficulty Level:Easy
-
Total Repair Time:Less than 15 mins
-
Tools:Screw drivers, Wrench set
565 of 581 people
found this instruction helpful.
Was this instruction helpful to you?
Thank you for voting!
Load Grinding/Rubbing Noise in Rinse and Spin Cycles
First unplug the washer for the electrical outlet. You will need to tip the washer back to get to the bottom of the machine. There you will see the belt that drives the transmission and the water pump from the motor. Remove the belt and set it to the side. Then you will need to gain access to the top side of the machine by gently using a screwdriver to pry the front of the top up off the front panel on both sides then hinge it back out of the way. Use a nut driver to remove the two screws on the inside edge of the front panel and remove the front panel. Once the front panel is off you will see the water pump on the right hand side as you face the front of the machine. Remove the hose clamp on the water pump with the flat head screw driver or nut driver and use a pair of pliers to remove the compression clip on the water pump. Remove the 4 bolts holding the water pump in place. Reverse the entire process to put it back together. This job was very easy and I was only without a washer for 2 days because of partselect.com.
Parts Used:
-
Doug from Port Richey, FL
-
Difficulty Level:Really Easy
-
Total Repair Time:Less than 15 mins
-
Tools:Pliers, Screw drivers
139 of 155 people
found this instruction helpful.
Was this instruction helpful to you?
Thank you for voting!
Puddling on the floor. Water was leaking through the impeller bushing on the water pump
..First I sought the source of the water leak, by removing the louvered panel on the rear (4 nut headed screws hold it in place) and observed for water leaks during a wash cycle. This required that I re-position the washer and route the fill and drain hoses in order to stand behind the washer during its cycle to observe through the rear panel opening.
...There was no visible leakage of any of the hoses or connections but I could see the water puddle on the floor was coming from under the water pump located in the front corner.
...I wasn't able to peel the sides off the washer. I disconnected the rear hoses for hot and cold water and the drain hose. I removed the plate on the rear that orients the drain hose.
...I tilted the washer 90 degrees to its front using 2 x 4's to cushion the front so the machine would not be scratched.
....I removed the drive belt underneath. It was easy to remove by hand and did not require loosening screws on any of the pulleys.
...I disconnected the black exhaust hose from the tub with a screw driver and the white drain outlet hose with water pump pliers.
...I then reached into the front corner of the machine through the opening in the back and removed the water pump which is held in place by 3 nut head screws. I used a ratchet set to do this.
...I observed the water pump which is almost all molded plastic. The bushing area in the center attached to the impeller appeared to be wet and rusted. I assumed this to be the source of the water leak. I found the replacement on line at PartSelect site and ordered it. It was much cheaper at PartSelect then other sites.
....When the replacement pump arrived 2 days later , I compared it to the pump I removed. It matched physically including the pulley so then I installed it and re-assembled the washing machine in the reverse order from disassembly.
...I left the louvered panel off and observed the water flow for leaks during the first wash after re-assembly.
...There were no internal leaks and no puddling on the floor, so I replaced the louvered panel and put the washing machine back in place.
The water pump was a bit noisy during the 1st load
but otherwise the machine ran well. After the 1st load the pump is quiet and the machine runs just as it did before the puddling occurred. It is fine.
After having done this I can say, it was uncomfortable and cramped to reach in through the rear panel opening to remove and replace the water pump. But I could not find a way to lift the top of the machine easily so I could removed the side panels to have better access to the water pump and hoses. If anyone knows a way to do that without unplugging and removing the electronics panel, that would be useful information. Please post it.
It can be done the way I described here because I did it, but that may not be the easiest way if the side panels can be easily removed it would probably be an easier repair.
...There was no visible leakage of any of the hoses or connections but I could see the water puddle on the floor was coming from under the water pump located in the front corner.
...I wasn't able to peel the sides off the washer. I disconnected the rear hoses for hot and cold water and the drain hose. I removed the plate on the rear that orients the drain hose.
...I tilted the washer 90 degrees to its front using 2 x 4's to cushion the front so the machine would not be scratched.
....I removed the drive belt underneath. It was easy to remove by hand and did not require loosening screws on any of the pulleys.
...I disconnected the black exhaust hose from the tub with a screw driver and the white drain outlet hose with water pump pliers.
...I then reached into the front corner of the machine through the opening in the back and removed the water pump which is held in place by 3 nut head screws. I used a ratchet set to do this.
...I observed the water pump which is almost all molded plastic. The bushing area in the center attached to the impeller appeared to be wet and rusted. I assumed this to be the source of the water leak. I found the replacement on line at PartSelect site and ordered it. It was much cheaper at PartSelect then other sites.
....When the replacement pump arrived 2 days later , I compared it to the pump I removed. It matched physically including the pulley so then I installed it and re-assembled the washing machine in the reverse order from disassembly.
...I left the louvered panel off and observed the water flow for leaks during the first wash after re-assembly.
...There were no internal leaks and no puddling on the floor, so I replaced the louvered panel and put the washing machine back in place.
The water pump was a bit noisy during the 1st load
but otherwise the machine ran well. After the 1st load the pump is quiet and the machine runs just as it did before the puddling occurred. It is fine.
After having done this I can say, it was uncomfortable and cramped to reach in through the rear panel opening to remove and replace the water pump. But I could not find a way to lift the top of the machine easily so I could removed the side panels to have better access to the water pump and hoses. If anyone knows a way to do that without unplugging and removing the electronics panel, that would be useful information. Please post it.
It can be done the way I described here because I did it, but that may not be the easiest way if the side panels can be easily removed it would probably be an easier repair.
Parts Used:
-
Richard from Boyertown, PA
-
Difficulty Level:A Bit Difficult
-
Total Repair Time:1- 2 hours
-
Tools:Pliers, Screw drivers, Socket set
36 of 40 people
found this instruction helpful.
Was this instruction helpful to you?
Thank you for voting!
Washer Made Screeching noise on spin & Rinse
Unplugged Machine, Turned Off Water, Disconnected water and drain hoses. Let water run from hoses ino bucket.
Removed back plate where drain hose goes into back of machine. Used pliers to close the clamp holding to drain hose to remove it. I stuffed the exposed water pump opening with towels to keep water from spilling.
At this point I leaned the machine over on its front so the back of the machine was facing skyward. I placed a towel over the motor in case water spilled it would not get on the electrical components. I removed the belt on the bottom of the machine from the water pumps pully. I then removed the three screws mounting the pump to the bottom of the machine. I disconnected the other hose from the water pump that comes from the wash tank with the pliers. Once disconnected I stuffed the ends of both with towels to keep water from leaking out.
I took the new pump and connected the hose from the washer tub with pliers, mounted the pump back to the bottom of the tub with the three screws, replaced the belt, and reconnected the drain hose, and took the towel off the motor. I then replaced the back plate and set the machine upright. I connected all the hoses back up and plugged it in. It worked great. If you spill water on the motor you can dry it with a hair dryer.
Removed back plate where drain hose goes into back of machine. Used pliers to close the clamp holding to drain hose to remove it. I stuffed the exposed water pump opening with towels to keep water from spilling.
At this point I leaned the machine over on its front so the back of the machine was facing skyward. I placed a towel over the motor in case water spilled it would not get on the electrical components. I removed the belt on the bottom of the machine from the water pumps pully. I then removed the three screws mounting the pump to the bottom of the machine. I disconnected the other hose from the water pump that comes from the wash tank with the pliers. Once disconnected I stuffed the ends of both with towels to keep water from leaking out.
I took the new pump and connected the hose from the washer tub with pliers, mounted the pump back to the bottom of the tub with the three screws, replaced the belt, and reconnected the drain hose, and took the towel off the motor. I then replaced the back plate and set the machine upright. I connected all the hoses back up and plugged it in. It worked great. If you spill water on the motor you can dry it with a hair dryer.
Parts Used:
-
Michael from Elgin, SC
-
Difficulty Level:Really Easy
-
Total Repair Time:30 - 60 mins
-
Tools:Nutdriver, Pliers
34 of 37 people
found this instruction helpful.
Was this instruction helpful to you?
Thank you for voting!
Hinge pin on one side and Lid hinge on the other
First I popped the lid up to about 70 degrees. Then removed the two hinges. Then removed and replaced the two hinge pins. The key is to then just start the two screws for the hinges, slip the pins in and then tighten the hinge screws. Total time was 5 minutes.
Parts Used:
-
Jon from Ridgecrest, CA
-
Difficulty Level:Really Easy
-
Total Repair Time:Less than 15 mins
-
Tools:Screw drivers
31 of 35 people
found this instruction helpful.
Was this instruction helpful to you?
Thank you for voting!
slipping drive belt
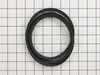
Tipped machine 45-degrees to reveal belt on bottom of machine. Used screwdriver to remove old belt which looked fine. Installed new belt (which arrived from PartSelect within 2-days) but it felt loose. Tried machine anyway and it works just fine. Easiest repair ever. Thanks, PartSelect!
Parts Used:
-
stephen from redondo beach, CA
-
Difficulty Level:Really Easy
-
Total Repair Time:Less than 15 mins
-
Tools:Screw drivers
25 of 31 people
found this instruction helpful.
Was this instruction helpful to you?
Thank you for voting!
Water would leak out from the bottom of the washer
I used a putty knife to disengage the clips that attach the top of the washer to the front panel. The top will lay back without having to hold it however, I didn't trust it to stay up on it's own so I used a bungy cord and straped it onto a wire rack that hangs on the wall above my washer. Next I removed the two screws, one on each side, located on the inside of the front panel near the top of it. Then I gently pulled the front panel towards myself so that I could lift it off of the clips located at the bottom of the panel. The pump assembly is located at the front right corner inside of the washer. I disconnected the two hoses that run to the pump assembly and using my ratchet, I removed the 3 screws that hold the pump assembly in place. There is a belt on the bottom of the washer that goes around three pulleys, one of which is the pump assembly pulley. After I removed the pump assembly, I took the belt and laid it to the side. I then installed the new pump assembly. After I put everything back together, I gently tipped the washer over on it's side as far as I could and reinstalled the belt around all three pulleys. I started with the pulley on the left side and then the pulley in the middle and finally, the pump assembly pulley. I have washed a total of seven loads of laundry since I did the repair and have had no problems.
Parts Used:
-
Amanda from Lewisville, TX
-
Difficulty Level:A Bit Difficult
-
Total Repair Time:More than 2 hours
-
Tools:Pliers, Screw drivers, Socket set, Wrench (Adjustable)
22 of 24 people
found this instruction helpful.
Was this instruction helpful to you?
Thank you for voting!
Water pump failed and was making loud screeching noises. Eventually, it bound up stopping the washer.
I unplugged the electric power cord and disconnected the two water hoses and the drain line from the wall. It was messy as water leaked from the disconnected hoses. I tilted the washer forward and leaned it against a bench for support. This exposed the bottom of the washer from the back. I removed the v-belt from the three pulleys. The motor mount was spring loaded making it easy to remove the v-belt from this pulley first. After removing the v-belt, I then removed the 4 screws to the small plate on the back of the washer to gain access to the water pump. I then removed the two water hoses from the water pump using vice grips to squeeze the clamps and slide them off of the hoses toward the water pump. After removing the two hoses (a little messy again), I removed the water pump by using a socket ratchet to loosen the four bolts. I replaced the water pump with the new pump and then reassembled everything in reverse order.
Parts Used:
-
Mark from Port Matilda, PA
-
Difficulty Level:Easy
-
Total Repair Time:15 - 30 mins
-
Tools:Pliers, Screw drivers, Socket set
21 of 25 people
found this instruction helpful.
Was this instruction helpful to you?
Thank you for voting!
drive belt was squealing and slipping
I wasted time opening up the metal container for the washing machine, which was easier than expected. The top simply pops off with a little bit of prying with a screwdriver, then the front panel is held in place with two sheet metal screws. The front panel then lifts off and you can see the exterior case for the tub drive mechanism and motor. But, it wasn't obvious what was wrong until I tilted the entire unit backwards and saw the drive belt available directly under the machine and fully accessible without any tools. It was obvious, because there was a 1/8" worth of belt fragment dust under the machine. A new belt was all it needed and after I ordered it from PartSelect, I simply jimmied the old belt off the main pulley and put the new one on. It no longer squeals or slips. Hopefully, I gained another 5 years of life out of the washing machine.
Parts Used:
-
Kevin from North Plains, OR
-
Difficulty Level:Really Easy
-
Total Repair Time:Less than 15 mins
17 of 18 people
found this instruction helpful.
Was this instruction helpful to you?
Thank you for voting!
Water overflowed from tub onto floor
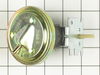
The problem was not in the switch but in the plastic hose from the tub to the switch. The hose was cracked and air/water leaked which therefore didn't activate the switch. I removed the top back cover to access the switch and released the hood of the machine, like a car, using a thin scaper to depress the spring loaded retaining clips. The hose was cracked at the tub just above the retainig clip. I bought new hosing at a local hardware store and replaced the switch to omit both of them as a future problem. Sell the tube with the switch as a package deal? Damage to tube may occur from violent, out of balance, spinning tub on spin cycle.
Parts Used:
-
Dan from Lombard, IL
-
Difficulty Level:Easy
-
Total Repair Time:30 - 60 mins
-
Tools:Pliers, Screw drivers
18 of 21 people
found this instruction helpful.
Was this instruction helpful to you?
Thank you for voting!
Washer made grinding noise then stopped working.
First I tipped the washing machine onto its front. I removed the belt on the bottom of the machine. Then I removed the screws that held the cover in place on the back of the machine. Next I removed the two hoses that were connected to the vertical pump using pliers to pinch the clamps. I then removed three screws that held the vertical pump in place. I took the new verticle pump with pulley and mounted it to the washer and putting the washer machine back together using the previous steps in reverse order.
Parts Used:
-
David from Honesdale, PA
-
Difficulty Level:Easy
-
Total Repair Time:Less than 15 mins
-
Tools:Nutdriver, Pliers
15 of 16 people
found this instruction helpful.
Was this instruction helpful to you?
Thank you for voting!
Water would not stop filling
1. Unplug power cord.
2. Move washer away from the wall to get access to the back of the control panel.
3. Remove 5 screws from the back panel cover with 1/4" driver, & remove cover.
4. Pull the Water Level Switch knob out from the front control panel.
5. Use pliers to slide away the retaining clip holding the clear rubber tube to the water level switch, & separate the tube from the switch.
6. Use 1/4" driver to remove 2 screws holding the switch, & remove the switch.
7. Remove the electrical wires
8. Install new switch in reverse order.
When you are testing out the washer afterward & your spouse said still not fixed because she thought the water level is too high when the water is still running? Wait a little while longer, the water should stop. She is just not used to see it filled without a load of laundry in it.
2. Move washer away from the wall to get access to the back of the control panel.
3. Remove 5 screws from the back panel cover with 1/4" driver, & remove cover.
4. Pull the Water Level Switch knob out from the front control panel.
5. Use pliers to slide away the retaining clip holding the clear rubber tube to the water level switch, & separate the tube from the switch.
6. Use 1/4" driver to remove 2 screws holding the switch, & remove the switch.
7. Remove the electrical wires
8. Install new switch in reverse order.
When you are testing out the washer afterward & your spouse said still not fixed because she thought the water level is too high when the water is still running? Wait a little while longer, the water should stop. She is just not used to see it filled without a load of laundry in it.
Parts Used:
-
Hing from Toms River, NJ
-
Difficulty Level:Really Easy
-
Total Repair Time:Less than 15 mins
-
Tools:Nutdriver, Pliers
15 of 19 people
found this instruction helpful.
Was this instruction helpful to you?
Thank you for voting!
Pump was leaking
I felt extremely confident when purchasing the part because I say three diagrams which clearly showed I was ordering the correct part. 0. Drain all of the water out of the machine. 1. Remove the rear panel from the washer. 2. Use the pliers to disconnect the hoses from the pump. 3. Remove the three screwa from the old pump. 4. Support the washer with the block then take the belt off pulley. 5. Remove old pump. 6. put new pump in place then reconnect the pulley, you can remove the block.. 7. Install the three screws for the pump after you tighten it up by placing the pump over ther correct screw holes.. 8. Reconnect the two hoses using the clamps you removed. 9. Secure the rear panel and screw in place. 10. Wash clothes. EASY FIX!!!
Parts Used:
-
Christopher from Westwego, LA
-
Difficulty Level:Really Easy
-
Total Repair Time:15 - 30 mins
-
Tools:Nutdriver, Pliers
14 of 17 people
found this instruction helpful.
Was this instruction helpful to you?
Thank you for voting!
Cover of washing machine wouldn't stay open, it fell on my wife's hand.
This is a very simple repair, I opened the top of the washer by inserting a screwdriver between the top and the washer cabinet. There are 2 clips on the front of washer, locate and push in to release top. Lift top with lid attached and remove the 2 screws holding the lid to the top of washer. Remove lid and replace hinge pin and hinge.
Replace lid, close top , all done. Total time about 15 minutes or so. Now the lid will stay up and not fall on someone.
Replace lid, close top , all done. Total time about 15 minutes or so. Now the lid will stay up and not fall on someone.
Parts Used:
-
Edward from Coventry, RI
-
Difficulty Level:Really Easy
-
Total Repair Time:15 - 30 mins
-
Tools:Screw drivers
12 of 15 people
found this instruction helpful.
Was this instruction helpful to you?
Thank you for voting!
The motor was worn out.
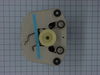
I first leaned the washer up and "walked" the belt off of the motor pulley. Then I lifted the top cover of the washer and propped it up so I had access to the screws in the front cover. I took out the two screws at the top of that cover and lifted it out of the way to get to the motor. I took out the mounting bolts and then removed the ground wires. I followed the lead of a previous "repair story" by taking the electrical wires off the old motor, one by one, and immediately putting them on the new motor in order to get them in the right spot. The only issue I had was that one of the ground-wire screws was smaller than the hole that had been tapped on the new motor. Otherwise it was really simple and the job was finished by completing reassembly in reverse order of disassembly. And the old washer seems to have more life in it today.
Parts Used:
-
Morgan from Edon, OH
-
Difficulty Level:Really Easy
-
Total Repair Time:Less than 15 mins
-
Tools:Nutdriver, Socket set
16 of 28 people
found this instruction helpful.
Was this instruction helpful to you?
Thank you for voting!