















LGR463 Whirlpool Dryer - Instructions
Keep searches simple. Use keywords, e.g. "leaking", "pump", "broken" or "fit".
Got heat only on start of cycle and no repeat of flame. Suspected coils on gas valve.
I used a multi meter to find coils failed in warmed temperature condition.
I tested main switch for different cycle operation. Main switch was worn out inside and not making good contact for soft cycles.
This dryer is 25 years old. I chose to replace all the sensors, fuses, ignitor, gas valve coils, cycle switch and thermostat.
This was cost effective for me, because now, I actually have a good dryer that might just last another 25 years. I might replace the drive belt soon. I'll order from Parts Select. This was easy and fun. Thanks!
I tested main switch for different cycle operation. Main switch was worn out inside and not making good contact for soft cycles.
This dryer is 25 years old. I chose to replace all the sensors, fuses, ignitor, gas valve coils, cycle switch and thermostat.
This was cost effective for me, because now, I actually have a good dryer that might just last another 25 years. I might replace the drive belt soon. I'll order from Parts Select. This was easy and fun. Thanks!
Parts Used:
-
John T Lundy from Pittsburgh, PA
-
Difficulty Level:Really Easy
-
Total Repair Time:1- 2 hours
-
Tools:Nutdriver, Screw drivers, Wrench set
18 of 20 people
found this instruction helpful.
Was this instruction helpful to you?
Thank you for voting!
lint filter shredded after 24 years
pulled out filter measured it looked on internet found this site ordered it threedays later BINGO new filter thank you!
Parts Used:
-
barbara from merrick, NY
-
Difficulty Level:Really Easy
-
Total Repair Time:Less than 15 mins
18 of 20 people
found this instruction helpful.
Was this instruction helpful to you?
Thank you for voting!
Replaced two parts in the gas heater assembly
I removed the front panel of the dryer by removing the 2 screw that secure it at the bottom and pulling upward to disconnect the cover at the top. I then removed the two screws that hold the metal cover that secures the 2 elements in place. I disconnected the wire plugs from the 2 elements, removed the 2 elements and replaced them with the new parts making sure to place them in the same positions as before. I then replaced the housing cover and tightened the screws. Then I replaced the front cover of the dryer.
Parts Used:
-
L R from Carmel, NY
-
Difficulty Level:Easy
-
Total Repair Time:15 - 30 mins
-
Tools:Screw drivers
20 of 26 people
found this instruction helpful.
Was this instruction helpful to you?
Thank you for voting!
Heat Would Not Come On
After replacing all the other fuses and sensors I finally replaced the Radiant Flame Sensor and it is working perfectly.
After replacing the other parts and the heat still not coming on I read somewhere that the Radiant Flame Sensor is a normal closed circuit and when I checked with a meter it was open. I would have saved a lot of time and money if I had read that earlier.
After replacing the other parts and the heat still not coming on I read somewhere that the Radiant Flame Sensor is a normal closed circuit and when I checked with a meter it was open. I would have saved a lot of time and money if I had read that earlier.
Parts Used:
-
Lynn from Novi, MI
-
Difficulty Level:Really Easy
-
Total Repair Time:Less than 15 mins
-
Tools:Nutdriver
19 of 23 people
found this instruction helpful.
Was this instruction helpful to you?
Thank you for voting!
dryer sounded like I was strangling a dog
First, I watched a utube video of replacing the dryer belt. Then I went to Sears Hardware and couldn't find a part. Then I ordered the parts for my favorite online repair parts source - partselect.com. I had the part in one day! We did exactly what the video showed and also replaced the two wheels that looked like roller blade wheels. Piece of cake. Saved a $75 repair call plus whatever the parts would have been and spent about 20 minutes doing it. Back in business. Great for a 12 year old dryer! Buy the dryer kit!
Parts Used:
-
Lynda from Syracuse, NY
-
Difficulty Level:Easy
-
Total Repair Time:15 - 30 mins
-
Tools:Pliers, Screw drivers
18 of 21 people
found this instruction helpful.
Was this instruction helpful to you?
Thank you for voting!
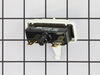
Broken push to stat switch
Removed back cover, removed broken switch, replaced with new switch, replaced back cover, told wife her dryer was fixed.
Parts Used:
-
Charles from Fairfax, OK
-
Difficulty Level:Really Easy
-
Total Repair Time:Less than 15 mins
-
Tools:Screw drivers
18 of 21 people
found this instruction helpful.
Was this instruction helpful to you?
Thank you for voting!
dryer not working
After unplugging and removing the back cover from the dryer, locate the push button switch. Slide putty knife around outer cover to unhook catch. Replace with new push button switch. My dryer is still not working, but this was a simple replacement.
Parts Used:
-
Maura from Newtown, CT
-
Difficulty Level:Really Easy
-
Total Repair Time:Less than 15 mins
22 of 33 people
found this instruction helpful.
Was this instruction helpful to you?
Thank you for voting!
The Dryer would not start
First and most important was to unplug the unit.
I removed the 2 screws that hold the lint screen shoot to the top cover and then simply popped the top of the machine open using 2 screw drivers and
gently prying it up. I raised the top cover about 8 inches and supported it with a block of wood.
I opened the front loading door and removed the 2 screws that hold the door actuator switch while holding the switch on the inside so that nothing would fall down into no mans land. Once the switch was loose I pulled it into view and could see that the actuator spring was broken. I used the search at the Part Select Web site and found the placement part very easy. I was amazed that the part was shipped and delivered to my house the very next day. The actuator spring simply snaps into place and I assembled it in the reverse order of removal, I removed the block of wood and snapped the top back into location and reinstalled the 2 screws for the lint screen shoot . I plugged the dryer in and it work perfect. I can't say enough about how well the experiance with Parts Select went, I will recommend them to others.
I removed the 2 screws that hold the lint screen shoot to the top cover and then simply popped the top of the machine open using 2 screw drivers and
gently prying it up. I raised the top cover about 8 inches and supported it with a block of wood.
I opened the front loading door and removed the 2 screws that hold the door actuator switch while holding the switch on the inside so that nothing would fall down into no mans land. Once the switch was loose I pulled it into view and could see that the actuator spring was broken. I used the search at the Part Select Web site and found the placement part very easy. I was amazed that the part was shipped and delivered to my house the very next day. The actuator spring simply snaps into place and I assembled it in the reverse order of removal, I removed the block of wood and snapped the top back into location and reinstalled the 2 screws for the lint screen shoot . I plugged the dryer in and it work perfect. I can't say enough about how well the experiance with Parts Select went, I will recommend them to others.
Parts Used:

-
Dennis from Redondo Beach, CA
-
Difficulty Level:Really Easy
-
Total Repair Time:Less than 15 mins
-
Tools:Screw drivers
17 of 18 people
found this instruction helpful.
Was this instruction helpful to you?
Thank you for voting!
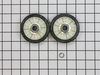
Drum would get hung up, belt would slip sometimes and there was a squeaking sound
Pull the front off. The belt was removed from idler pulley which was missing the wheel and pulled drum forward . Removed drum, replaced rear drum support roller kit and idler pulley assembly, put belt on and slid drum back in. Installed front panel, plugged in, works like a new dryer. It was very simple.
Parts Used:


-
Michael from N CHESTERFLD, VA
-
Difficulty Level:Very Easy
-
Total Repair Time:15 - 30 mins
-
Tools:Nutdriver, Screw drivers
19 of 25 people
found this instruction helpful.
Was this instruction helpful to you?
Thank you for voting!
Door Gasket tore out
Put high temperature glue on first, then put door gasket over the high temperature glue and then let it set for 24 hours. It worked fine....
Parts Used:

-
Manolak from MURFREESBORO, TN
-
Difficulty Level:Easy
-
Total Repair Time:Less than 15 mins
16 of 16 people
found this instruction helpful.
Was this instruction helpful to you?
Thank you for voting!
Squeaky Dryer
I looked for squeaky dryer within parts select and went with the 80%. I received the Maintenance Kit, replaced two rollers and it works like new. Amazing since this is the first time I have ever opened a dryer. The instruction sheet and parts were all I needed.
Parts Used:
-
Daniel from Hamilton, OH
-
Difficulty Level:Easy
-
Total Repair Time:15 - 30 mins
-
Tools:Screw drivers
17 of 19 people
found this instruction helpful.
Was this instruction helpful to you?
Thank you for voting!
Handle broke on dryer filter
-
FRAN from ROSEVILLE, MI
-
Difficulty Level:Really Easy
-
Total Repair Time:Less than 15 mins
17 of 19 people
found this instruction helpful.
Was this instruction helpful to you?
Thank you for voting!
Loudly clunking clothes drum due to worn out roller
Followed video on Parts Select site for comparable model showing roller and drive belt replacement.
The triangle plastic retaining clips were the most difficult part , to put
on and take off. They required careful , firm stretching with needle nose pliers.
The triangle plastic retaining clips were the most difficult part , to put
on and take off. They required careful , firm stretching with needle nose pliers.
Parts Used:
-
KENNETH from WEST ORANGE, NJ
-
Difficulty Level:A Bit Difficult
-
Total Repair Time:1- 2 hours
-
Tools:Pliers, Screw drivers, Socket set
17 of 20 people
found this instruction helpful.
Was this instruction helpful to you?
Thank you for voting!
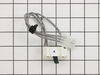
Dryer kept spinning when the door opened
Came to Parts Select. Looked for door switch. Read what other people did. Part came in a few days took a few minutes to take old switch out (had to pry the plastic connection apart with little thin screwdriver). Everything was easy
Parts Used:
-
Gary from Ocean Springs, MS
-
Difficulty Level:Really Easy
-
Total Repair Time:Less than 15 mins
-
Tools:Screw drivers
16 of 18 people
found this instruction helpful.
Was this instruction helpful to you?
Thank you for voting!
One day, I found my dryer continued running after I opened the door. And next day, it stopped working at all. I thought it was time to buy a new one, since my dryer had been used for more than 15 years. But I was curious to know what went wrong, and recalled my friend told me he repaired the door
My daughter found the video on youtube, which showed step by step repairing procedures. I just followed it and fixed my dryer in 15 min.
Parts Used:
-
Xiaobin from Cordova, TN
-
Difficulty Level:Really Easy
-
Total Repair Time:Less than 15 mins
-
Tools:Screw drivers, Wrench set
17 of 21 people
found this instruction helpful.
Was this instruction helpful to you?
Thank you for voting!