















LEB356GY3BB General Electric Range - Instructions
Keep searches simple. Use keywords, e.g. "leaking", "pump", "broken" or "fit".
Oven not heating
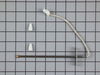
It was very easy I removed two screws unpluged the sensor and wire spliced it together and also replaced the modual on the top of the stove and it was that easy.
Parts Used:
-
Joseph from Stuart, FL
-
Difficulty Level:Really Easy
-
Total Repair Time:15 - 30 mins
-
Tools:Screw drivers
14 of 21 people
found this instruction helpful.
Was this instruction helpful to you?
Thank you for voting!
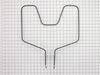
Broken oven element.
DO NOT ATTEMPT THIS REPAIR UNTIL THE RANGE IS UNPLUGGED AND THE CIRCUIT BREAKER IS OFF!!!!!!
Very easy repair, but, either there is a minor amount of current flowing through the element at all times, or the off switch wasn't working when I started. didn't turn the breaker off, after I removed the nuts, as I was pulling the element to reveal the terminals, the terminals arc'd on the oven wall. BIG SPARKS!
After I turned the breaker off and started again. No problems.
Very easy repair, but, either there is a minor amount of current flowing through the element at all times, or the off switch wasn't working when I started. didn't turn the breaker off, after I removed the nuts, as I was pulling the element to reveal the terminals, the terminals arc'd on the oven wall. BIG SPARKS!
After I turned the breaker off and started again. No problems.
Parts Used:
-
NICHOLAS from BALTIMORE, MD
-
Difficulty Level:Really Easy
-
Total Repair Time:Less than 15 mins
-
Tools:Nutdriver
10 of 11 people
found this instruction helpful.
Was this instruction helpful to you?
Thank you for voting!
Oven would not maintain set temperature
No problem installing oven sensor, but I diagnose the problem wrong, I need to change(ERC-11)control p/n wb27k5140
Parts Used:
-
Leonel from Biddeford, ME
-
Difficulty Level:Easy
-
Total Repair Time:30 - 60 mins
-
Tools:Screw drivers
11 of 16 people
found this instruction helpful.
Was this instruction helpful to you?
Thank you for voting!
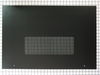
Daughter broke outer glass on stove
Unpacked the glass, unscrewed the screws, slid the glass in and screwed the screws again.
Parts Used:
-
Pat from Rudyard, MI
-
Difficulty Level:Really Easy
-
Total Repair Time:Less than 15 mins
-
Tools:Screw drivers
8 of 8 people
found this instruction helpful.
Was this instruction helpful to you?
Thank you for voting!
The Bake Element Split
This was so easy I should be a repairman! Turned off power at the breaker, used socket to unscrew two hex head screws, pulled out element slowly from the back of oven wall - enough to expose the wires about 3". Used pliers to remove clips from terminals, put new element in, pushed on new terminal clips, fed wires and terminals back through the two holes, replaced the hex head screws, turned breaker on and wallah! My wife was happy! That's a good thing.
Parts Used:
-
Steve from Surprise, AZ
-
Difficulty Level:Really Easy
-
Total Repair Time:Less than 15 mins
-
Tools:Pliers, Socket set
8 of 9 people
found this instruction helpful.
Was this instruction helpful to you?
Thank you for voting!
Bake element did not get hot.
I was able to remove the heating element but in the process one of the wires fell behind the back wall of the oven so I needed a little help getting it out. It was my first time working with electricity. If this didn't happen the repair would have been quit easy. The instructions were great.
Parts Used:
-
Jeanette from Vergennes, VT
-
Difficulty Level:Really Easy
-
Total Repair Time:15 - 30 mins
-
Tools:Nutdriver, Screw drivers, Wrench set
8 of 9 people
found this instruction helpful.
Was this instruction helpful to you?
Thank you for voting!
Oven bake element would not heat up.
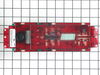
Removed two phillips screws in bottom front edge of control panel.
Lifted panel up and removed from back of panel.
Took electrical connections off of the circuit board and removed the four screws that held it to the
Panel.
Carefully remove the plastic clock overlay from the old unit and attach to the new one.
Mount the unit on the panel and reconnect the wire connecters.
Remount the contol panel to the oven.
Lifted panel up and removed from back of panel.
Took electrical connections off of the circuit board and removed the four screws that held it to the
Panel.
Carefully remove the plastic clock overlay from the old unit and attach to the new one.
Mount the unit on the panel and reconnect the wire connecters.
Remount the contol panel to the oven.
Parts Used:
-
Richard from Fleetwood, PA
-
Difficulty Level:Really Easy
-
Total Repair Time:15 - 30 mins
-
Tools:Screw drivers
7 of 8 people
found this instruction helpful.
Was this instruction helpful to you?
Thank you for voting!
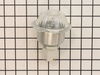
Oven light did not work
Turned off power to the oven, Removed the oven light housing, installed new housing, turned power on and walla.
Parts Used:
-
Howard from Rio Vista, CA
-
Difficulty Level:Really Easy
-
Total Repair Time:Less than 15 mins
-
Tools:Nutdriver
9 of 16 people
found this instruction helpful.
Was this instruction helpful to you?
Thank you for voting!
my lower oven heater went out
i was really pleased getting the order from partselect. i had torn my oven appart and knew i needed just this one part i came home and ordered it from parts select and actually got the part the next day.... very nice.... so pleased
Parts Used:
-
lorita from bend, OR
-
Difficulty Level:Really Easy
-
Total Repair Time:Less than 15 mins
-
Tools:Nutdriver
6 of 7 people
found this instruction helpful.
Was this instruction helpful to you?
Thank you for voting!
Bottom element burnt out
-
Curtis from Oxon Hill, MD
-
Difficulty Level:Easy
-
Total Repair Time:Less than 15 mins
-
Tools:Screw drivers
6 of 7 people
found this instruction helpful.
Was this instruction helpful to you?
Thank you for voting!
wire connection to socket was bad
Disconnected the old socket ( 2 srews ) removed the two wires from the old socket, reconnected them to the new socket and reinstalled the lamp.
Parts Used:
-
David from Gansevoort, NY
-
Difficulty Level:A Bit Difficult
-
Total Repair Time:15 - 30 mins
-
Tools:Pliers, Screw drivers
6 of 10 people
found this instruction helpful.
Was this instruction helpful to you?
Thank you for voting!
Light not working tried to Remove light assembly not knowing glass could screw out. Without thinking grounded exposed hot wire to burner bracket melting light socket connector. Had to replace socket.
First and most important trun off curcit breaker. Use 1/4 inch but driver to remove socket (2) screws. Remove ground and hot wire clips from old socket, replace on new socket. Screw back into oven ceiling and turn on power. Reset clock and your are done. Very simple.
Parts Used:
-
Richard from CUMMING, GA
-
Difficulty Level:Really Easy
-
Total Repair Time:15 - 30 mins
-
Tools:Socket set
4 of 4 people
found this instruction helpful.
Was this instruction helpful to you?
Thank you for voting!
Heating element had shorted out and broken.
Unscrewed the heating element from the inside back of the oven and removed the housing cover from the back of the stove to access the terminals. (The unit had arked and fused the terminal to the connector.) Installed the new unit and replaced the housing cover on the back and screwed the unit into the back of the oven. Works like a charm.
Parts Used:
-
Lisa from Lexington, KY
-
Difficulty Level:Easy
-
Total Repair Time:30 - 60 mins
-
Tools:Screw drivers, Socket set
4 of 5 people
found this instruction helpful.
Was this instruction helpful to you?
Thank you for voting!
Lower heating element cracked
Followed the video directions on your website - GREAT INFORMATION. Everything went very smoothly It took me longer to find my work light (after turning off the electric to the oven) out in the garage than it did to complete the repair!! SUPER PLEASED - WOULD NOT HESITATE TO RECOMMEND THIS COMPANY TO ANY DIY ADVENTURER!!
Parts Used:
-
Craig from Dayton, OH
-
Difficulty Level:Very Easy
-
Total Repair Time:Less than 15 mins
-
Tools:Pliers, Socket set
3 of 3 people
found this instruction helpful.
Was this instruction helpful to you?
Thank you for voting!
F2 error code when oven was set at a higher temperature.
I pretty much followed the youtube video posted under the part that I needed. Turned off electricity to that area of the house. Unplugged stove. Took out the old sensor, pushed new sensor cord through the back hole. I did put a small amount of tape,so I could pull it through from the back better. It was impossible to get the clip disconnected in the back and the new clip didn't match up correctly anyway. Ended up having to cut the wires and strip them. I twisted them together and put on the ceramic wire nuts on. Reversed ever thing I did and F3 appeared. Looked that code up on internet. It was from an open or shorted oven. Suggested I check the connections. Pulled stove out again, unscrewed caps on wires and noticed the sensor's wire had another cloth type coating on it. I gentle cut that off, twisted and capped wires again. Plugged in oven, turn on electricity, and tried out stove. Everything is working just fine. Everything took a little longer because this was first time doing this type of repair.
Parts Used:
-
Rachele from OCEANSIDE, CA
-
Difficulty Level:A Bit Difficult
-
Total Repair Time:30 - 60 mins
-
Tools:Socket set
3 of 4 people
found this instruction helpful.
Was this instruction helpful to you?
Thank you for voting!