















LATA401AGE Admiral Washer - Instructions
Keep searches simple. Use keywords, e.g. "leaking", "pump", "broken" or "fit".
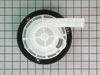
washing machine squeaked on the spin cycle
removed hoses and belt. removed 3 screws that secured pump. and then removed pump. received new pump and just reversed the process to repair!
Parts Used:
-
Jeffrey from Wabash, IN
-
Difficulty Level:Really Easy
-
Total Repair Time:15 - 30 mins
-
Tools:Pliers, Screw drivers, Socket set
1 person
found this instruction helpful.
Was this instruction helpful to you?
Thank you for voting!
The water pump went out
UNPLUG ELECTRICITY. I pulled out the washing machine turned the water off pulled all of your hoses from the back of the machine there may be a mess so you need some thing that will catch the water as it comes out of the hoses. On the bottom of the machine is a belt you have to remove it. Its easy just pull it off. On the back is a panel that you unscrew four screws. On the water pump it self you unscrew three screws. Then for the new part you do in reverse order screw your three screws back in put your hoses back on make sure your clamps are tight around your hoses or you will have a leak. Put your panel back on. Put your belt back on. Turn your water on from the wall plug in the electricity and you are done.
Parts Used:
-
felicia from Broken Arrow, OK
-
Difficulty Level:Really Easy
-
Total Repair Time:15 - 30 mins
-
Tools:Pliers, Screw drivers, Socket set
1 person
found this instruction helpful.
Was this instruction helpful to you?
Thank you for voting!
Problem manifested as a loud squealing/grinding noise during all cycles.
Disconnected both power and hot and cold input water lines. Laid the washer on its front side for access to the bottom. Removed the small access panel from the back of the machine to remove the metal screws holding the pump in place. Removed the single drive belt. New pump installed easily, replaced the belt and access panel. Reconnected the power and water hoses and everything worked fine.
Parts Used:
-
Michael from Atlanta, GA
-
Difficulty Level:Easy
-
Total Repair Time:15 - 30 mins
-
Tools:Nutdriver, Screw drivers
1 person
found this instruction helpful.
Was this instruction helpful to you?
Thank you for voting!
Plastic Lid Hinge was broken
Changing the hinge was not difficult, but here's a hint: the top of the washer raises up if you pry it with a big screwdriver- be sure to wrap the screwdriver in a cloth so as not to scratch the appliance. Doing it this way makes it easy to access the retaining screws. You can push the wash tub to one side and reach the screws from underneath, but they're a tight fit and doing it that way is difficult. Overall a pretty easy repair and I'm only moderately handy.
Parts Used:
-
Thomas from Coral Springs, FL
-
Difficulty Level:Easy
-
Total Repair Time:15 - 30 mins
-
Tools:Nutdriver, Screw drivers
2 of 4 people
found this instruction helpful.
Was this instruction helpful to you?
Thank you for voting!
loud grinding sound then washer would shut down then there was water all over
first removed panel from rear of washer removed hoses and drained water in them, removed the 3 screws and removed the belt then removed the pump. Replaced with new one and put back screws,hoses and belt. walaaa.... it works like new!!!!
Parts Used:
-
marilisa from naples, FL
-
Difficulty Level:Really Easy
-
Total Repair Time:15 - 30 mins
-
Tools:Nutdriver, Socket set
1 person
found this instruction helpful.
Was this instruction helpful to you?
Thank you for voting!
The water was leaking out from the bottom.
My husband took out the 2 screws in the front panel and loosen the 3 nuts from the pump.
The parts was easily removed and the entire job tooked 30 mins.
The parts was easily removed and the entire job tooked 30 mins.
Parts Used:
-
Doris from Plainsboro, NJ
-
Difficulty Level:Easy
-
Total Repair Time:15 - 30 mins
-
Tools:Screw drivers, Socket set
1 person
found this instruction helpful.
Was this instruction helpful to you?
Thank you for voting!
Water removal pump stopped working.
Removed lower rear panel by removing 8 screws. Then I removed the two hoses that are attached to the pump by removing the hose clamps with a pair of plyers. The three hex head screws that anchor the pump to the base of the washer unit were removed and the pump came right out. To put the new pump in I just slipped the pump through the hole at the bottom of the washer and attached the belt onto the pulley. Then reversed the installation process. The washer had to be tipped forward slightly for this process and blocked (approx. 8 in.) to allow access to pulley. Very easy install, no help needed. Washer must be empty and preferable dry when task is done or water will be everywhere.
Parts Used:
-
Timothy from Palmdale, CA
-
Difficulty Level:Really Easy
-
Total Repair Time:15 - 30 mins
-
Tools:Nutdriver, Pliers
1 person
found this instruction helpful.
Was this instruction helpful to you?
Thank you for voting!
Water pump replacement
Reverse the process to install new pump
Unplug the machine
Place pad on floor to protect the machine from scratches
Lay front of machine on floor
Remove back cover (10 screws)
Disconnect 2 hoses
Remove 4 screws which secure pump to bottom frame
Remove belt
Remove pump
Reverse the process to install a new pump
Your web sites intuitive design makes it easy to navigate and the customer service person was knowledgeable, easy to understand and professional.
The part arrived via UPS in 3 days. It was double boxed (well packaged) and most importantly, it was the correct part.
This was is 1st time we used your server but it won’t be the last!
Kudos to the entire staff and please…keep up the good work.
Sincerely,
Lon Thomas
Unplug the machine
Place pad on floor to protect the machine from scratches
Lay front of machine on floor
Remove back cover (10 screws)
Disconnect 2 hoses
Remove 4 screws which secure pump to bottom frame
Remove belt
Remove pump
Reverse the process to install a new pump
Your web sites intuitive design makes it easy to navigate and the customer service person was knowledgeable, easy to understand and professional.
The part arrived via UPS in 3 days. It was double boxed (well packaged) and most importantly, it was the correct part.
This was is 1st time we used your server but it won’t be the last!
Kudos to the entire staff and please…keep up the good work.
Sincerely,
Lon Thomas
Parts Used:
-
Lon from Morton Grove, IL
-
Difficulty Level:A Bit Difficult
-
Total Repair Time:15 - 30 mins
-
Tools:Nutdriver, Pliers, Socket set
1 of 2 people
found this instruction helpful.
Was this instruction helpful to you?
Thank you for voting!
broken lid hinge
short drive, 90 degree, "star" driver. push tub to side and back to reach lower part of old hinge, remove single screw. (careful not to drop it into the "mechanics" of the tub.) repeat for the other side. remove parts from lid. reassemble new parts onto lid, along with lower hinge parts. secure the lower hinge to door part(s) with masking tape to hold in place. hold lid in place over lower hinge screw holes and start screws by hand. snug up the screws and your done! the 'STAR" screws may be relpaced with similar "phillips" so you wont have to scrounge for a "star" driver the next time.
Parts Used:
-
dorris from slaughters, KY
-
Difficulty Level:Easy
-
Total Repair Time:15 - 30 mins
-
Tools:Screw drivers
1 of 2 people
found this instruction helpful.
Was this instruction helpful to you?
Thank you for voting!
The Pump Went Out & Water Was All Over My Floor..
Unscrewed the front panel. Then took pump out & put new one in. . . . . Thank you part select. Com. . . Super fast shipping. . .
Parts Used:
-
BILL from DIX, IL
-
Difficulty Level:Really Easy
-
Total Repair Time:15 - 30 mins
-
Tools:Pliers, Screw drivers
1 of 2 people
found this instruction helpful.
Was this instruction helpful to you?
Thank you for voting!
Lid hinge pin broken
Opened hinges top of washer. Removed screws holding hinge bases. Removed the washer top lid and unscrewd broken hinge pin. Replaced hinge pin and inserted in pin base and screwd base op hinge back onto washer and job was done.
Parts Used:
-
Harvey from East Brunswick, NJ
-
Difficulty Level:Really Easy
-
Total Repair Time:15 - 30 mins
-
Tools:Screw drivers
1 of 2 people
found this instruction helpful.
Was this instruction helpful to you?
Thank you for voting!
Broken Hinge Pin
I followed the feed back in the forum from a previous repair. I popped open the top of the Washing and propped it open @ approx. 70 degrees,moved the Tub out of the way and used a small Phillips Scwdrvr to remove the broken part, installing the new parts was a snap, I took the time to use a Q-Tip and petroleum jelly to coat the pin and hinge making it easier and less binding when opening the lid.
Parts Used:
-
John from Dover, PA
-
Difficulty Level:Really Easy
-
Total Repair Time:15 - 30 mins
-
Tools:Screw drivers
1 of 2 people
found this instruction helpful.
Was this instruction helpful to you?
Thank you for voting!
Washer wouldn't spin because the switch on the lid broke
I unscrewed the old lid switch and screwed on the new switch in seriously 2 minutes!
Parts Used:
-
Rachelle from Eagle Mountain, UT
-
Difficulty Level:Really Easy
-
Total Repair Time:Less than 15 mins
-
Tools:Screw drivers
2 of 5 people
found this instruction helpful.
Was this instruction helpful to you?
Thank you for voting!
Started making loud screeching noise(bad Bearing)
Turned water off,tilted unit forward,removed lower rear cover,removed belt,laid towels around ,removed inlet hose and exit hose off pump,removed 3 screws holding pump,removed pump and installed new one,reversed order of disassemble, has been running great ever since.
Parts Used:
-
Michele from Lebanon, PA
-
Difficulty Level:Easy
-
Total Repair Time:Less than 15 mins
-
Tools:Pliers, Screw drivers, Socket set
1 of 2 people
found this instruction helpful.
Was this instruction helpful to you?
Thank you for voting!
Lid hinges wear out, causing lid to slam as you are trying to put clothes in or take them out.
Lift the top of the washer so you can access the screws that hold the hinges. Replace the hinges,and close the washer top. This is the sescond time we have had to replace the hinges.
This lid and hinges are very poorly designed. Instead of opening to the side, it opens straight back. That means when the hinges wear out (and they do because they are plastic), you have to push the lid all the way back to stay open. When you push it all the way back, it hits the control knob and turns off the water.
If you are like me, I like to turn the water on and add the soap so it can dissolve before I add the clothes. It is really irritating when you open the lid and the only way for it to stay open is to push it all the way back and the water shuts off. And if you don't push it all the way back, it slams and scares the bejeebers out of you or slams on your fingers.
This lid and hinges are very poorly designed. Instead of opening to the side, it opens straight back. That means when the hinges wear out (and they do because they are plastic), you have to push the lid all the way back to stay open. When you push it all the way back, it hits the control knob and turns off the water.
If you are like me, I like to turn the water on and add the soap so it can dissolve before I add the clothes. It is really irritating when you open the lid and the only way for it to stay open is to push it all the way back and the water shuts off. And if you don't push it all the way back, it slams and scares the bejeebers out of you or slams on your fingers.
Parts Used:
-
Jan from Challis, ID
-
Difficulty Level:Easy
-
Total Repair Time:Less than 15 mins
-
Tools:Screw drivers
1 of 2 people
found this instruction helpful.
Was this instruction helpful to you?
Thank you for voting!