















KFIS25XVMS2 KitchenAid Refrigerator - Instructions
Keep searches simple. Use keywords, e.g. "leaking", "pump", "broken" or "fit".
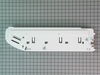
The pin on the right side of the end cap broke off.
1. I had to remove the cold cut drawer.
2. Remove the two screws for the sliding track and then the sliding track.
4. Remove the two crisper drawers as well as the glass and the two supports for the glass.
3. Remove the two screws for the end cap. This is accomplished by gently lifting up at the front of the part. You will find another three parts that are attached to the end cap. One is the slider that controls the tempetature, it is attached to a long plastic rod that is connected to the back side of the end cap by pressure clip points. The other end of the plastic rod is connected to a piece that is mounted to the back wall of the refridgerator. this is removed by gently pulling the entire unit forward until it comes loose from the back wall. Once the entire assembly is removed, The plastic rod must be released from teh back of the end cap. This will allow both ends to be disconnected from the slider at the front and the piece that was attached to the back wall by rotating each end to allow the removal of the components fronm the end cap. Once everything is removed, you are ready to complete the repair by reversing the removal process.
2. Remove the two screws for the sliding track and then the sliding track.
4. Remove the two crisper drawers as well as the glass and the two supports for the glass.
3. Remove the two screws for the end cap. This is accomplished by gently lifting up at the front of the part. You will find another three parts that are attached to the end cap. One is the slider that controls the tempetature, it is attached to a long plastic rod that is connected to the back side of the end cap by pressure clip points. The other end of the plastic rod is connected to a piece that is mounted to the back wall of the refridgerator. this is removed by gently pulling the entire unit forward until it comes loose from the back wall. Once the entire assembly is removed, The plastic rod must be released from teh back of the end cap. This will allow both ends to be disconnected from the slider at the front and the piece that was attached to the back wall by rotating each end to allow the removal of the components fronm the end cap. Once everything is removed, you are ready to complete the repair by reversing the removal process.
Parts Used:
-
Clarence from Gold River, CA
-
Difficulty Level:Easy
-
Total Repair Time:15 - 30 mins
-
Tools:Nutdriver
43 of 48 people
found this instruction helpful.
Was this instruction helpful to you?
Thank you for voting!
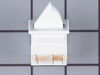
while closing the door, the light switch fouled, resulting in the switch breaking
I used a flat screwdriver and released the lock tab on the bottom of the light switch, and pried the switch out, being careful to not damage the plastic around the mounting place of the switch, unplugged wiring from old switch, plugged in the new one and pushed the new switch into place. Job finished light switch now working.
Parts Used:
-
Kevin from Beckley, WV
-
Difficulty Level:Really Easy
-
Total Repair Time:Less than 15 mins
-
Tools:Screw drivers
65 of 116 people
found this instruction helpful.
Was this instruction helpful to you?
Thank you for voting!
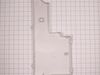
Drip pan in the back bottom was cracked during shipping and leaked
We had periodic leaks from under the Unit from new, could never figure out where it was coming from. Finally as it began to cause damage to surrounding cabinets, we took the back off and found the multiple cracks in the drip pan. Someone had hand trucked it from the wrong side! It was difficult to figure out the fan removal (it sits in the pan) but push the top forward and pull the bottom back and the fan came out. Then the pan was simple to remove / replace, by reversing the removal procedure, the fan was re installed.
Parts Used:
-
David from Traverse City, MI
-
Difficulty Level:A Bit Difficult
-
Total Repair Time:15 - 30 mins
-
Tools:Nutdriver
39 of 48 people
found this instruction helpful.
Was this instruction helpful to you?
Thank you for voting!
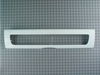
Plexiglas in lid cracked after heavy object fell from shelf
This was very easy...
1. Pulled pantry shelf to fully opened position
2. Carefully pushed left lid hinge in with thumb to clear lid
3. Gently lifted lid past lid hinge
4. Right side then easily cleared right hinge
5. Reversed above =>
6. Inserted new lid onto right hinge
7. Gently pushed left hinge in with thumb far enough for lid to slip into place
8. Slipped lift side of lid into place
9. Pushed pantry back into place
10. ALL DONE! Less then 10 minutes from opening replacement lid box to cleaning up.
1. Pulled pantry shelf to fully opened position
2. Carefully pushed left lid hinge in with thumb to clear lid
3. Gently lifted lid past lid hinge
4. Right side then easily cleared right hinge
5. Reversed above =>
6. Inserted new lid onto right hinge
7. Gently pushed left hinge in with thumb far enough for lid to slip into place
8. Slipped lift side of lid into place
9. Pushed pantry back into place
10. ALL DONE! Less then 10 minutes from opening replacement lid box to cleaning up.
Parts Used:
-
Michael from Ludington, MI
-
Difficulty Level:Really Easy
-
Total Repair Time:Less than 15 mins
28 of 28 people
found this instruction helpful.
Was this instruction helpful to you?
Thank you for voting!
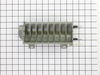
The black plastic or teflon coating on the ice mold was coming off in flakes and freezing in the ice cubes
I took out the ice collection box and auger to get access to the three screws holding the ice maker assembly against the left wall of the freezer. You can use a screwdriver or a nut driver. I then unpluged the assembly and wiggled it loose from the water fill tube. I assumed that unplugging the unit would disable the water valve but I put a plastic tub under the fill tube just in case. I studied the assembly on the kitchen table for a few minutes before I disasembled it. After removing a snapon plastick cover I removed three or four screws on the gearbox and was able to pull and wiggle the parts apart. The heater contacts have rubber O rings so you have to be firm pulling the mould out of and into the gearbox mount. Make sure it is fully seated. On reassembly note that the ice kicking arm is notched so it fits into the gearbox only one way and it helps to have it in position when you screw the gearbox back on. I also found the plastic ice guide that fits on top of the mold a little awkward in snaping back together. Make sure its fingers space evenly with the ice kicking arms.
Parts Used:
-
Roger from Sunnyvale, CA
-
Difficulty Level:Easy
-
Total Repair Time:30 - 60 mins
-
Tools:Nutdriver, Screw drivers
32 of 42 people
found this instruction helpful.
Was this instruction helpful to you?
Thank you for voting!
Ice maker mold was cracked and leaking water into the bin which then froze all the cubes together.
I removed the ice maker assembly from the freezer compartment (four nuts/ nut driver) and unplugged the wire harness. I discovered the nature of the problem and I went on the Internet to look for replacement parts expecting I'd have to buy the entire ice maker. When I found PartSelect.com I looked through the pictures of the parts available for my ice maker. I found the correct part quickly and easily. And having an acurate photo on the site, I was able to match all the key features of the mold I had with the one on the screen. I ordered the part, and installed it the day it arrived with just a Phillips screwdriver and a nut driver. It functions perfectly.
Parts Used:
-
George from Cottage Grove, MN
-
Difficulty Level:Really Easy
-
Total Repair Time:Less than 15 mins
-
Tools:Nutdriver, Screw drivers
28 of 30 people
found this instruction helpful.
Was this instruction helpful to you?
Thank you for voting!
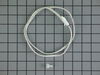
The refrigerator was freezing most products
Remove the light cover. Use a flat head screw driver to push in the tabs on the back of the program mount and pull down to expose the computer board. The Thermistor is clipped on under the vent holes on the right side. Cut both wires to remove the old thermistor strip a 1/4 inch off the remaning wires and the new thermistor wires twist both ends together crimp on the wire caps snap in the new thermistor reinstall the program board until the retainer clips snap into place, slide the light cover back on.
Parts Used:
-
michael from MARION, IL
-
Difficulty Level:Easy
-
Total Repair Time:Less than 15 mins
-
Tools:Pliers, Screw drivers
27 of 30 people
found this instruction helpful.
Was this instruction helpful to you?
Thank you for voting!
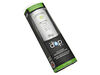
needed to replace filter
-
Marilynn from Holland, MI
-
Difficulty Level:Really Easy
-
Total Repair Time:Less than 15 mins
30 of 41 people
found this instruction helpful.
Was this instruction helpful to you?
Thank you for voting!
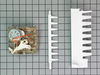
Ice Magic Plus stopped making ice
First I removed the icemaker from the freezer by removing two horizontal screws holding it to the side wall, and one vertical screw holding the front to a bracket coming off the side wall. Then I used a flat screwdriver to unlock the electrical plug. (After doing this, I realized that this wasn't necessary at all, and this part could have been changed just as easily without removing the icemaker.) On the front, there is a white cover with Ice Maker Plus. Use a flat screwdriver to unlock the tangs and remove the cover. There are three screws in the corners that once removed, will allow the motor assy. to be gently pulled straight out. On the back of the part, you will see many gold lands that the timer touches. I don't think there was anything wrong with my motor. I had two spots where the gold plating was worn off, so I suspect it was not making contact, and the whole process would stop. Slide the new part in place making sure the teeth on the gears line up (not a big deal), and secure with the screws. Install cover and you're done. Mine has been making ice like it was brand new.
Parts Used:
-
George from Hammond, LA
-
Difficulty Level:Really Easy
-
Total Repair Time:Less than 15 mins
-
Tools:Screw drivers
25 of 35 people
found this instruction helpful.
Was this instruction helpful to you?
Thank you for voting!
Deli cover panel hinge pin broke off
Removed all of the bottom drawers and shelvs, then removed the end panel that contained the broken Deli cover hinge pin. Replaced with new panel, cleaned all of the existing parts and ten re-assembled.
Parts Used:
-
Scot from Tijeras, NM
-
Difficulty Level:Really Easy
-
Total Repair Time:15 - 30 mins
-
Tools:Nutdriver
22 of 29 people
found this instruction helpful.
Was this instruction helpful to you?
Thank you for voting!
Refrigerator quit except for the light inside.
Removed the metal cover over the HV electronic board on the back of the unit. Using a flat head screwdriver I unsnapped the plastic cover and removed it. I unplugged the 5 or 6 cables from the electronic board. Bent back the plastic tabs holding the board. You might think they are going to break but they bend. I lifted the board out and replaced it with the new one. Then plugged the cables in being careful to align them first. I then applied power and the refrigerator came to life. I followed the programming instructions that came with the refrigerator. You can get those online also. The unit began to run and in a few minutes the compressor came on. The unit began cooling and life was good again!
Parts Used:

-
Roy from BARTLETT, TN
-
Difficulty Level:Very Easy
-
Total Repair Time:15 - 30 mins
-
Tools:Nutdriver
20 of 23 people
found this instruction helpful.
Was this instruction helpful to you?
Thank you for voting!
Lid to chef pantry would not work.
First I removed the drawers and shelf above the pantry drawer and then removed the pantry drawer. The end cap came off very simply by removing two screws. I removed the slide attachment to the old end cap and attached it two the new end cap. I then installed the new end cap and replaced the drawers and shelf. The lid to the chef pantry popped right in place. Job complete.
Parts Used:
-
Rodger from Marion, IL
-
Difficulty Level:Easy
-
Total Repair Time:30 - 60 mins
-
Tools:Nutdriver
19 of 21 people
found this instruction helpful.
Was this instruction helpful to you?
Thank you for voting!
Crisper Glass Shattered While Cleaning
Since it was apparent the crisper glass is fragile I was very careful to not stress it. I opened the box then took a large board almost as big and slid it on. I carried both items to the fridge and with both doors open slid the glass into place. I am 65 yrs. Old and have owned many refrigerators but this is a first. They don't build them like they use to. .
Parts Used:

-
Thomas from San Diego, CA
-
Difficulty Level:Really Easy
-
Total Repair Time:Less than 15 mins
19 of 22 people
found this instruction helpful.
Was this instruction helpful to you?
Thank you for voting!
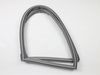
Old refrigerator gaskets were worn out
I unboxed the replacement gasket set and inspected them for damage. Then I opened the left refrigerator door and grabbed the right hand corner of the old gasket and removed it. I then aligned the new gasket with the door and using my fingers pushed the gasket into the gasket grove. I used my thumb to seat the gasket. I repeated the process for the right door. Total time was under 15 minutes.
Parts Used:
-
Ron from LIVERMORE, CA
-
Difficulty Level:Very Easy
-
Total Repair Time:Less than 15 mins
18 of 19 people
found this instruction helpful.
Was this instruction helpful to you?
Thank you for voting!
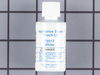
Scratches in Surface
This product comes in a bottle with a brush like Liquid Paper. It goes on incredibly easy. A second coat might be needed. I wanted to prevent rust from setting in so I covered the scratches and dings. The paint is a little brighter since my washer is 10 years old but it still looks great.
Parts Used:
-
Michelle from Richardson, TX
-
Difficulty Level:Really Easy
-
Total Repair Time:Less than 15 mins
81 of 209 people
found this instruction helpful.
Was this instruction helpful to you?
Thank you for voting!