Your coupon for will be reflected when you check out!
✖
Your coupon for
✖
Hello!
You're visiting the PartSelect site in U.S.
Would you like to shop on the Canadian site?
Stay on this site
Go to Canadian site
✖
Model Number Locations
1Select Category Type
Select Category Type
2Select Product Type
Select Product Type
3Select {MODEL} Type
Select {MODEL} Type
Sample Model Number Tags
Model numbers can be made up of numbers (1005400, for example) or a combination of letters and numbers (LAT1000AAE). The model number will most likely appear on either a paper sticker or a metal plate. Your appliance's model number tag may look similar to the sample model number tags shown here (model number highlighted in yellow):
Model has been saved to My Models. If you're not signed in, your lists are available on this device and will expire within 30 days.
Model has been saved to My Models.
This an authentic OEM 40-Watt replacement light bulb, used in a number of household appliances. It is specially designed to withstand extreme temperatures, which is why these replacement bulbs are mos...
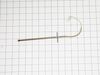
This is a leveling leg for your oven, range, or stove. The leveling legs on your oven allow your appliance to sit perfectly flat. The new one may be longer in length than your original, but will work...
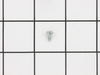
This is a multi-use and multi-appliance screw. It can be used on a microwave, refrigerator, range/oven, air conditioner, dehumidifier, washer, or dryer. The measurements of this screw are 8 x 1/2 inch...
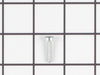
This gas range oven igniter is a flat-style component designed to initiate the heating process by glowing and igniting the gas for the bake burner. Essential for proper oven function, it ensures consi...
This touch-up paint can be used on a wide variety of household appliances. It is most often used on washers, dryer, refrigerators, dishwashers, ranges, freezers, trash compactors, or microwaves. It is...
This is cookware designed for use in your range or oven. It is a two-piece dish that is used to grill or cook food while the broil function is on, meaning it can withstand high temperatures. This set ...
$49.50
In Stock
Order now and your part arrives by Apr 23
Questions And Answers for KFGD500EBS05
Be the first to ask our experts a question about this model!
✖
Ask a Question
Ask our experts a question on this model and we'll respond as soon as we can.
First I removed the lower tray and all parts covering the ignitor on the upper oven. 2. Then I removed the screws holding down the ignitor and flame distributor. 3. I then had to pull out the oven from the wall and remove the back panel to expose the wires connecting the ignitor. This required the removal of about six screws but they
... Read morewere fairly easy to get to. 4. I disconnected the ignitor from the back panel then went around to the front of the oven and pulled out the ignitor and all of the attached parts. 5. Here's the tricky part. The screws holding the ignitor in place had fused from the heat and then the threads stripped when I tried to remove them. I had to use a dremel tool and cutting wheel to carefully cut the screws off and then went to buy some replacement screws from the hardware store. 6. I replaced them with a nut and a bolt, to hopefully avoid the same problem for later replacement if necessary. 7. I then replaced everything the same way it came out and all is working like new!
Socket Lite come with clips attached to the outside of the housing. After you unhook the 3 lead wires that are attached to the unit. All you have to do is push in on the clips and release the unit. Then you snap in the new unit. Attach the 3 wire leads, put a oven bulb in the socket end, and the install the light cove
... Read morer
Lifted door off hinges; removed lower oven spill plate; unmounted bake igniter from heat shield; pulled stove away from wall; removed rear access panels (4 screws); unplugged bake igniter; installed new part; vacuumed behind stove and mopped floor (this took more time than installing the part); oven is back in cookie baking mode!


 Diagram and Parts List for KitchenAid Range")


 – Part Number: W11665456")


")

