















KDRP487MSS01 KitchenAid Range - Instructions
Keep searches simple. Use keywords, e.g. "leaking", "pump", "broken" or "fit".
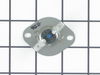
After using the self cleaning feature for the 10th or so time, the range locked up and nothing worked.
First we watched a YouTube on how to replace the thermostat. It was easy to turn off the circuit breaker. It was a little tricky to pull the range away from the wall and then we were able to unplug. Because our range is a dual fuel model, the back had a lot more screws to remove to get to the thermostat because there were covers over a lot of wires and the gas line I presume. However, we did get off the 12 or so screws with a regular screw driver. We easily located the thermostat and quickly realized that the two screws holding the thermostat in place were neither flat head nor phillips. We were able to remove one of them and merely twisted it sideways, installed the new thermostat with one screw and attached the wires. When we flipped the circuit breaker and plugged in the over, Voila, it worked. The hardest part was getting all the covers off the back. I hope it doesn't happen again because this was an expensive replacement part.
Parts Used:
-
Shay from KITTY HAWK, NC
-
Difficulty Level:Easy
-
Total Repair Time:30 - 60 mins
-
Tools:Screw drivers
1 of 2 people
found this instruction helpful.
Was this instruction helpful to you?
Thank you for voting!
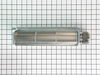
Bearing on cooling fan.
Removed old fan by removing all screws except the back two lower screws - here I cut the flange on the old fan to remove. Drilled the back two bottom holes so as to fit over existing screws then replaced the top 3 and bottom 2 screws as well as power leads. Offset screwdriver is a must.
Parts Used:
-
Mary R. from Thornton, NH
-
Difficulty Level:A Bit Difficult
-
Total Repair Time:30 - 60 mins
-
Tools:Nutdriver, Screw drivers
1 of 2 people
found this instruction helpful.
Was this instruction helpful to you?
Thank you for voting!
I snapped a bolt on the main power terminal block when connecting the pigtail.
Removed the small metal panel covering the main power terminal in back of the electric range. Removed the nuts holding the red, white and black electrical wires from the range using the appropriate socket (there will be two nuts on each bolt end). Removed the two screws holding the main power terminal block with appropriate screw driver. Connect the new main power terminal block to the range using the two screws. Reconnect the red, black and white electrical wires coming from the range using one nut for each wire. IMPORTANT: do no over tighten the nuts because the bolts could snap. Reconnect the pigtail and secure the small metal panel covering the main power panel.
Parts Used:

-
Frank from Palm Coast, FL
-
Difficulty Level:Easy
-
Total Repair Time:15 - 30 mins
-
Tools:Screw drivers, Socket set
3 of 8 people
found this instruction helpful.
Was this instruction helpful to you?
Thank you for voting!
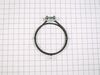
Not heating up properly
Installed a new thermostat and noticed the convection heating element wire had burned in two. Ordered new element and installed. Oven is currently working properly again.
Parts Used:
-
Harmon from MONTICELLO, GA
-
Difficulty Level:Really Easy
-
Total Repair Time:30 - 60 mins
-
Tools:Pliers, Screw drivers
1 of 3 people
found this instruction helpful.
Was this instruction helpful to you?
Thank you for voting!
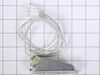
The light bulb burnt out, the assembly was damaged by the rack sliding in and out
This is a microwave/ Oven slide in unit. You DO NOT need to slide out the unit, the repair can be done from inside the oven. Just be careful on pulling the wires from the unit so they do not break. I used shrink wrap over the joints but you can use tape as long as it can take the temperatures
Parts Used:
-
Robert from CLINTON, CT
-
Difficulty Level:Really Easy
-
Total Repair Time:Less than 15 mins
-
Tools:Screw drivers
1 of 3 people
found this instruction helpful.
Was this instruction helpful to you?
Thank you for voting!
Block broke
Unplug power cord, remove wires from block. take 2 screws out. replace with new block about 15 mins. Done
Parts Used:
-
Edward from Crimora, VA
-
Difficulty Level:Really Easy
-
Total Repair Time:15 - 30 mins
-
Tools:Screw drivers, Socket set
1 of 4 people
found this instruction helpful.
Was this instruction helpful to you?
Thank you for voting!
range installer broke a screw off & busted the plastic piece
-
Christina from West Des Moines, IA
-
Difficulty Level:Easy
-
Total Repair Time:30 - 60 mins
-
Tools:Pliers, Screw drivers
Was this instruction helpful to you?
Thank you for voting!
Cracked inner door glass
A generic video on Youtube was actually very helpful as it showed how to remove the door from the oven for easier glass replacement. The only tricky part is getting the panes of glass in the correct order during reassembly,as there are actually 4 pieces in the door. Only the piece that faces the oven's interior was cracked on mine. The two inner pieces between the two outermost pieces are the ones not to mix up. This little repair also gave me the opportunity to thoroughly clean all 4 pieces of glass that had become rather dirty over 12 years. Now the oven door looks like new!
Parts Used:
-
Mark from Ocean, NJ
-
Difficulty Level:A Bit Difficult
-
Total Repair Time:30 - 60 mins
-
Tools:Screw drivers
Was this instruction helpful to you?
Thank you for voting!
Inner Glass Was Broken
I followed the instructions for installation on your site. I encountered two problems. I was unable to unscrew several screws. I had to used wd40 and slight encouragement from a soft hammer. Also, I was glad for the advice in one instruction about paying attention to the type of screw (flat or more flat). Otherwise, when I was ready to put everything back together, I would have had some problems. The flatter screws definitely had to be used in certain areas.
Parts Used:
-
Jane A. from Lake Forest, IL
-
Difficulty Level:A Bit Difficult
-
Total Repair Time:30 - 60 mins
-
Tools:Pliers, Screw drivers
Was this instruction helpful to you?
Thank you for voting!
Cracked/broken inner glass
Took the door off, removed the screws, took door cover off, cleaned the other two pieces of glass and the new one, and then reassembled. I set the screws aside so I put them back in the same holes. I never want to take the chance of a possible cross threaded screw not going back into the same hole. Note:Now is a good time to clean edges with oven cleaner before reassembly.
Parts Used:
-
Danny from Wolcott, NY
-
Difficulty Level:Really Easy
-
Total Repair Time:30 - 60 mins
-
Tools:Screw drivers
Was this instruction helpful to you?
Thank you for voting!
Cracked oven door inner glass
Not difficult, but there are several layers of glass, metal, and insulation inside this door. Keep track of where the screws go and have room to lay out all the layers. You'll reach the cracked inner glass last.
Parts Used:
-
michael from corona del mar, CA
-
Difficulty Level:Easy
-
Total Repair Time:15 - 30 mins
-
Tools:Screw drivers
Was this instruction helpful to you?
Thank you for voting!
burners would not lite, no spark
pull out the stove,took the top back panel off, take off wires one at a time on new spark module.. easy
Parts Used:
-
doug from ramsey, IL
-
Difficulty Level:Really Easy
-
Total Repair Time:Less than 15 mins
-
Tools:Screw drivers
Was this instruction helpful to you?
Thank you for voting!
Had to replace oven glass door that was shattered
First of all I would like to say how prompt the delivery of my oven glass was. I ordered it Thurs & it came on Sat ~ 2 days thats amazing! Ordering my glass was easy & the representitive that helped me was very nice & the price was great! My husband repaired it in about 20 minutes - very easy to istall the glass & very cost effective repairing it ourselves rather than having a repair man come out! Thanks Part Select I will recommend you to all out fam & friends most definetly!
Parts Used:
-
Romaine from Costa Mesa, CA
-
Difficulty Level:Really Easy
-
Total Repair Time:15 - 30 mins
-
Tools:Screw drivers
Was this instruction helpful to you?
Thank you for voting!
Main oven interior bulbs burned out
The Kitchenaid oven has 2 interior oven lights. They are behind rectangular glass panels, in an assembly housing The repair is pretty simple. Shut off the power at the breaker box to the oven first. First remove the small screw that holds in the assembly with a Phillips screwdriver. Put down a white piece of paper towel to catch it in case it drops. It is grey color and hard to find against the bottom of the oven. This will free up the assembly and you can move it out. There is a wire on the back so it only comes out a short distance. Next the glass panel covering the bulb must be removed. The small metal clamp with 2 projections that act like a spring to put tension on the glass. Gently pull this out parallel to to the glass and it will release the lens. The old bulb is a simple 2 prong halogen that pulls out easily. Replace it with the new bulb carefully pushing the prongs in. If you did not turn off the power the light will come on immediately. it will get hot quickly so don't touch it for more than a few seconds. Next slide the glass lens back into place into the back of the assembly. Slip the other clip with the screw back on the front. Replace the assembly back into the oven side opening. Secure by replacing the small screw removed in the beginning. You are done. It is about a 5 minute job start to finish. I would replace both bulbs even if only one went out because the other one probably will go out a short time later and you will have to go through this again soon. Oh, and cheap bulbs are not worth it. They are very dim and burn out quickly. Go with the better bulbs you get from PartSelect.
Parts Used:
-
Bruce from Clarksville, MD
-
Difficulty Level:Really Easy
-
Total Repair Time:Less than 15 mins
-
Tools:Screw drivers
Was this instruction helpful to you?
Thank you for voting!
Door Gasket was stained and dirty
Removed with screw driver the gasket clamp at bottom of door opening and then pulled away the old gasket. Installed new gasket making sure that each holding pin was insert in mounting holes, trimmed away un-raveled gasket material at ends and reinstalled gasket clamp at bottom of door. Removed old oven racks and installed new racks.
Parts Used:


-
Kenneth from Englewood, CO
-
Difficulty Level:Really Easy
-
Total Repair Time:Less than 15 mins
-
Tools:Screw drivers
Was this instruction helpful to you?
Thank you for voting!