















KBRS20EVWH3 KitchenAid Refrigerator - Instructions
Keep searches simple. Use keywords, e.g. "leaking", "pump", "broken" or "fit".
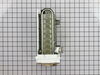
Refrigerator Ice Maker stopped making ice.
(1) Removed the three screws which attached the ice maker to the freezing compartmnet wall in refrigerator; (2) Disconnected the power to the old ice maker; (3) Removed the old ice maker from the freezing compartment of the refrigerator; (4) Took the white front cover off of the old ice maker; (5) Disconnected the wiring harness from the old ice maker; (6) Removed the "ice making-stop arm" from the old ice maker; (7) Placed the items taken from old ice maker on to the new ice maker; (8) Reconnected the new ice maker to the power; (9) Placed the new ice maker in the proper position in freezing compartment of refrigerator and replaced the three screws. JOB DONE!
Parts Used:
-
Harold from Oakton, VA
-
Difficulty Level:Really Easy
-
Total Repair Time:15 - 30 mins
-
Tools:Nutdriver
18 of 34 people
found this instruction helpful.
Was this instruction helpful to you?
Thank you for voting!
fridge door would not close completely by itself
Removed the hinge cover, removed three hinge screws, removed door. Then I used a screwdriver to pry out the hinge bushings, pushed the new ones in and replaced the door. Both Maytag and Lowe's (who held the extended warranty) said that the door was not a repairable item and would have to replace the whole door. Since that would cost more than the value of the fridge, they voided the warranty and returned my cost. Too bad we didn't know about Part Select, we would have held their feet to the fire.
Parts Used:
-
thomas from melbourne, FL
-
Difficulty Level:Really Easy
-
Total Repair Time:Less than 15 mins
-
Tools:Nutdriver, Screw drivers
10 of 11 people
found this instruction helpful.
Was this instruction helpful to you?
Thank you for voting!
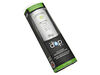
Six months in use time to replace the filter
-
Michael from Long Valley, NJ
-
Difficulty Level:Easy
-
Total Repair Time:Less than 15 mins
13 of 20 people
found this instruction helpful.
Was this instruction helpful to you?
Thank you for voting!
Plastic peg hinging lid to drawer broke
It actually took 1 day and 15 minutes to fix this problem.
I removed the drawers and shelves in the area around the pantry. I carefully took apart the sliders and plastic parts that comprise the endcap/temperature adjuster. Then I tried to replace the unbroken part into the assembly. At that point I realized that something was wrong and I had ordered the wrong part. So I cleaned and put the broken part back in the refrigerator to wait for the replacement.
PartSelect customer service person was terrific and had the correct part on the way to my home immediately. I don't know how, but it arrived the NEXT day!
THEN, it took me 15 minutes to unscrew the sliders, endcap and replace both.
Thank you PartSelect.
I removed the drawers and shelves in the area around the pantry. I carefully took apart the sliders and plastic parts that comprise the endcap/temperature adjuster. Then I tried to replace the unbroken part into the assembly. At that point I realized that something was wrong and I had ordered the wrong part. So I cleaned and put the broken part back in the refrigerator to wait for the replacement.
PartSelect customer service person was terrific and had the correct part on the way to my home immediately. I don't know how, but it arrived the NEXT day!
THEN, it took me 15 minutes to unscrew the sliders, endcap and replace both.
Thank you PartSelect.
Parts Used:

-
Lee from North Potomac, MD
-
Difficulty Level:Really Easy
-
Total Repair Time:Less than 15 mins
-
Tools:Screw drivers
9 of 9 people
found this instruction helpful.
Was this instruction helpful to you?
Thank you for voting!
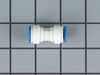
Leaking water tube connector/union
Received the union I ordered, then discovered that the tubes were different sizes, so I had the wrong part. I had read elsewhere that it was necessary to trim the two ends of the tubes with a box cutter to stop the leaks - I did this, and the leaking stopped. I was then able to go to a local hardware store and get a 5/16 to 1/4 union and replace it. The leaking is stopped, and the water supply in the door is now working like new. No problem with partselect, but I did buy a caliper so that I can check tube diameters if I ever have a similar problem! This is a great site to find instructions - well worth the time to search!
Parts Used:
-
Roderick from NEWTOWN, PA
-
Difficulty Level:Easy
-
Total Repair Time:15 - 30 mins
-
Tools:Pliers, Screw drivers
10 of 12 people
found this instruction helpful.
Was this instruction helpful to you?
Thank you for voting!
Right hand door would not auto close.
Removed the top door hinge cover.
Remover the four 12mm hex screws.
Lifted empty door off bottem hinge support.
Removed old door closure.
Put some silicon lub on the new closure and installed.
Reversed the removal steps.
But this did not fix the problem. Will have to remove the door and inspect the inside of the door's lower hinge assembly.
Remover the four 12mm hex screws.
Lifted empty door off bottem hinge support.
Removed old door closure.
Put some silicon lub on the new closure and installed.
Reversed the removal steps.
But this did not fix the problem. Will have to remove the door and inspect the inside of the door's lower hinge assembly.
Parts Used:
-
Bill from Murphy, NC
-
Difficulty Level:Easy
-
Total Repair Time:Less than 15 mins
-
Tools:Nutdriver
16 of 31 people
found this instruction helpful.
Was this instruction helpful to you?
Thank you for voting!
There was no light on in refrig area
Just replaced the switch, but unfortunately that was not the problem; nor was it the bulb....so I am back to square one.
But Parts Select is a great place to order from. Thank you.
But Parts Select is a great place to order from. Thank you.
Parts Used:

-
Lori from Chuluota, FL
-
Difficulty Level:Easy
-
Total Repair Time:Less than 15 mins
-
Tools:Screw drivers
12 of 19 people
found this instruction helpful.
Was this instruction helpful to you?
Thank you for voting!
Replace water filter
pop open, unscrew quarter turn, screw new one in quarter turn, pop shut. duh
Parts Used:
-
Brenda from Spokane Valley, WA
-
Difficulty Level:Really Easy
-
Total Repair Time:Less than 15 mins
13 of 23 people
found this instruction helpful.
Was this instruction helpful to you?
Thank you for voting!
broken light switch
-
Richard from West Warwick, RI
-
Difficulty Level:Really Easy
-
Total Repair Time:Less than 15 mins
-
Tools:Screw drivers
12 of 20 people
found this instruction helpful.
Was this instruction helpful to you?
Thank you for voting!
Light switch rocker broke, disabling freezer internal light, water dispenser, and ice dispenser
Very simple. Matched female plugs with respective male color coded prong; pushed together then inserted unit in slot of freezer sidewall and rotated into position...job done.
Parts Used:
-
Kenneth from Newton Grove, NC
-
Difficulty Level:Really Easy
-
Total Repair Time:Less than 15 mins
10 of 14 people
found this instruction helpful.
Was this instruction helpful to you?
Thank you for voting!
Icemaker Would Not Produce Ice
Contacted sears home service to perform repair. Quote for repair was $307. 43. ( $196. 90 For labor ,$102. 58 For part) plus $75. 00 For service call. Based on the charge, I refused the repair and ordered the appropriate part from "part select" (733947) (wpl 8201515) motor module for a cost of $81. 84. To my surprise, the part arrived the next day and in 15 minutes the icemaker was in a position to make ice, and has been producing ice ever since. To perform the module replacement, I had to remove one screw with a nutdriver, pull the icemaker out, disconnect a wire harness, replace the module and do the reverse procedure to complete the installation. I saved a total of $225. 59 By doing this repair myself. A lesson learned. . . . . I will always investigate doing a repair myself with the help from the people at part select. Very professional and they sent the correct part the first time.
Parts Used:
-
ROBERT from INVERNESS, IL
-
Difficulty Level:Easy
-
Total Repair Time:15 - 30 mins
-
Tools:Nutdriver
8 of 8 people
found this instruction helpful.
Was this instruction helpful to you?
Thank you for voting!
Clicking & popping for about 30 sec. when compressor starts
As shown on the YouTube link sent with email receipt.
Removed back panel. Removed the clip securing the parts with long nose pliers. Unplugged the old, replugged the new. Replaced the clip to secure.
Unfortunately, the capacitor and relay did not fix the loud clicking issue.
Removed back panel. Removed the clip securing the parts with long nose pliers. Unplugged the old, replugged the new. Replaced the clip to secure.
Unfortunately, the capacitor and relay did not fix the loud clicking issue.
Parts Used:

-
Michael from SCOTTSDALE, AZ
-
Difficulty Level:Really Easy
-
Total Repair Time:30 - 60 mins
-
Tools:Nutdriver, Pliers
8 of 8 people
found this instruction helpful.
Was this instruction helpful to you?
Thank you for voting!
Refrigerator wouldn't cool
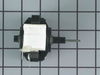
First I removed the six screws from the cover. I then disconnected the two wires and pulled the small motor out with its base and removed two screws that hold it in place. I then changed the old one for the new one and set it back in its place. I then set the cover back and turned it on. I was happy again.
Parts Used:
-
Fidel from Forest, MS
-
Difficulty Level:Easy
-
Total Repair Time:30 - 60 mins
-
Tools:Screw drivers
10 of 15 people
found this instruction helpful.
Was this instruction helpful to you?
Thank you for voting!
Broken Tab
You will need a Nutdriver a 1/4" size and a philips screwdriver, I'm a young woman, It was easy find the pc. I need here since I lost my manual, in this particular piece the inside part is not included the tab that controls the tempeture, you will have to use the same from the broken one, snap off all and carefully remove it from the insideout of the broken piece to intall it in the replacement, make sure you remember how its going back, that was the hard part of all the repair! after that it was easy as 1, 2, 3!!! have fun!!
Parts Used:
-
CARMEN from CORAL GABLES, FL
-
Difficulty Level:Easy
-
Total Repair Time:15 - 30 mins
-
Tools:Nutdriver, Screw drivers
8 of 9 people
found this instruction helpful.
Was this instruction helpful to you?
Thank you for voting!
replacing thermostat did not help
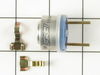
Icecubes came out half-way, and refrooze. I figured out, that the melter does not work (HEATER in the icemaker) Voltage measured 105V no load. Studied the Internet, and folloved an advice: shorted the back wire and the blackwire with white stripes.these go to relay contacts. It seems, that the relay contacts are no good on Infrared receiver boaed. I turn off manually the icemaker, when needed
Parts Used:
-
John from Rocky River, OH
-
Difficulty Level:Difficult
-
Total Repair Time:More than 2 hours
-
Tools:Pliers, Screw drivers, Socket set
10 of 15 people
found this instruction helpful.
Was this instruction helpful to you?
Thank you for voting!