















KBRS19KTWH01 KitchenAid Refrigerator - Instructions
Keep searches simple. Use keywords, e.g. "leaking", "pump", "broken" or "fit".
needed a Door Bin to replace the old one

-
Susan from BLOOMINGTON, IN
-
Difficulty Level:Easy
-
Total Repair Time:Less than 15 mins
6 of 11 people
found this instruction helpful.
Was this instruction helpful to you?
Thank you for voting!
the rail to hold the crisper drawers broke
I first removed the bottom shelf. Then I popped the rail in. It was pretty easy although I did have to use some force to fit it in. Ordering the part and doing it myself was a lot cheaper than calling the repair man.
Parts Used:

-
Christina from Orange, CT
-
Difficulty Level:Really Easy
-
Total Repair Time:Less than 15 mins
4 of 5 people
found this instruction helpful.
Was this instruction helpful to you?
Thank you for voting!
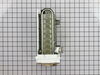
leaking ice maker,big chunks ot ice were forming and had to remove them 2-3 times a day
removed old ice maker by taking out a couple of screws in the back of freezer,when new ice maker arrived i saw that it didn't have the same hose apparatus as old one so I easily took apart old one then took apart new one and switched them out-very-- easily done for a 61 yr old lady I might add-- also had to reinstall ice maker arm off old ice maker as new one does not come with one Then installed new ice maker in freezer I am very very pleased,sure saved a lot of money doing it my self
Parts Used:
-
Linda from Johnson City, NY
-
Difficulty Level:Really Easy
-
Total Repair Time:30 - 60 mins
-
Tools:Screw drivers
4 of 5 people
found this instruction helpful.
Was this instruction helpful to you?
Thank you for voting!
Ice maker just stopped making ice
This was the third icemaker replaced since January 1999. Improvement need to be made in the design of the icemaker so that more than 2-3 years of life is available.
The most difficult part was disconnecting the power plug in the back of the icemaker. You must squeeze the upper and lower tabs together and pull out at the same time to disconnect. Once this is done, take out one nut head screw, lift up on the icemaker and remove from the hanger. Be careful that you don't break the plastic tabs on the hangers. Replace new icemaker in reverse, feed water supply where it must go in the back, resnap onto hangers, replace the nut head screw and snap in the power plug. It took about 2 hours before the icemaker began making ice. It has been working fine ever since. PS. I saved about $200.00 over having a repairman come in and replace the unit.
The most difficult part was disconnecting the power plug in the back of the icemaker. You must squeeze the upper and lower tabs together and pull out at the same time to disconnect. Once this is done, take out one nut head screw, lift up on the icemaker and remove from the hanger. Be careful that you don't break the plastic tabs on the hangers. Replace new icemaker in reverse, feed water supply where it must go in the back, resnap onto hangers, replace the nut head screw and snap in the power plug. It took about 2 hours before the icemaker began making ice. It has been working fine ever since. PS. I saved about $200.00 over having a repairman come in and replace the unit.
Parts Used:
-
Thomas from Valencia, PA
-
Difficulty Level:A Bit Difficult
-
Total Repair Time:1- 2 hours
-
Tools:Nutdriver
4 of 5 people
found this instruction helpful.
Was this instruction helpful to you?
Thank you for voting!
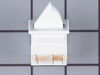
Broken light switch
Watched video. Unplugged refrigerator and popped out switch. In plugged connector and pushed switch in place. Plugged in refrigerator and the light worked
Parts Used:
-
Terry from WARMINSTER, PA
-
Difficulty Level:Really Easy
-
Total Repair Time:15 - 30 mins
-
Tools:Screw drivers
4 of 5 people
found this instruction helpful.
Was this instruction helpful to you?
Thank you for voting!
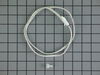
FREEZER WOULD NOT DEFROST.
I initially tested the heating element and defrost thermostat using an ohm meter. the defrost thermostat was incased in ice, so I replaced it first. The refridgerator worked for about a week and then froze up again. I then replaced the thermistor and the unit is working as designed.
Parts Used:
-
JEFF from SEATTLE, WA
-
Difficulty Level:Really Easy
-
Total Repair Time:30 - 60 mins
-
Tools:Nutdriver, Screw drivers
4 of 5 people
found this instruction helpful.
Was this instruction helpful to you?
Thank you for voting!
Raplaced switch
Repair went well,took about five to ten minutes to disconnect the power from the fridge removed the defective switch installed the new one ,reconnected the power,,,and Let there be light and there was light!
Parts Used:

-
Winston A from Brooklyn, NY
-
Difficulty Level:Really Easy
-
Total Repair Time:Less than 15 mins
-
Tools:Pliers
5 of 9 people
found this instruction helpful.
Was this instruction helpful to you?
Thank you for voting!
Refrigerator compressor not run
-
ronald from San Diego, CA
-
Difficulty Level:Really Easy
-
Total Repair Time:30 - 60 mins
-
Tools:Screw drivers
3 of 3 people
found this instruction helpful.
Was this instruction helpful to you?
Thank you for voting!
Fresh Food Compartment occasionally going down to 28-30 degrees F
Failure detected as Damper Control at upper rear of compartment would continuously open/close, would never stay open or closed. Sometimes the main board would turn it off (maybe a low thermistor limit?), but it would stick open a bit, and keeping letting freezer air into fridge. Could have potentially been control board, but as it turns out after disassembly of the defective damper, the internal microswitch was stuck in the closed position so it wouldn't shut off the motor. Easy fix by gently pulling the cover off the damper control, pull out Styrofoam encasement, then a phillips to remove the damper assembly. Gently push tabs to release wire connectors. Reverse the process and you're done! If I really wanted to go on the cheap, I could have just changed the microswitch, but that looked like a shaky maneuver at best. This site saved me on this one, so happy to share my experience with this Maytag and its nasty habit of freezing my milk and eggs!! :)
Parts Used:

-
Galen from WASECA, MN
-
Difficulty Level:Really Easy
-
Total Repair Time:15 - 30 mins
-
Tools:Screw drivers
3 of 3 people
found this instruction helpful.
Was this instruction helpful to you?
Thank you for voting!
Ice maker not producing ice
The parts were very easy to replace, however I am still without ice and cannot figure out why. I have ohm tested the contol unit and everything works fine, I am able to jump it and turn on the motor and water fill valve. Any suggestions?...
Parts Used:
-
frank from NORTHRIDGE, CA
-
Difficulty Level:Very Easy
-
Total Repair Time:15 - 30 mins
-
Tools:Nutdriver
3 of 3 people
found this instruction helpful.
Was this instruction helpful to you?
Thank you for voting!
lights wouldn't come on/work in refrigerator
Referencing the info/schematics you have on your website, I unscrewed/unattached top-front panel (carefully), from behind the panel you have to detach the wires (2) from the switch, pushed "in" the switch to remove, put in new switch and attach wires to test BEFORE remounting panel. Tada!! Thank you PartSelect! You saved me at least $80...would have been at least $100 to have a repair person come to the house!
Parts Used:
-
Jane from Albuquerque, NM
-
Difficulty Level:Easy
-
Total Repair Time:15 - 30 mins
-
Tools:Pliers, Screw drivers, Socket set
4 of 6 people
found this instruction helpful.
Was this instruction helpful to you?
Thank you for voting!
Top section warm, but freezer okay.
Popped off the control panel at the top behind the door. Found the thermistor and replaced it, cutting the wires and splicing the new one in. Immediately the warm section of the refrigerator was getting below freezing temperature readings, so the cooling vent was not opening. I put the old one back on and the temperature readings went back to being accurate. So this was not the problem. I believe now that the fan somehow is not blowing enough cold air up. So now I'll probably buy a fan motor and maybe a blade and try that. Otherwise the computer module I priced at $500 so I hope it isn't that. I replace the fan motor a few years ago already.
Parts Used:
-
Christopher from HOMESTEAD, FL
-
Difficulty Level:Easy
-
Total Repair Time:15 - 30 mins
-
Tools:Screw drivers
3 of 3 people
found this instruction helpful.
Was this instruction helpful to you?
Thank you for voting!
Broken clips on old part
-
Rose from OCOEE, FL
-
Difficulty Level:Really Easy
-
Total Repair Time:Less than 15 mins
3 of 3 people
found this instruction helpful.
Was this instruction helpful to you?
Thank you for voting!
Fill cup broke.
Very easy to order from parts select. Took seconds to replace.
Parts Used:

-
Aliki from Miami, FL
-
Difficulty Level:Really Easy
-
Total Repair Time:Less than 15 mins
6 of 12 people
found this instruction helpful.
Was this instruction helpful to you?
Thank you for voting!
Broken center crisper rail
Total time 10 minutes. 9 minutes to clear out the food and 1 minute to install the part. Installation was self evident and could have been done blindfolded. Part just snapped in.
Parts Used:
-
Allan from Tucson, AZ
-
Difficulty Level:Very Easy
-
Total Repair Time:Less than 15 mins
3 of 3 people
found this instruction helpful.
Was this instruction helpful to you?
Thank you for voting!