















JVM2052DN2WW General Electric Microwave - Instructions
Keep searches simple. Use keywords, e.g. "leaking", "pump", "broken" or "fit".
Timer, light and control pad worked. Turn table and heat did not work. Oven would not start up.
I first read where someone had the same problem. Their solution was a burned-out fuse. I ordered a new fuse...installed it and that did not solve my problem. I revisted PartSelect and read how Marla (from Arlington, TX)solved her problem. I purchased a secondary switch and when it arrived, I made a copy of Marla's instructions and followed them to the letter. I installed the new secondary switch into the secondary space, put everything back together and the oven STILL DID NOT WORK. I had to take the latching panel apart again and test each switch to see if there was another bad one. I found that the third switch was burned out. So I took the new switch out of the second slot and installed it into the third slot. I tested the switches before reinstalling the latching panel. This time everything worked. So I put everything back together, reinstalled the microwave on the wall, tested it again, and everything worked perfectly.
Parts Used:

-
Pearlie from Beulaville, NC
-
Difficulty Level:A Bit Difficult
-
Total Repair Time:30 - 60 mins
-
Tools:Screw drivers
1 person
found this instruction helpful.
Was this instruction helpful to you?
Thank you for voting!
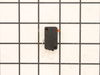
M/W would not start. control panel OK
unplugged power
removed main black cover.
located part WB24X10047 and replaced
removed main black cover.
located part WB24X10047 and replaced
Parts Used:
-
Jeffrey from FULSHEAR, TX
-
Difficulty Level:A Bit Difficult
-
Total Repair Time:30 - 60 mins
-
Tools:Pliers, Screw drivers
1 person
found this instruction helpful.
Was this instruction helpful to you?
Thank you for voting!
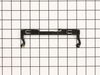
Cracked plastic where the spring attaches
A 2 yr old could do this snap out. Snap in less then. 30 seconds . What a shame and rip off on appliance repair shops - I called to do this rediculsley 40 second job and the wantvv$125.00!9t more. Omg. I’m a senior/ no wonder God punished the world wit Covid 19! Too many nasty infair. Buii I needed and rip offs.
Parts Used:
-
Samuel from LAS VEGAS, NV
-
Difficulty Level:Very Easy
-
Total Repair Time:Less than 15 mins
2 of 4 people
found this instruction helpful.
Was this instruction helpful to you?
Thank you for voting!
Food wouldn't heat up
Googled problem, removed diode, checked with meter and it was open, ordered new diode, checked new diode and it read open, installed. Any way, it didn't work. Went and bought new microwave!!
Parts Used:

-
Ira from LIVINGSTON, LA
-
Difficulty Level:Easy
-
Total Repair Time:30 - 60 mins
-
Tools:Screw drivers
1 person
found this instruction helpful.
Was this instruction helpful to you?
Thank you for voting!
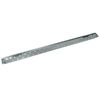
installed new kitchen cabinets
the problem was the mounting bracket that was installed when the house was built ,was not the bracket that came with the microwave. It was used to step the microwave out 3" in front of the other cabinets for the style that they were using then. so when I was installing the new cabinets I didn't want that style, so I ordered the original mounting bracket. It was a perfect fit and the install went great
Parts Used:
-
andrew from HOMOSASSA, FL
-
Difficulty Level:Easy
-
Total Repair Time:15 - 30 mins
1 of 2 people
found this instruction helpful.
Was this instruction helpful to you?
Thank you for voting!
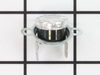
To heat a cup of coffee, user entered "10:00" instead of "1:00". Mess! After cleanup, microwave ran, but would not heat. While running, it made 2 or 3 time the noise volume as before.
I went for the cheap things first. Ohmmeter showed one of the thermostats in the magnetron compartment was open. I ordered and replaced all three thermostats. Still no heat. I took the unit off the wall (aaarrgh!) and checked the oven cavity thermal cutout. It said 7 ohms. I tested by shorting the wires together, but still no heat. So, I ordered the magnetron and diode cable. When replacing the diode cable (be sure to discharge the big cap!) either I broke it, or it was already damaged. It came off in two pieces. The new diode cable was re-enforced with thick heat shrink tubing, to prevent such breaking. You need a very short screwdriver to replace the magnetron. Now, all fixed! ~$150. A new one lists for $2000, installed in the overhead. My wife thinks I am a genius.
Parts Used:
-
G. Wayne from GARDNERVILLE, NV
-
Difficulty Level:Easy
-
Total Repair Time:1- 2 hours
-
Tools:Pliers, Screw drivers
1 of 2 people
found this instruction helpful.
Was this instruction helpful to you?
Thank you for voting!
No heat.
-
Mack from Jacksonville, FL
-
Difficulty Level:Really Easy
-
Total Repair Time:Less than 15 mins
-
Tools:Pliers, Screw drivers
0 of 1 people
found this instruction helpful.
Was this instruction helpful to you?
Thank you for voting!
No heat
-
Edwin from New York, NY
-
Difficulty Level:Really Easy
-
Total Repair Time:15 - 30 mins
-
Tools:Screw drivers
0 of 1 people
found this instruction helpful.
Was this instruction helpful to you?
Thank you for voting!
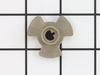
Broken turntable coupler
-
Donald from Sioux Falls, SD
-
Difficulty Level:Really Easy
-
Total Repair Time:Less than 15 mins
3 of 15 people
found this instruction helpful.
Was this instruction helpful to you?
Thank you for voting!
Powered Off completely
After reading reviews that there was no power what so ever and a fuse replacement will solve the problem, I tried it. Replacing the fuse is very easy (and I am not handy at all). All you have to do is remove the microwave cover from the top by removing two screws, slide the cover to the left and pulling the cover off. Then remove the grill in front of you, by removing one or two screws. The fuse is in front of you, use pliers and be firm but gentle. Replacing the fuse is easy but it did not solve my problem.
Parts Used:
-
Mohammad from Piscataway, NJ
-
Difficulty Level:Easy
-
Total Repair Time:Less than 15 mins
-
Tools:Screw drivers
Was this instruction helpful to you?
Thank you for voting!
All power to the microwave went out.
PartSelect had helpful repair instructions on-line which made the repair easier and faster. Unfortunately, there were other problems with the oven that immediately blew the new fuse I had just installed. It was then determined that additional repair would most likely cost almost as much as a new microwave.
Parts Used:
-
Michael from East China Township, MI
-
Difficulty Level:Easy
-
Total Repair Time:Less than 15 mins
-
Tools:Screw drivers
Was this instruction helpful to you?
Thank you for voting!
Quit working
-
William from Socorro, NM
-
Difficulty Level:Really Easy
-
Total Repair Time:Less than 15 mins
-
Tools:Pliers, Screw drivers
Was this instruction helpful to you?
Thank you for voting!
Dirty charcoal filter
-
Janet from Fairview, TX
-
Difficulty Level:Really Easy
-
Total Repair Time:Less than 15 mins
-
Tools:Screw drivers
Was this instruction helpful to you?
Thank you for voting!
Turntable not turning
The hard part I thought, was to find the part I needed. Not so with Part Select. It took less than a minute to find and order. The new part showed up in a few days. I noticed the new part was a little differant in a good way. The socket porition was a little deeper making it a little better. The microwave works great now.
Parts Used:
-
Richard from San Carlos, CA
-
Difficulty Level:Really Easy
-
Total Repair Time:Less than 15 mins
Was this instruction helpful to you?
Thank you for voting!
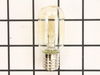
lights were burned
It was REALLY EASY finding the right parts using your diagrams..Thanks for your HELP!!I will definitely be back.Dan H
Parts Used:
-
Danny from Louisville, KY
-
Difficulty Level:Really Easy
-
Total Repair Time:Less than 15 mins
-
Tools:Screw drivers
Was this instruction helpful to you?
Thank you for voting!