















JVM1653WH06 General Electric Microwave - Instructions
Keep searches simple. Use keywords, e.g. "leaking", "pump", "broken" or "fit".
grease filter missing - taken by previous owner
-
Pamela from Indio, CA
-
Difficulty Level:Really Easy
-
Total Repair Time:Less than 15 mins
12 of 16 people
found this instruction helpful.
Was this instruction helpful to you?
Thank you for voting!
No cooking Power
Had to remove outer cover (special screws involved). Found the correct part at PartSelect.Com and it arrived 3 days later as promissed.
This oven has diffcult electrical connections at switch to get disconnected. I found it easier with the sw loose and in hand so that the connectors can be released with a small screwdriver.
One has to this in order to test the part wirh an ohm meter. I found the sw did not close but remained open and thus caused the oven not to function.
Removing interconnect switch is tricky but not difficult.
Outer cover replacement is not as easy as it should be, especially the sides.
All is well and working.
Microwaves are simple devices if you are know how to read and understand schemetic diagrams.
This oven has diffcult electrical connections at switch to get disconnected. I found it easier with the sw loose and in hand so that the connectors can be released with a small screwdriver.
One has to this in order to test the part wirh an ohm meter. I found the sw did not close but remained open and thus caused the oven not to function.
Removing interconnect switch is tricky but not difficult.
Outer cover replacement is not as easy as it should be, especially the sides.
All is well and working.
Microwaves are simple devices if you are know how to read and understand schemetic diagrams.
Parts Used:
-
Norbert from Minnetonka, MN
-
Difficulty Level:A Bit Difficult
-
Total Repair Time:15 - 30 mins
-
Tools:Pliers, Screw drivers
12 of 19 people
found this instruction helpful.
Was this instruction helpful to you?
Thank you for voting!
Microwave does not have power at all, though outlet has power
unplugged power cable / unhooked front vent / unscrew the monitor panel / slide up to dislodge / take the fuse out and put in the new one in / fuse is located right in front of monitor panel once its open might be covered by wirings / you can unpin the cables from the panel to make it easier for you just make sure to put it back properly or you can have somebody hold the panel for you. Installing the fuse is easy waiting for the parts is crazy......
Parts Used:

-
Ronie from BRIARWOOD, NY
-
Difficulty Level:Really Easy
-
Total Repair Time:Less than 15 mins
-
Tools:Screw drivers
8 of 9 people
found this instruction helpful.
Was this instruction helpful to you?
Thank you for voting!
Blown fuse in microwave
One small Phillips screwdriver and one fuse puller (I used cord). Unplug unit. Remove the two screws on the vent face plate. Remove the one screw on the panel assembly. Gently let hang. Pull the fuse located on the upper left wall. Replace fuse. Reassemble.
Parts Used:
-
Frank from VIPER, KY
-
Difficulty Level:Very Easy
-
Total Repair Time:15 - 30 mins
-
Tools:Screw drivers
8 of 9 people
found this instruction helpful.
Was this instruction helpful to you?
Thank you for voting!
microwave would not heat
First remove all screws holding on outer metal casing of microwave. Next remove the back and bottom metal pieces. You will then be able to pull aside the outer casing so you can access the door switches. Check each switch with an ohm meter in both the open position and with the switch closed. If the ohm meter reads the same in both the open and closed position, the switch is bad. Check the top switch first. Replace switch and reassemble. Cheap fix for a costly microwave. Great customer service at Parts Select!
Parts Used:
-
John from Erie, PA
-
Difficulty Level:Easy
-
Total Repair Time:30 - 60 mins
-
Tools:Screw drivers
14 of 29 people
found this instruction helpful.
Was this instruction helpful to you?
Thank you for voting!
Oven wouldn't sensor reheat & error code on display
I looked at the exploded pic on your web site to find the location of the sensor. Next I removed the cover by unscrewing 15 screws then swaped the sensor and re assembled! Works great! Fixing it my self I saved at least 150$ and did not have to wait all day for a repair man who probaly would not have the part on the first visit.
Parts Used:
-
Chris from Springfield, VA
-
Difficulty Level:Easy
-
Total Repair Time:15 - 30 mins
-
Tools:Screw drivers
8 of 11 people
found this instruction helpful.
Was this instruction helpful to you?
Thank you for voting!
Door frame was cracked.
Followed instructions already on site. Somewhat difficult to remove inner trim ring. Need to be careful not to break this trim and also with positioning of glass.
Parts Used:
-
William from Odenton, MD
-
Difficulty Level:A Bit Difficult
-
Total Repair Time:15 - 30 mins
-
Tools:Screw drivers
7 of 9 people
found this instruction helpful.
Was this instruction helpful to you?
Thank you for voting!
Microwave not heating.
Followed the instructions on your website and a YouTube video. The diode was at a 90 degree angle which made it a little trickier. Unfortunately the repair did not resolve the problem. I ended up buying a new microwave for temporary use for less than ordering any more parts. We are pleased with your website, instructions, ease of installation though!
Parts Used:

-
Seven from MOUNT AIRY, MD
-
Difficulty Level:Easy
-
Total Repair Time:15 - 30 mins
-
Tools:Screw drivers
6 of 7 people
found this instruction helpful.
Was this instruction helpful to you?
Thank you for voting!
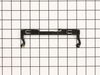
Door latch broke where it hooks to spring.
Just pulled off the cover, removed the old latch, re-connected the spring...put it all back togeather. Everything just snapps back in. The entire repair took about two minutes. Very easy.
Parts Used:
-
Robert from Colorado Springs, CO
-
Difficulty Level:Really Easy
-
Total Repair Time:Less than 15 mins
-
Tools:Screw drivers
9 of 16 people
found this instruction helpful.
Was this instruction helpful to you?
Thank you for voting!
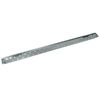
I needed to acquire and install a mounting plate for an over the range microwave
I attached the mounting plate to the wall as directed in the installation instructions which I had downloaded from GE. This procedure took 45 minutes to complete. I was then able to mount the microwave.
Parts Used:
-
Roy from Lakewood, CO
-
Difficulty Level:Really Easy
-
Total Repair Time:30 - 60 mins
-
Tools:Screw drivers
9 of 17 people
found this instruction helpful.
Was this instruction helpful to you?
Thank you for voting!
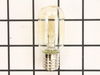
Interior lamp burned out
Unscrewed the vent at top of microwave exposing small access to bulb. The access to this was very limited so that was the major issue in changing the bulb. You needed small hands to do the job.
Parts Used:
-
Patricia from Tarpon Springs, FL
-
Difficulty Level:A Bit Difficult
-
Total Repair Time:Less than 15 mins
-
Tools:Screw drivers
11 of 23 people
found this instruction helpful.
Was this instruction helpful to you?
Thank you for voting!
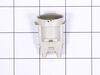
Bulbs were burnt out tried to remove them and the bulb broke from the socket
Moved the stove from underneath the microwave. Took the microwave down and turned it over. this need not be done. took the screws out to remove the bottom panel. there is a quick disconnect that need to be opened up. used pliers to remove the bad sockets and installed new one, used pliers to seat them. put bottom panel on, hooked up the quick connect. put the screws in and tightened them. installed bulbs and hooked up the electric and turned the lights on, they worked. installed the microwave, slid the stove back in place.
Parts Used:
-
William from Vero Beach, FL
-
Difficulty Level:Easy
-
Total Repair Time:30 - 60 mins
-
Tools:Pliers, Screw drivers
7 of 12 people
found this instruction helpful.
Was this instruction helpful to you?
Thank you for voting!
Broken glass turntable
I was surprised to find that the turntable for my 10 year old GE Profile microwave/convection oven was not readily available at my local GE retailer. I ordered the part from this website hoping that my order would be filled. I received an immediate response from customer service and the part was on my front doorstep in under 1 week! I would order from this website again!
Parts Used:

-
Mary from SPRING, TX
-
Difficulty Level:Very Easy
-
Total Repair Time:Less than 15 mins
4 of 4 people
found this instruction helpful.
Was this instruction helpful to you?
Thank you for voting!
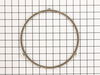
Wheels would not stay on old ring
Removed turn table,removed old ring,put new one in its place, Put turntable back in and ready to go.
Parts Used:
-
Kenneth from Smithton, IL
-
Difficulty Level:Really Easy
-
Total Repair Time:Less than 15 mins
5 of 7 people
found this instruction helpful.
Was this instruction helpful to you?
Thank you for voting!
Broken glass turntable in microwave
-
Linda sklar from JAMAICA PLAIN, MA
-
Difficulty Level:Very Easy
-
Total Repair Time:30 - 60 mins
4 of 4 people
found this instruction helpful.
Was this instruction helpful to you?
Thank you for voting!