















JVM1350WWC01 General Electric Microwave - Instructions
Keep searches simple. Use keywords, e.g. "leaking", "pump", "broken" or "fit".
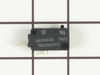
Microwave would turn on when door opened
Unscrewed numerous screws holding the "body/shell" to the microwave. Removed body. I then unplugged top door switch, replaced it with new one, and "tested" the new one. I fixed our $400 convection micro with an $18 switch. NICE!
Parts Used:
-
Lois from El Segundo, CA
-
Difficulty Level:Easy
-
Total Repair Time:15 - 30 mins
-
Tools:Screw drivers
5 of 8 people
found this instruction helpful.
Was this instruction helpful to you?
Thank you for voting!
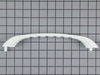
Door Handle Broke
Pry out plastic flange on inside of door...exposing to two screws (top of handle/bottom of handle) that attached plastic handle to oven door.
Removed the two screws and discarded broken handle..
Placed new handle on outside of door and replaced the two screws that secure handle to door.
Snapped inside flange cover in place...
Repair completed...
15 minutes...
Removed the two screws and discarded broken handle..
Placed new handle on outside of door and replaced the two screws that secure handle to door.
Snapped inside flange cover in place...
Repair completed...
15 minutes...
Parts Used:
-
Janie from Ruskin, FL
-
Difficulty Level:Easy
-
Total Repair Time:15 - 30 mins
-
Tools:Screw drivers
3 of 3 people
found this instruction helpful.
Was this instruction helpful to you?
Thank you for voting!
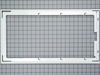
The old door frame had a total break at the lower right corner.
First I removed the inner snap seal to expose the lower screw to the handle. Once the handle was removed the outer frame came off. I then installed the new frame and the handle and replaced the inner snap seal. Nothing to it.
Parts Used:
-
Frank from Sarasota, FL
-
Difficulty Level:Really Easy
-
Total Repair Time:15 - 30 mins
-
Tools:Screw drivers
3 of 3 people
found this instruction helpful.
Was this instruction helpful to you?
Thank you for voting!
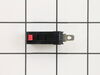
Microwave wouldn’t shut off when door was opened
Followed the online videos to enter the cavity to the switch holder. Noticed right away the dreaded capacitor was in back right corner behind where the touch pad had been removed. I isolated the capacitor with an old computer mouse pad for extra safety. Took some manipulations to get the switch mount out from behind the wire bundles. Once out front, easy to use small flat blade screwdriver to release each switch and replace with matching new switch. Only one switch was bad but replaced all three. Back together and working great.
Parts Used:
-
John from POWHATAN, VA
-
Difficulty Level:Easy
-
Total Repair Time:30 - 60 mins
3 of 3 people
found this instruction helpful.
Was this instruction helpful to you?
Thank you for voting!
When door opened, microwave would turn on
Removed the outer cover to access the door switches. Turns out there were three switches, but I determined that only two were bad. When the small colored tab on the switch is pushed in it should make a clicking sound. The two bad switches had no resistance and did not make any noise when pressed. Removing the switch is relatively easy, you simply pull it away from a couple small tabs holding them in place. After reconnecting the wire leads, insert back into the holding tabs and install the cover.
Parts Used:
-
Tom from SUN PRAIRIE, WI
-
Difficulty Level:Easy
-
Total Repair Time:30 - 60 mins
-
Tools:Pliers, Screw drivers
3 of 3 people
found this instruction helpful.
Was this instruction helpful to you?
Thank you for voting!
Smelling and smoking. Than stop.
I took the cabinet off and saw where the switch had been burnt. So I remove it and order another one from your company. And I put new clips on it with heat shrinks. We might get another 30 years out it, Although I'm 80 years old.
Parts Used:
-
CHARLES B. from CLARKSVILLE, TN
-
Difficulty Level:Really Easy
-
Total Repair Time:30 - 60 mins
-
Tools:Pliers, Screw drivers
3 of 3 people
found this instruction helpful.
Was this instruction helpful to you?
Thank you for voting!
Light bulb burned out and assembly broke when trying to replace bulb
I used the internet and your directions to complete the repair. It was easy!
Parts Used:
-
Jeanne from Kirkwood, MO
-
Difficulty Level:Really Easy
-
Total Repair Time:Less than 15 mins
-
Tools:Screw drivers
4 of 6 people
found this instruction helpful.
Was this instruction helpful to you?
Thank you for voting!
Microwave Handle snapped!
Imagine the surprise on my daughter's face when she went to open the microwave and the handle broke in half! I called multiple places locally, and ten days was the soonest I could find the part. I went online and ordered from PartSelect....three days later we were back in business. Good job, guys! And I installed it myself! A single mom from Texas
Parts Used:
-
Judith from Pflugerville, TX
-
Difficulty Level:Really Easy
-
Total Repair Time:Less than 15 mins
-
Tools:Screw drivers
4 of 6 people
found this instruction helpful.
Was this instruction helpful to you?
Thank you for voting!
bulb fused to jolder
removed electrical wires, unscrewed holder, inserted holder, attached wires, added bulb, and put cover back on.
Parts Used:
-
James from Big Rock, IL
-
Difficulty Level:Really Easy
-
Total Repair Time:Less than 15 mins
-
Tools:Screw drivers
4 of 6 people
found this instruction helpful.
Was this instruction helpful to you?
Thank you for voting!
replace broken door handle
removed visble screw. Then lifted the inside door rim around the glass to reveal the hidden screw. Removed that screw and replaced broken handle with new handle and screwed it in place. Replace part of rim that was lifted to reveal the hidden screw.
Parts Used:
-
Leslie from Darien, CT
-
Difficulty Level:Easy
-
Total Repair Time:Less than 15 mins
-
Tools:Screw drivers
3 of 3 people
found this instruction helpful.
Was this instruction helpful to you?
Thank you for voting!
Lost screws for the covers on the lights over the cook-top
Placed the screws in the proper areas, used the screw driver to tighten down and I was in business with light to spare. I am happy to have found the proper screws.
Thank you.
Thank you.
Parts Used:
-
Geraldine from Clearwater, FL
-
Difficulty Level:Really Easy
-
Total Repair Time:Less than 15 mins
-
Tools:Screw drivers
3 of 4 people
found this instruction helpful.
Was this instruction helpful to you?
Thank you for voting!
Unit would run when door is opened
Two screws to remove upper from vent. Two screws to remove the didgit panel lift ip to remove and put aside remove the two screws that hold the door sensors. Depress the tab to remove the defective sensor disconnect the electrical connector and replace the new sensor snap it back into the holder install the two screws, install the didgital panel and vent panel to complete the job. Please be aware that there is a video of this procedure on Y tube
Parts Used:
-
Ernest from RIVERSIDE, CA
-
Difficulty Level:Very Easy
-
Total Repair Time:Less than 15 mins
-
Tools:Screw drivers
3 of 4 people
found this instruction helpful.
Was this instruction helpful to you?
Thank you for voting!
Lens Was Not Sized To Fit And Was Left Extremely Sharp
Had to take to a local glass shop for sizing and to remove sharp edges. Will never order again.
Parts Used:
-
robert from salmon, ID
-
Difficulty Level:Easy
-
Total Repair Time:15 - 30 mins
-
Tools:Screw drivers
3 of 4 people
found this instruction helpful.
Was this instruction helpful to you?
Thank you for voting!
Remove old light sockets and replace in Microwave over stove
Have a microwave that the light and sockets just broke in pieces so I ordered two sockets from this site . The fit perfectly and it was a breeze to install. Took out 7 screws and the plate dropped down, hooked up the little wire which was so simple and bingo I had lite again. I just wished the hold plate came down but it didn't but it was still very easy to install. Will continue to get my appliance parts from this company.
Parts Used:
-
Cathy from LINCOLN, CA
-
Difficulty Level:Very Easy
-
Total Repair Time:Less than 15 mins
-
Tools:Screw drivers
2 of 2 people
found this instruction helpful.
Was this instruction helpful to you?
Thank you for voting!
no lights on microwave
ordered 2 new sockets and bulbs easy replacement great service from this site
Parts Used:
-
james from CHESTERFIELD, VA
-
Difficulty Level:Very Easy
-
Total Repair Time:Less than 15 mins
-
Tools:Screw drivers
2 of 2 people
found this instruction helpful.
Was this instruction helpful to you?
Thank you for voting!