















JSS27G4J4 General Electric Range - Instructions
Keep searches simple. Use keywords, e.g. "leaking", "pump", "broken" or "fit".
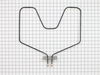
Bake element developed a hot spot that burned through it.
Easily removed two screws, pulled the wires out of the oven wall, disconnected the old and reconnected the new, pushed it back into the insulation, inserted the screws and tightened them. There was a problem with the model number. It was on a vinyl plate inside the oven drawer wall. The plate was slightly yellowed so I used my finger to wipe the yellow away. When I did, the model number ended up as a black smudge on my finger tip. GE's engineers could have come up with a better method of displaying the model number. GE's customer service operator, however, did an excellent job of helping me to ascertain, at least, some of the number.
Parts Used:
-
Paul from Slatington, PA
-
Difficulty Level:Really Easy
-
Total Repair Time:15 - 30 mins
-
Tools:Nutdriver
1 person
found this instruction helpful.
Was this instruction helpful to you?
Thank you for voting!
boken element
remove screws attaching burner plate to back of oven, pull out element, undo wiring to old burner by unscrewing 2 screws, remove old burner, reverse process to put new burner in
Parts Used:
-
cynthia from snyder, NY
-
Difficulty Level:Really Easy
-
Total Repair Time:15 - 30 mins
-
Tools:Wrench set
1 person
found this instruction helpful.
Was this instruction helpful to you?
Thank you for voting!
Element at the bottom of oven cracked
First I turned off the circuit breaker leading to the oven. Then I removed the two screws that held the old element in place. I pulled out the element and disconnected the wires. I reconnected the wires to the new element and pushed it back in place. I then secured it with the two screws. I turned the circuit breaker back on and turned on the oven. Works just great!!!
Parts Used:
-
AMELDA from BRYANS ROAD, MD
-
Difficulty Level:Really Easy
-
Total Repair Time:15 - 30 mins
-
Tools:Pliers
1 person
found this instruction helpful.
Was this instruction helpful to you?
Thank you for voting!
Bake element burnt out
Firs I shut the power off to the range. Then I removed the bottom oven rack, then removed the two screws holding the element in place. I pulled the element out about 3 inches to pull the connecting wires off. However, when I pulled the element towards me a lost on of the connecting wires that attached to the element. I then had to pull the range away from the wall and remove the back cover panel.I then fed the new element into the wholes from the inside of the range and having the back panel removed gave me full access for reconnecting the element wires. I put the back cover panel into place , put the bottom oven rack in and that was it. I was done with the repair. I turned the power back on and everything worked fine. I would recommend removing the back cover panel prior to trying to remove the element. This will save you some time and give you full access to the wiring before attempting to remove the bake element.
Parts Used:
-
David from West Union, AL
-
Difficulty Level:Easy
-
Total Repair Time:15 - 30 mins
-
Tools:Nutdriver
1 person
found this instruction helpful.
Was this instruction helpful to you?
Thank you for voting!
No heat from bake element
Ordered part, took old bake element out, installed new bake element. It was real easy.
Parts Used:
-
Roberta from Southampton, NJ
-
Difficulty Level:Really Easy
-
Total Repair Time:Less than 15 mins
-
Tools:Socket set
1 person
found this instruction helpful.
Was this instruction helpful to you?
Thank you for voting!
No heat on bake.
The first thing I did wrong was order the wrong part. Then later I did find the Model number on the side of the bottom drawer. I reordered the right part and turned off the electrical breaker. Removed the old element. I then installed the element in the oven with 2 screw nuts and pulled out the stove, took off the back panel and slipped the wire nuts onto the element. Very simple. I am really thankful there is a place to order the part and it came the next day after I ordered it. WHOW!
Parts Used:
-
Marian from Inglis, FL
-
Difficulty Level:Really Easy
-
Total Repair Time:Less than 15 mins
-
Tools:Nutdriver
1 person
found this instruction helpful.
Was this instruction helpful to you?
Thank you for voting!
After being invited to my mom's house for supper, the oven lower baking element had shorted out and self destructed.
After supper, without biscuits, I removed the element by simply removing 4 screws with my nut driver. We went home and I immediately went online to your web site, inserted the old element part number, followed the ordering instructions, and in 3 dayd the new element had been delivered to our door. Several days later we were invited to mom's for dinner once again. I quickly installed the new element (perfect fit and works great) and enjoyed a great supper........with biscuits this time. Thank you.
Parts Used:
-
Arthur from Dallas, PA
-
Difficulty Level:Really Easy
-
Total Repair Time:Less than 15 mins
-
Tools:Nutdriver
1 person
found this instruction helpful.
Was this instruction helpful to you?
Thank you for voting!
Bake element burned out
I removed the oven door and racks. After turning off the power I raised the old element up to be able to access the screws. I undid the two that connected the element to the back of the oven. After pulling the element forward, I undid the two screws that supplied power. I reconnected everything and, after turning the power back on, tested the element. It worked perfectly. It has been used quite extensively since then with no problems.
Parts Used:
-
Mark from North Richland Hills, TX
-
Difficulty Level:Really Easy
-
Total Repair Time:Less than 15 mins
-
Tools:Nutdriver
1 person
found this instruction helpful.
Was this instruction helpful to you?
Thank you for voting!
Took forever to preheat
When I told my husband I ordered the part and was going to fix it myself, he laughed and said I might not have ordered the right part for the problem and I should just buy a new stove.
The part was delivered the day before Christmas, just 3 days after I placed the order! I had read the stories of others fixing theirs and gave it a shot. It took me longer to find the tools then it did to replace the element!
I took the screws out , pulled the element toward me and disconnected the wires. Put it back the way I found it. Oven heated up in less then 5 minutes!
The part was delivered the day before Christmas, just 3 days after I placed the order! I had read the stories of others fixing theirs and gave it a shot. It took me longer to find the tools then it did to replace the element!
I took the screws out , pulled the element toward me and disconnected the wires. Put it back the way I found it. Oven heated up in less then 5 minutes!
Parts Used:
-
Terri from Edgewater, FL
-
Difficulty Level:Really Easy
-
Total Repair Time:Less than 15 mins
-
Tools:Screw drivers, Socket set
1 person
found this instruction helpful.
Was this instruction helpful to you?
Thank you for voting!
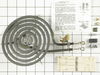
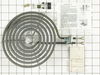
tabs soldered on end of coils (2) into which wire connectors are fitted are oversize
file/grind inner corners to fit into ceramic blocks correctly
Parts Used:
-
william from BOWIE, MD
-
Difficulty Level:A Bit Difficult
-
Total Repair Time:30 - 60 mins
-
Tools:Nutdriver
1 person
found this instruction helpful.
Was this instruction helpful to you?
Thank you for voting!
bake element burned out
took cover off back of stove. Removed two screws and wires that were attached to the element. Removed old element and installed new element. An easy repair.
Parts Used:
-
Dave from Maryville, OH
-
Difficulty Level:Easy
-
Total Repair Time:15 - 30 mins
-
Tools:Nutdriver, Screw drivers
1 person
found this instruction helpful.
Was this instruction helpful to you?
Thank you for voting!
All burners on stove needed to be replaced due to age
Followed instruction that came in the new parts. Each element took about 10 minutes to remove, inspect the wires, clean the connections and reconnect the new elements. The element covers that came with the kit were easy to install, and everything fit just fine. Most important thing is to turn of the electrical power to the unit BEFORE you start.
Parts Used:
-
ROY from CULPEPER, VA
-
Difficulty Level:Easy
-
Total Repair Time:30 - 60 mins
-
Tools:Nutdriver, Pliers, Screw drivers
2 of 4 people
found this instruction helpful.
Was this instruction helpful to you?
Thank you for voting!
Heating Unit had seperated from my coils.
A friend had stopped by and insisted on replacing the heating element on my 32 year old range. It took him all of 45 minutes to replace it, and now it works like a charm.
Parts Used:
-
Rosemary from New Port Richey, FL
-
Difficulty Level:Easy
-
Total Repair Time:30 - 60 mins
-
Tools:Screw drivers, Socket set
1 person
found this instruction helpful.
Was this instruction helpful to you?
Thank you for voting!
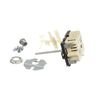
Halogen element staying on
removed the end caps from the stove panel, unscrewed the back, unscrewed the old switch, CAREFULLY noting which wire went to which terminal, removed the wires.
Reversed the process. took a little longer because I felt compelled to do a thorough cleaning while I was there.
Reversed the process. took a little longer because I felt compelled to do a thorough cleaning while I was there.
Parts Used:
-
Arthur from Indian Harbour Beach, FL
-
Difficulty Level:Easy
-
Total Repair Time:30 - 60 mins
-
Tools:Pliers, Screw drivers
2 of 4 people
found this instruction helpful.
Was this instruction helpful to you?
Thank you for voting!
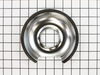
Broiler and Baking elements replacement
Unplug range from its 220V source. Make sure range is not hot from recent usage. You’ll need a #2 Philips driver, preferably one with 14-18 inch length. The old screws will likely be very stubborn about coming loose. Two of them hold bottom element in. Remove the back panel so access to the two connectors on the bottom element are easily removable. Be very careful not to the let the wire connectors from the heating element drop down into the insulation. For the top element, there are four screws holding it in place, I found it was easier to access these two screws leaning the range backward at a slight angle. Take special care again not to let the wires drop down into the insulation. The connectors to the old element will likely need some extra effort to remove. The reconnection to the new elements should be ok. Make sure all screws go back in that were removed. The new elements will be amazing, and baking and broiling will be like new again.
Parts Used:
-
Joseph from Buford, GA
-
Difficulty Level:A Bit Difficult
-
Total Repair Time:1- 2 hours
-
Tools:Pliers, Screw drivers
1 person
found this instruction helpful.
Was this instruction helpful to you?
Thank you for voting!