















JSS27G4J2 General Electric Range - Instructions
Keep searches simple. Use keywords, e.g. "leaking", "pump", "broken" or "fit".
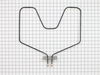
bake element burned out
took cover off back of stove. Removed two screws and wires that were attached to the element. Removed old element and installed new element. An easy repair.
Parts Used:
-
Dave from Maryville, OH
-
Difficulty Level:Easy
-
Total Repair Time:15 - 30 mins
-
Tools:Nutdriver, Screw drivers
1 person
found this instruction helpful.
Was this instruction helpful to you?
Thank you for voting!
One burner was not level and the otherone I burned out tea kettle on it and when I pulled the kettle off the burner it was also not level not to mention part of the kettle was burned onto the burner.
I didn't turn the power off which was risky and dangerous, however it was very easy just removing one screw a couple of wires and installing the new one. VERY EASY!
Parts Used:
-
Jenean from San Jose, CA
-
Difficulty Level:Really Easy
-
Total Repair Time:15 - 30 mins
-
Tools:Screw drivers
2 of 4 people
found this instruction helpful.
Was this instruction helpful to you?
Thank you for voting!
Old Reliable
This range is about 30 years old and I was thrilled to still be able to get the bake element, which burned out about a month ago. I was doing research to buy a new stove when a cousin, from out of town, called to say they were going to visit the following week. No time now to get a new one installed. "partselect.com" was the fastest way. THANK YOU!
First off, I want you to know I'm an obese 56-year female without tools. But, I knew where to borrow those.
I first shut the power off to the range. I then disconnected the 2 screws that hold the element and pulled it out to reveal the 2 screws which connected the wires. I unscrewed those and removed the bake element. I double checked the stove model and bake element part # at the GE website and ordered it from "Partselect.com". It came in about 3 days. I then reversed the order of the above and it was done.
Here are some challenges I encountered..
1) The oven door was in the way making it uncomfortabe to get to the back of the stove.
2) Those $#%& screws are so short I kept dropping them.
3) The wires in the back bend easily. Be careful.
That's about it. It was a pill but not a real problem. It sure beat buying a new range before I've decided on which one to buy.
First off, I want you to know I'm an obese 56-year female without tools. But, I knew where to borrow those.
I first shut the power off to the range. I then disconnected the 2 screws that hold the element and pulled it out to reveal the 2 screws which connected the wires. I unscrewed those and removed the bake element. I double checked the stove model and bake element part # at the GE website and ordered it from "Partselect.com". It came in about 3 days. I then reversed the order of the above and it was done.
Here are some challenges I encountered..
1) The oven door was in the way making it uncomfortabe to get to the back of the stove.
2) Those $#%& screws are so short I kept dropping them.
3) The wires in the back bend easily. Be careful.
That's about it. It was a pill but not a real problem. It sure beat buying a new range before I've decided on which one to buy.
Parts Used:
-
Laura from Crofton, MD
-
Difficulty Level:A Bit Difficult
-
Total Repair Time:15 - 30 mins
-
Tools:Wrench set
1 person
found this instruction helpful.
Was this instruction helpful to you?
Thank you for voting!
Bake element developed a hot spot that burned through it.
Easily removed two screws, pulled the wires out of the oven wall, disconnected the old and reconnected the new, pushed it back into the insulation, inserted the screws and tightened them. There was a problem with the model number. It was on a vinyl plate inside the oven drawer wall. The plate was slightly yellowed so I used my finger to wipe the yellow away. When I did, the model number ended up as a black smudge on my finger tip. GE's engineers could have come up with a better method of displaying the model number. GE's customer service operator, however, did an excellent job of helping me to ascertain, at least, some of the number.
Parts Used:
-
Paul from Slatington, PA
-
Difficulty Level:Really Easy
-
Total Repair Time:15 - 30 mins
-
Tools:Nutdriver
1 person
found this instruction helpful.
Was this instruction helpful to you?
Thank you for voting!
The oven heating element was broken
I removed the 2 screws and the 2 wires from the broken heating element. I removed the broken oven heating element. Then I attached the 2 wires to the new heating element and put the 2 screws in to attach the new heating element into the oven. The new oven heating element worked just fine and I was done.
Parts Used:
-
Daniel from Denver, CO
-
Difficulty Level:Really Easy
-
Total Repair Time:15 - 30 mins
-
Tools:Pliers
1 person
found this instruction helpful.
Was this instruction helpful to you?
Thank you for voting!
bake element no heat
-
larry from buckhannon, WV
-
Difficulty Level:Really Easy
-
Total Repair Time:15 - 30 mins
-
Tools:Nutdriver, Pliers
1 person
found this instruction helpful.
Was this instruction helpful to you?
Thank you for voting!
Element was cut
Removed two screws and take Element out and put new one in.It is very easy to do.
Parts Used:
-
Rosaire from St. Agatha,, ME
-
Difficulty Level:Really Easy
-
Total Repair Time:Less than 15 mins
-
Tools:Nutdriver
1 person
found this instruction helpful.
Was this instruction helpful to you?
Thank you for voting!
Heating Element Was No Longer Working.
Removed oven door by holding sides and pulling upward. It's easy to remove and replace. Removed shelves by sliding back and up, then out. Removed two hex nuts with socket wrench. They are on back wall of oven and secure element to that wall. I then pulled element out about 3 inches and disconnected the two leads.
I put new element in, reconnected two leads, replace two hex nuts and was done.
Turn off power to stove at circuit breaker before starting.
I put new element in, reconnected two leads, replace two hex nuts and was done.
Turn off power to stove at circuit breaker before starting.
Parts Used:
-
Karen from Stuart, FL
-
Difficulty Level:Really Easy
-
Total Repair Time:Less than 15 mins
-
Tools:Screw drivers, Socket set
1 person
found this instruction helpful.
Was this instruction helpful to you?
Thank you for voting!
Bake element burnt out
Firs I shut the power off to the range. Then I removed the bottom oven rack, then removed the two screws holding the element in place. I pulled the element out about 3 inches to pull the connecting wires off. However, when I pulled the element towards me a lost on of the connecting wires that attached to the element. I then had to pull the range away from the wall and remove the back cover panel.I then fed the new element into the wholes from the inside of the range and having the back panel removed gave me full access for reconnecting the element wires. I put the back cover panel into place , put the bottom oven rack in and that was it. I was done with the repair. I turned the power back on and everything worked fine. I would recommend removing the back cover panel prior to trying to remove the element. This will save you some time and give you full access to the wiring before attempting to remove the bake element.
Parts Used:
-
David from West Union, AL
-
Difficulty Level:Easy
-
Total Repair Time:15 - 30 mins
-
Tools:Nutdriver
1 person
found this instruction helpful.
Was this instruction helpful to you?
Thank you for voting!
Lower (bake) element burned out
Two 1/4" srews to remove the element from its mount, two 1/4" screws to remove wires and then the reverse to install new unit. Delivery was super fast and the price was half the price of the local dealers. I will certainly be a repeat customer.
Gary T.
Gary T.
Parts Used:
-
gary from Broken Arrow, OK
-
Difficulty Level:Really Easy
-
Total Repair Time:Less than 15 mins
-
Tools:Nutdriver
1 person
found this instruction helpful.
Was this instruction helpful to you?
Thank you for voting!
boken element
remove screws attaching burner plate to back of oven, pull out element, undo wiring to old burner by unscrewing 2 screws, remove old burner, reverse process to put new burner in
Parts Used:
-
cynthia from snyder, NY
-
Difficulty Level:Really Easy
-
Total Repair Time:15 - 30 mins
-
Tools:Wrench set
1 person
found this instruction helpful.
Was this instruction helpful to you?
Thank you for voting!
Element at the bottom of oven cracked
First I turned off the circuit breaker leading to the oven. Then I removed the two screws that held the old element in place. I pulled out the element and disconnected the wires. I reconnected the wires to the new element and pushed it back in place. I then secured it with the two screws. I turned the circuit breaker back on and turned on the oven. Works just great!!!
Parts Used:
-
AMELDA from BRYANS ROAD, MD
-
Difficulty Level:Really Easy
-
Total Repair Time:15 - 30 mins
-
Tools:Pliers
1 person
found this instruction helpful.
Was this instruction helpful to you?
Thank you for voting!
No heat on bake.
The first thing I did wrong was order the wrong part. Then later I did find the Model number on the side of the bottom drawer. I reordered the right part and turned off the electrical breaker. Removed the old element. I then installed the element in the oven with 2 screw nuts and pulled out the stove, took off the back panel and slipped the wire nuts onto the element. Very simple. I am really thankful there is a place to order the part and it came the next day after I ordered it. WHOW!
Parts Used:
-
Marian from Inglis, FL
-
Difficulty Level:Really Easy
-
Total Repair Time:Less than 15 mins
-
Tools:Nutdriver
1 person
found this instruction helpful.
Was this instruction helpful to you?
Thank you for voting!
Took forever to preheat
When I told my husband I ordered the part and was going to fix it myself, he laughed and said I might not have ordered the right part for the problem and I should just buy a new stove.
The part was delivered the day before Christmas, just 3 days after I placed the order! I had read the stories of others fixing theirs and gave it a shot. It took me longer to find the tools then it did to replace the element!
I took the screws out , pulled the element toward me and disconnected the wires. Put it back the way I found it. Oven heated up in less then 5 minutes!
The part was delivered the day before Christmas, just 3 days after I placed the order! I had read the stories of others fixing theirs and gave it a shot. It took me longer to find the tools then it did to replace the element!
I took the screws out , pulled the element toward me and disconnected the wires. Put it back the way I found it. Oven heated up in less then 5 minutes!
Parts Used:
-
Terri from Edgewater, FL
-
Difficulty Level:Really Easy
-
Total Repair Time:Less than 15 mins
-
Tools:Screw drivers, Socket set
1 person
found this instruction helpful.
Was this instruction helpful to you?
Thank you for voting!
After being invited to my mom's house for supper, the oven lower baking element had shorted out and self destructed.
After supper, without biscuits, I removed the element by simply removing 4 screws with my nut driver. We went home and I immediately went online to your web site, inserted the old element part number, followed the ordering instructions, and in 3 dayd the new element had been delivered to our door. Several days later we were invited to mom's for dinner once again. I quickly installed the new element (perfect fit and works great) and enjoyed a great supper........with biscuits this time. Thank you.
Parts Used:
-
Arthur from Dallas, PA
-
Difficulty Level:Really Easy
-
Total Repair Time:Less than 15 mins
-
Tools:Nutdriver
1 person
found this instruction helpful.
Was this instruction helpful to you?
Thank you for voting!