















JSS26BW2BB General Electric Range - Instructions
Keep searches simple. Use keywords, e.g. "leaking", "pump", "broken" or "fit".
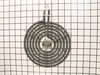
melted electric range element
Because of the superb pics and descriptions on the Part Select site, I was able (with NO range model number) to order the correct range element for beloved son's stove. He plugged it in in 3 seconds, works great !
Parts Used:
-
Carole from Cleveland, OH
-
Difficulty Level:Really Easy
-
Total Repair Time:Less than 15 mins
3 of 5 people
found this instruction helpful.
Was this instruction helpful to you?
Thank you for voting!
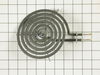
old unit failing to heat all coils
I first removed the unit by pulling gently from connection. Replaced the new one in that same manner - simply inserting into connection.
Very easy, I'll probably try it again soon.
Very easy, I'll probably try it again soon.
Parts Used:
-
Emma from The VIllags, FL
-
Difficulty Level:Really Easy
-
Total Repair Time:Less than 15 mins
2 of 2 people
found this instruction helpful.
Was this instruction helpful to you?
Thank you for voting!
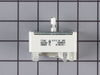
Burner control was erratic. Sometimes it worked, sometimes it didn't.
First pull knob off switch. You may need a small screwdriver to gently start it. I then removed two screws, one in each end of control panel. Then rolled the panel up and out, as it is kind of hinged in the back. Removed two screws from switch front,layed it to the side and installed new switch. Removed wires (there were 5) one at a time with needle nose pliers, and placed on new switch. Replaced panel screws and was finished. Easy fix, quick delivery of part, I have used Partselect in the past and will continue.
Parts Used:
-
Charles from Clarksville, OH
-
Difficulty Level:Really Easy
-
Total Repair Time:Less than 15 mins
-
Tools:Pliers, Screw drivers
2 of 3 people
found this instruction helpful.
Was this instruction helpful to you?
Thank you for voting!
Melted plastic colander on a burner
I simply replaced the element. HOWEVER, the most wonderful parts of this repair...Because of the pictures and closeups and descriptions I knew exactly 'what' to order! And I had the replacement in less than 24 hours. I can do some home repairs but this company provided such detailed information AND speed of delivery...that this was a no-fuss fix. I'll definitely stop by to buy, again. Thanks!
Parts Used:
-
Paula from Dyersburg, TN
-
Difficulty Level:Really Easy
-
Total Repair Time:Less than 15 mins
2 of 3 people
found this instruction helpful.
Was this instruction helpful to you?
Thank you for voting!
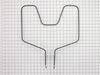
oven stopped heating and element appeared broken
The customer service rep was brilliant in finding the
right part number! It was sent the following day
(with email to let me know) The part itself was just
exactly like the old one. I simply turned off the power,
removed the 2 metal screws and unplugged the
broken element. The new one fit properly and works
like a million dollars. For about $50, you made me
look like a hero in my own house! Thjank you
right part number! It was sent the following day
(with email to let me know) The part itself was just
exactly like the old one. I simply turned off the power,
removed the 2 metal screws and unplugged the
broken element. The new one fit properly and works
like a million dollars. For about $50, you made me
look like a hero in my own house! Thjank you
Parts Used:
-
Henry J from South Haven, MI
-
Difficulty Level:Really Easy
-
Total Repair Time:15 - 30 mins
-
Tools:Socket set
2 of 3 people
found this instruction helpful.
Was this instruction helpful to you?
Thank you for voting!
children used it for a chin bar and broke the handle and the piece that holds the handle on
We had to buy washers and screws to hold the handle on.
Then all we did was undo the screws that were on the side of the door. place handle on door screw the new screws and washers that we had to buy and replace the side screws and it was fixed.
The only problem that I found was that the handle kit did not come with screws or some kind of attachment to hold the handle on the door. We had to buy extras at the hardware store for that.
Then all we did was undo the screws that were on the side of the door. place handle on door screw the new screws and washers that we had to buy and replace the side screws and it was fixed.
The only problem that I found was that the handle kit did not come with screws or some kind of attachment to hold the handle on the door. We had to buy extras at the hardware store for that.
Parts Used:
-
Joyce from Houston, TX
-
Difficulty Level:Really Easy
-
Total Repair Time:Less than 15 mins
-
Tools:Screw drivers
2 of 3 people
found this instruction helpful.
Was this instruction helpful to you?
Thank you for voting!
Oven door glass broke
First, I cleaned all the glass from the stove. then I inserted the replacement glass into the slots and screwed the bolts back into the stove. It took me about 1o minutes to do repair. It waS VERY EASY..
Parts Used:
-
BEVERLY from PHENIX CITY, AL
-
Difficulty Level:Really Easy
-
Total Repair Time:Less than 15 mins
-
Tools:Nutdriver, Screw drivers
2 of 3 people
found this instruction helpful.
Was this instruction helpful to you?
Thank you for voting!
Old Burner Chrome Ruined
-
RALPH from TROY, NY
-
Difficulty Level:Really Easy
-
Total Repair Time:Less than 15 mins
3 of 6 people
found this instruction helpful.
Was this instruction helpful to you?
Thank you for voting!
bake element burnt into
-
gary from assumption, IL
-
Difficulty Level:Easy
-
Total Repair Time:15 - 30 mins
-
Tools:Nutdriver
2 of 3 people
found this instruction helpful.
Was this instruction helpful to you?
Thank you for voting!
Inner glass of slide in range was cracked needed replaced
Removed door from Oven.
removed screws from several components comprising the door and separated pieces.
Removed broken glass.
Prior to putting back together I took advantage of the convenience and used oven cleaner to clean inner portion of door. Installed new glass.
Reassembled door.
removed screws from several components comprising the door and separated pieces.
Removed broken glass.
Prior to putting back together I took advantage of the convenience and used oven cleaner to clean inner portion of door. Installed new glass.
Reassembled door.
Parts Used:

-
Thomas from Westerville, OH
-
Difficulty Level:Easy
-
Total Repair Time:30 - 60 mins
-
Tools:Screw drivers
2 of 3 people
found this instruction helpful.
Was this instruction helpful to you?
Thank you for voting!
one of the burners was not working, the terminal block that the burner pluges into was burnt
I followed the instructions given to me in the package and all went well. I cut the old wires off the burnt terminal block, stripped the wires, installed the wire nuts with the shrink rap, installed the new terminal block and burner. The new burner is working great! Thanks
Parts Used:
-
Robert from Woolwich Twp., NJ
-
Difficulty Level:Really Easy
-
Total Repair Time:15 - 30 mins
-
Tools:Screw drivers
2 of 3 people
found this instruction helpful.
Was this instruction helpful to you?
Thank you for voting!
No heat lower bake unit / Broiler unit heats ok
Safety first: Turn range circuit breaker to off position. Turn a surface unit [burner] to the on position ,if no light exists power has been removed. Turn surface unit to off position. To remove bake unit. With a 1/4 socket driver remove two self tapping screws and gently pull out on the bake unit until you can access the slide on terninals. Careful lenth of wire is limited. Remove slide on terminals two each [2] . Install new bake unit in reverse order . Restore power
Parts Used:
-
Richard L. from Clear Spring, MD
-
Difficulty Level:Easy
-
Total Repair Time:30 - 60 mins
-
Tools:Nutdriver, Pliers
1 person
found this instruction helpful.
Was this instruction helpful to you?
Thank you for voting!
element broke
Fast shipping, Very easy to install I am a senior and had no problems works Great!!
Parts Used:
-
Art from FRESNO, CA
-
Difficulty Level:Very Easy
-
Total Repair Time:15 - 30 mins
-
Tools:Screw drivers
1 person
found this instruction helpful.
Was this instruction helpful to you?
Thank you for voting!
burner was not heating
-
lucille from HAPPY CAMP, CA
-
Difficulty Level:Very Easy
-
Total Repair Time:15 - 30 mins
-
Tools:Screw drivers
1 person
found this instruction helpful.
Was this instruction helpful to you?
Thank you for voting!
The element on our three year old stove stopped working...this was the bottom bake element.
It was surprisingly simple. All I had to do was shut the breaker off to the stove(safety first). Next open the oven door and use a flashlight just to help you see,and unscrew the two screws holding the element in place on the back stove wall. Next slide the stove away from the was to give yourself enough room to access the back of it(you may need to unplug it to get it out far enough. My model had a cover over the back that took six easy to remove screws. Once the back cover was off I could easily see where the element was plugged into, so i removed the wires from the end of the element(just female terminals slipped over the end) i then went back to the front of the stove and pulled to element out.
To install the new one...just guide the two ends throgh the back of the stove...install the two screws to hold it in place...go to back of stove..plug in wires(they were diff sizes so you couldnt mess it up) and put the cover back on..plug in oven..slide it back..and try it out...its that simple
To install the new one...just guide the two ends throgh the back of the stove...install the two screws to hold it in place...go to back of stove..plug in wires(they were diff sizes so you couldnt mess it up) and put the cover back on..plug in oven..slide it back..and try it out...its that simple
Parts Used:
-
shawn from port richey, FL
-
Difficulty Level:Really Easy
-
Total Repair Time:Less than 15 mins
-
Tools:Screw drivers
2 of 4 people
found this instruction helpful.
Was this instruction helpful to you?
Thank you for voting!