















JRP03006 General Electric Range - Instructions
Keep searches simple. Use keywords, e.g. "leaking", "pump", "broken" or "fit".
original heating element broke in 2
Unscrewed the broken element from the back of the inside of the oven, then unscrewed the connected wires from the element and did the reverse with the new element. Viola.
Before touching anything, however, I made sure the oven was in the off position and also went to the house circuit breaker box and flipped OFF the appropriate circuit breaker(s). There were two - one for the element and another for the rest of the controls.
When everything was in place, I turned the power back on and turned on the oven and was cooking again. We had Prime Rib for Easter.
Before touching anything, however, I made sure the oven was in the off position and also went to the house circuit breaker box and flipped OFF the appropriate circuit breaker(s). There were two - one for the element and another for the rest of the controls.
When everything was in place, I turned the power back on and turned on the oven and was cooking again. We had Prime Rib for Easter.
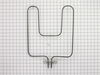
Parts Used:
-
Bill from Westfield, NJ
-
Difficulty Level:Easy
-
Total Repair Time:15 - 30 mins
-
Tools:Nutdriver, Screw drivers
0 of 1 people
found this instruction helpful.
Was this instruction helpful to you?
Thank you for voting!
Broiler Element burned out.
The replacement was straightforward, six screws. Instructions were provided with the part along with the necessary screws to fit the new element terminals.
Open the breaker, verify power is off, remove the old burner. Install the new burner and mounting bracket. Restore power and test. In and out in less then thirty minutes.
Open the breaker, verify power is off, remove the old burner. Install the new burner and mounting bracket. Restore power and test. In and out in less then thirty minutes.
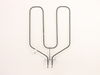
Parts Used:
-
George from Lecanto,, FL
-
Difficulty Level:Really Easy
-
Total Repair Time:15 - 30 mins
-
Tools:Nutdriver, Screw drivers
0 of 1 people
found this instruction helpful.
Was this instruction helpful to you?
Thank you for voting!
The baking element was old & sparks were coming from it..
I (a woman) unplugged the stove, took out the screws, and unhooked the baking element. I then replaced the old screws with the newer ones, and made sure everything was nice and tight. I was a little nervous at first but everything turned out okay. I plugged the stove back up & the baking element was a bright orange and it works better than ever. The whole process took about 15-20 minutes.
Parts Used:
-
Kelley from Cleveland, OH
-
Difficulty Level:Easy
-
Total Repair Time:15 - 30 mins
-
Tools:Screw drivers
0 of 1 people
found this instruction helpful.
Was this instruction helpful to you?
Thank you for voting!
Burned heating element (no continuity)
-
John from Baldwin, NY
-
Difficulty Level:Really Easy
-
Total Repair Time:Less than 15 mins
-
Tools:Screw drivers
0 of 1 people
found this instruction helpful.
Was this instruction helpful to you?
Thank you for voting!
240 Volt Bake Element Failed In Upper Oven
Turned the main breaker off and locked it out. Removed the original element using a 1/4" nut driver. Installed the new element using a Philips screwdriver. Turned the power on. Tha'ts it. Easy!
Parts Used:
-
Charles from Meridian, MS
-
Difficulty Level:Really Easy
-
Total Repair Time:Less than 15 mins
-
Tools:Nutdriver, Screw drivers
0 of 1 people
found this instruction helpful.
Was this instruction helpful to you?
Thank you for voting!
My 20+ year old bake element cracked
I turned off the power at the breaker for the oven. I had to use a small wrench to get off the two screws keeping the bake element in the oven.
I pulled it out a bit and exposed where the element screws into the power.
To prevent the wires from receding back into the wall after I unscrewed them, I taped them to the inside of the oven.
After removing the old element, I just installed the new one the same way. Screwed it into the power, and tightened the panel to the back of the oven.
Reset the breaker, and you're good to go.
Took 10 mins tops. It is pretty cramped in there and you need a good flashlight to see what you're doing.
I pulled it out a bit and exposed where the element screws into the power.
To prevent the wires from receding back into the wall after I unscrewed them, I taped them to the inside of the oven.
After removing the old element, I just installed the new one the same way. Screwed it into the power, and tightened the panel to the back of the oven.
Reset the breaker, and you're good to go.
Took 10 mins tops. It is pretty cramped in there and you need a good flashlight to see what you're doing.
Parts Used:
-
Michael from Silver Spring, MD
-
Difficulty Level:Really Easy
-
Total Repair Time:Less than 15 mins
-
Tools:Screw drivers, Wrench set
0 of 1 people
found this instruction helpful.
Was this instruction helpful to you?
Thank you for voting!
Replace baking element
Turned off power at breaker and removed old element and replaced new element.
Parts Used:
-
Eric from Roseville, CA
-
Difficulty Level:Easy
-
Total Repair Time:Less than 15 mins
-
Tools:Pliers
0 of 1 people
found this instruction helpful.
Was this instruction helpful to you?
Thank you for voting!
Heating element brned out.
Removed two screws to release the burner, then two screws to disconnect the wiring and replace them. Then inserted the burner int position and replaced the two screws which were removed to remove the burner.
Very easy, however you will need a flashlight to see by since the back of the oven is rather dark.
Very easy, however you will need a flashlight to see by since the back of the oven is rather dark.
Parts Used:
-
Ben from Mena, AR
-
Difficulty Level:Easy
-
Total Repair Time:Less than 15 mins
-
Tools:Screw drivers
0 of 1 people
found this instruction helpful.
Was this instruction helpful to you?
Thank you for voting!
Heating element broke in several places
Turned off the power source to the oven. I then removed the two screws that hold the element in place, then pulled the element out about 3 inches and disconnected the two wires at the back. The hardest part was getting the screws turned to connect the new wires at the back.
Parts Used:
-
Michelle from Pasadena, TX
-
Difficulty Level:Really Easy
-
Total Repair Time:Less than 15 mins
-
Tools:Screw drivers
0 of 1 people
found this instruction helpful.
Was this instruction helpful to you?
Thank you for voting!
Baking Element not working
Repair was easy! I asked my son to take out the old and put in the new! He did! The oven works like new again for less than $50.00!!! Thanks!
Parts Used:
-
Nancy from Marietta, GA
-
Difficulty Level:Really Easy
-
Total Repair Time:Less than 15 mins
0 of 1 people
found this instruction helpful.
Was this instruction helpful to you?
Thank you for voting!
The bottom heating element in the oven was not heating
First I shut off power to oven. Then I removed two screws from the back of the oven. Pulled elemeent out a couple of inches and diconnected from the power source. I removed the old unit and replaced it with the new one. Connected it to power source. Pushed element back into place and replaced the screws. Turn the power back on and turned on the oven. ....And there was HEAT!
Parts Used:
-
Felicia from Little Rock, AR
-
Difficulty Level:Really Easy
-
Total Repair Time:Less than 15 mins
-
Tools:Nutdriver
0 of 1 people
found this instruction helpful.
Was this instruction helpful to you?
Thank you for voting!
Bake element burned out.
I removed the two screws that hold the element in place; pulled the element out, disconnected the two wires held on by screws, replaced the element with a new one and reversed the procedure.
Parts Used:
-
James from Lewisville, TX
-
Difficulty Level:Really Easy
-
Total Repair Time:Less than 15 mins
-
Tools:Screw drivers
0 of 1 people
found this instruction helpful.
Was this instruction helpful to you?
Thank you for voting!
Beke Element broke into 3 pieces
-
Ron from Flower Mound, TX
-
Difficulty Level:Really Easy
-
Total Repair Time:Less than 15 mins
-
Tools:Nutdriver, Screw drivers
0 of 1 people
found this instruction helpful.
Was this instruction helpful to you?
Thank you for voting!
Old element burnt out.
No instructions provided, but not needed. Removed two screws holding element in place. Removed two screws connecting element to power wires. Installed new element using reverse process.
Parts Used:
-
Charles from Saint Louis, MO
-
Difficulty Level:Really Easy
-
Total Repair Time:Less than 15 mins
-
Tools:Nutdriver, Screw drivers
0 of 1 people
found this instruction helpful.
Was this instruction helpful to you?
Thank you for voting!
Coil element blew up breaking in three pieces.
I removed the plate held by 2 screws that holds the element, pulled the coil out and disconnected the yellow and red wires. Removed the broken one and connected the new one. Very simple. I also would like to add that you people are great to deal with and I will tell everyone to buy parts from PartSelect. Your service is outstanding and fast. Thank You.
Parts Used:
-
Dominick from Oceanside, CA
-
Difficulty Level:Really Easy
-
Total Repair Time:Less than 15 mins
-
Tools:Wrench set
0 of 1 people
found this instruction helpful.
Was this instruction helpful to you?
Thank you for voting!