















JP626BKB General Electric Range - Instructions
Keep searches simple. Use keywords, e.g. "leaking", "pump", "broken" or "fit".
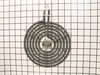
Large burner quit working
I pulled out the old burner - put the new one in and I was done. No tools required.
The first burner I received from PartSelect was warped. I called on Friday morning to see about returning it and ordering a new one. The CSR was very helpful and I was totally surprised to have the replacement arrive the very next day since I didn't ask for a Saturday delivery. I will definitely use PartSelect again.
The first burner I received from PartSelect was warped. I called on Friday morning to see about returning it and ordering a new one. The CSR was very helpful and I was totally surprised to have the replacement arrive the very next day since I didn't ask for a Saturday delivery. I will definitely use PartSelect again.
Parts Used:
-
JoAnn from Fort Worth, TX
-
Difficulty Level:Really Easy
-
Total Repair Time:Less than 15 mins
1 of 2 people
found this instruction helpful.
Was this instruction helpful to you?
Thank you for voting!
switch was weak.
Open top by reaching through a burner hole after the power has been disconnected at the fuse box. Take 4 1/4 screws out. take 2 phillips screws out of old switch. Take wires off one at a time placing them on the new switch. as an added precaution take a picture with your phone. Replace screws and lower top to working position. Replace knobs on stems and turn back on the power.
Parts Used:

-
Brent from HUNTER, OK
-
Difficulty Level:Very Easy
-
Total Repair Time:Less than 15 mins
-
Tools:Nutdriver, Screw drivers
1 of 2 people
found this instruction helpful.
Was this instruction helpful to you?
Thank you for voting!
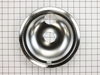
Drip bowls had deteriorated after years of use
Removed burners and existing drip bowls and installed new drip bowls and existing burners took approximately 15 minutes
Parts Used:
-
Stuart from UNION SPRINGS, NY
-
Difficulty Level:Very Easy
-
Total Repair Time:Less than 15 mins
1 of 2 people
found this instruction helpful.
Was this instruction helpful to you?
Thank you for voting!
Surface Element/burner had to be replaced
First, I removed the burner from the box and plastic bag. Second, I pushed the burner into the socket and that was it.
I also want to comment on how easy the ordering process was. I ljust love this website. All you have to do is type in the model number and up comes all of the parts associated with the appliance. My order shipped the next day and I had unit within 2 days. Also, the part cost $42.00 with shipping. My local parts place was $48.00, so I wound up saving $6.00 and did not have to leave my home to buy it. I will definetly use this site again.
I also want to comment on how easy the ordering process was. I ljust love this website. All you have to do is type in the model number and up comes all of the parts associated with the appliance. My order shipped the next day and I had unit within 2 days. Also, the part cost $42.00 with shipping. My local parts place was $48.00, so I wound up saving $6.00 and did not have to leave my home to buy it. I will definetly use this site again.
Parts Used:
-
Natalie from Harleysville, PA
-
Difficulty Level:Really Easy
-
Total Repair Time:Less than 15 mins
1 of 2 people
found this instruction helpful.
Was this instruction helpful to you?
Thank you for voting!
8" stove element stopped working
Everything was very easy: identifying the right part was very easy on the website, the part came quicker than I expected, and my wife replaced the stove element before I even got home from work. She just pulled the old one out like she would to clean the top of the stove, and put the new one back in. Have had several awesome cups of coffee since the replacement.
Parts Used:
-
Michael from Standish, ME
-
Difficulty Level:Really Easy
-
Total Repair Time:Less than 15 mins
1 of 2 people
found this instruction helpful.
Was this instruction helpful to you?
Thank you for voting!
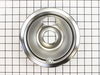
part replacement
-
charles from st marys, GA
-
Difficulty Level:Really Easy
-
Total Repair Time:Less than 15 mins
1 of 2 people
found this instruction helpful.
Was this instruction helpful to you?
Thank you for voting!
Burner Would Not Heat
Did it By Hand
Your Shipment Time Excellant
Order it Mon. Received it Wed.
Thank You
Your Shipment Time Excellant
Order it Mon. Received it Wed.
Thank You
Parts Used:
-
Robert from La Crosse, WI
-
Difficulty Level:Really Easy
-
Total Repair Time:Less than 15 mins
1 of 2 people
found this instruction helpful.
Was this instruction helpful to you?
Thank you for voting!
rusted drip bowls
I was very excited to get them in the mail but waited to install after a clean up but when I finally opened the box I found I only ordered 1 6 inch drip bowl. lol Now that I know they fit when I reorder I am ordering a who new set for later use.
Parts Used:
-
Caren from Choctaw, OK
-
Difficulty Level:Really Easy
-
Total Repair Time:Less than 15 mins
1 of 2 people
found this instruction helpful.
Was this instruction helpful to you?
Thank you for voting!
Burner not working.
I pulled the old burner out and slid the new one in it's place. Turned on the eye to make sure it worked. Felt heat in a few seconds and turned off.
Parts Used:
-
Scott from Dallas, GA
-
Difficulty Level:Really Easy
-
Total Repair Time:Less than 15 mins
0 of 1 people
found this instruction helpful.
Was this instruction helpful to you?
Thank you for voting!
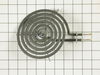
burned-out six inch electric stove- top burner
Removed the old and slipped in the new.No problem and it works fine.
Parts Used:
-
Harold from Gloversville, NY
-
Difficulty Level:Really Easy
-
Total Repair Time:Less than 15 mins
0 of 1 people
found this instruction helpful.
Was this instruction helpful to you?
Thank you for voting!
Electric stove 8" burner needed to be replaced
Installation took 30 seconds. Your website was easy to use & the part received was just as described. It arrived beautifully wrapped & in just a few days. ABSOLUTELY AWESOME!I will recommend your site to everyone.
Parts Used:
-
LISA from GLENDALE, CA
-
Difficulty Level:Really Easy
-
Total Repair Time:Less than 15 mins
0 of 1 people
found this instruction helpful.
Was this instruction helpful to you?
Thank you for voting!
Burner heating coil element would not get hot.
I pulled out the heating coil and pushed in the new coil. I turned the stove top on and heard a sound like "dzzzt". I immediately turned off the burner and waited for it to cool, then pulled it out. The part had a burn melt on one side of the end prong. It turns out that the part that the burner plugs into needs to be replaced. Actually, the stove top is over 20 years old and my landlord will have to replace the whole unit. So it turns out that I didn't need to order a surface element after all, but it was very easy to install!
Parts Used:
-
Jeannette from Haskell, NJ
-
Difficulty Level:Really Easy
-
Total Repair Time:Less than 15 mins
0 of 1 people
found this instruction helpful.
Was this instruction helpful to you?
Thank you for voting!
element broken at contact point
ordered new surface element and pushed in to conector turned on switch to test and works fine thanks
Parts Used:
-
MARLENE from EUGENE, OR
-
Difficulty Level:Really Easy
-
Total Repair Time:Less than 15 mins
0 of 1 people
found this instruction helpful.
Was this instruction helpful to you?
Thank you for voting!
Surface element didn't heat. Cracked.
I simply pulled out the old element. Plugged in
the replacement, which arrived very quickly, and
that was it. I couldn't believe that was all there
was to it. I really loved being able to order the
replacement part online. Intend to order more
replacement parts just to have my stovetop
looking like new again.
the replacement, which arrived very quickly, and
that was it. I couldn't believe that was all there
was to it. I really loved being able to order the
replacement part online. Intend to order more
replacement parts just to have my stovetop
looking like new again.
Parts Used:
-
Darlene from New Berlin, WI
-
Difficulty Level:Really Easy
-
Total Repair Time:Less than 15 mins
0 of 1 people
found this instruction helpful.
Was this instruction helpful to you?
Thank you for voting!
Needed new electric element
A breeze! Part was perfect replacement, snapped in place without tools, and heated almost immediately.
Parts Used:
-
Barbara from Richmond, VA
-
Difficulty Level:Really Easy
-
Total Repair Time:Less than 15 mins
0 of 1 people
found this instruction helpful.
Was this instruction helpful to you?
Thank you for voting!