















JCBS64WK2WW General Electric Range - Instructions
Keep searches simple. Use keywords, e.g. "leaking", "pump", "broken" or "fit".
oven racks very old and writing on knobs worn ff
-
Patricia from SAN JOSE, CA
-
Difficulty Level:Very Easy
-
Total Repair Time:Less than 15 mins
2 of 2 people
found this instruction helpful.
Was this instruction helpful to you?
Thank you for voting!
broiler unit went out
less then ten minutes, used a electric screw driver and in a snap, finished, I always buy my parts on line at parts select my stove is old but in good condition except parts give out sometimes and I just order part and keep on cooking.
Parts Used:

-
helen from PRINCETON, NC
-
Difficulty Level:Really Easy
-
Total Repair Time:Less than 15 mins
2 of 2 people
found this instruction helpful.
Was this instruction helpful to you?
Thank you for voting!
No Instructions
Lots of jiggling until I found the screws to remove. After finally getting the top off the base there was the Instructions on a pamphlet taped to the bottom. The key tho get the top off is to remove the face and remove the proper screws( they are identifiable)unplug the electric plug 2 screws on the back sides and poof it is free!
Parts Used:
-
Richard from FAYETTEVILLE, GA
-
Difficulty Level:Difficult
-
Total Repair Time:More than 2 hours
-
Tools:Nutdriver, Pliers, Wrench (Adjustable)
2 of 2 people
found this instruction helpful.
Was this instruction helpful to you?
Thank you for voting!
Rubber around the oven door cracked and fell down.
Ordered the part and put it on. My husband hasn't relized that i took care of it yet. One day he might remember to ask if we ever got the part. Very quick delivery.
Parts Used:
-
Pearl from MIDLAND, OH
-
Difficulty Level:Very Easy
-
Total Repair Time:Less than 15 mins
2 of 3 people
found this instruction helpful.
Was this instruction helpful to you?
Thank you for voting!
Heat element died
Very easy to replace. So easy even a man can do it.
Parts Used:
-
Andrea Hines from ELGIN, AZ
-
Difficulty Level:Very Easy
-
Total Repair Time:15 - 30 mins
-
Tools:Pliers, Screw drivers
2 of 3 people
found this instruction helpful.
Was this instruction helpful to you?
Thank you for voting!
lens snapped off on the inside-plug was left loose
popped out the remainder of old lens, then pushed in new ones and slipped on plugs.
Parts Used:
-
RICKEY from MONTROSE, NY
-
Difficulty Level:Easy
-
Total Repair Time:Less than 15 mins
-
Tools:Screw drivers
3 of 6 people
found this instruction helpful.
Was this instruction helpful to you?
Thank you for voting!
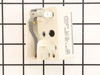
Burner spontaneously cycled without knob activation
First I cut the circuit at the breaker, and then pulled the range from wall to access the access panel. This top panel was held with 4 screws and removable with a standard phillips head screwdriver.
I then removed the 5 wire-crimped fasteners from the defective surface burner switch. (I first labeled these wires to ensure correct placement to the new switch). There were an additional two screws behind the corresponding knob that needed to be removed in order to completely remove the old switch.
The new switch was installed in reverse order to the steps indicated above (two screws behind knob, 5 wire-crimped fasteners, 4 screws to panel). Range was pushed back into position and breaker turned on.
I then removed the 5 wire-crimped fasteners from the defective surface burner switch. (I first labeled these wires to ensure correct placement to the new switch). There were an additional two screws behind the corresponding knob that needed to be removed in order to completely remove the old switch.
The new switch was installed in reverse order to the steps indicated above (two screws behind knob, 5 wire-crimped fasteners, 4 screws to panel). Range was pushed back into position and breaker turned on.
Parts Used:
-
Anil from Milpitas, CA
-
Difficulty Level:Easy
-
Total Repair Time:Less than 15 mins
-
Tools:Screw drivers
2 of 3 people
found this instruction helpful.
Was this instruction helpful to you?
Thank you for voting!
bottom trim had rusted out from water build-up
disassembled bottom trim on oven door.cleaned area of excess rust and installed trim piece.
Parts Used:
-
john from buford, GA
-
Difficulty Level:Really Easy
-
Total Repair Time:Less than 15 mins
-
Tools:Socket set
3 of 6 people
found this instruction helpful.
Was this instruction helpful to you?
Thank you for voting!
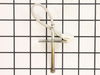
Not Reaching Temperature above 300 Degrees
Take off 6 screws of back cover of the range, unplug the white wire. Go to the inside of oven, pull out racks. At the top of the oven is your Broiler element, in the center you will see a rod sticking out with one screw holding it in place. Take out screw and pull temperature sensor out toward you. Reverse steps to put it back together.
Parts Used:
-
Ron from SAN TAN VLY, AZ
-
Difficulty Level:Very Easy
-
Total Repair Time:Less than 15 mins
-
Tools:Nutdriver
1 person
found this instruction helpful.
Was this instruction helpful to you?
Thank you for voting!
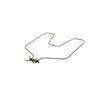
Oven would not heat up
I removed the rear lower cover. Disconnected the terminals from the heating element. Removed 2 screws from the heating element from inside the oven. Removed the heating element. Reinstalled everything in reverse order.
Parts Used:
-
MICHAEL from MORROW, GA
-
Difficulty Level:Really Easy
-
Total Repair Time:Less than 15 mins
-
Tools:Nutdriver
1 person
found this instruction helpful.
Was this instruction helpful to you?
Thank you for voting!
Element blew hole in self then no power to burner.
Replaced burned element, did not fix no power problem. Ordered receptor replacement, replaced it, took less than 10 mminutes, but still no power to burned. Then ordered replacement switch, replacement too less than 10 minutes again and burner works fine.
Parts Used:
-
Melvin from Portland, TN
-
Difficulty Level:Easy
-
Total Repair Time:Less than 15 mins
-
Tools:Screw drivers, Socket set
2 of 4 people
found this instruction helpful.
Was this instruction helpful to you?
Thank you for voting!
Burner burned out
Very easy. Unpluged range from outlet, took two screws from the front under side of the range top, raised cook top up, took off four wires from burner, removed two screws than holds burner on cook top, replaced with new burner, installed two screws that hold burner in place, installed the four wires to burner, lowered cook top back into place replaced two screws that hold cook top down, pluged back into outlet. DONE!
Parts Used:

-
Daniel from Norborne, MO
-
Difficulty Level:Really Easy
-
Total Repair Time:Less than 15 mins
-
Tools:Pliers, Screw drivers
1 person
found this instruction helpful.
Was this instruction helpful to you?
Thank you for voting!
would not heat
-
Mark from SARASOTA, FL
-
Difficulty Level:Really Easy
-
Total Repair Time:15 - 30 mins
-
Tools:Nutdriver, Pliers
1 person
found this instruction helpful.
Was this instruction helpful to you?
Thank you for voting!
Burned out
Remove two screws to loosen the ceramic top....prop top open and change part...the part was exactly the same...change wires from one to the other and transfer clamps.....1st grade craft class would have done it in half the time I did......you folks have your parts inventory and description application to a science.....God Bless
Parts Used:
-
Dean from Elkton, FL
-
Difficulty Level:Really Easy
-
Total Repair Time:15 - 30 mins
-
Tools:Screw drivers
1 person
found this instruction helpful.
Was this instruction helpful to you?
Thank you for voting!
The lower,BAKE, element had burned in half almost causing a fire.
Slide the rang out to access the 240V plug & unplugging it. Removed the sheetmetal cover from the rear of the range to access the slip on wire plugs to prevent damaging the insulation. The insulation would be damaged if pulling them through the opening in the oven wall with the plugs attached to the element. Removed the racks from the oven. Unscrewed the retaining screws holding the element to the rear wall of the oven, lifted damaged element out and reversed the process for instillation. Perfect opportunity to clean underneath and behind the range.
Parts Used:
-
Joseph from DIAMOND SPGS, CA
-
Difficulty Level:Very Easy
-
Total Repair Time:15 - 30 mins
-
Tools:Nutdriver, Pliers
1 person
found this instruction helpful.
Was this instruction helpful to you?
Thank you for voting!