















JCB840EF1ES General Electric Range - Instructions
Keep searches simple. Use keywords, e.g. "leaking", "pump", "broken" or "fit".
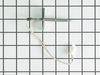
temperature sensor went
Took back panel off unplugged sensor and replugged in and worked like a charm!Sears wanted $400 and was going to 'overrepair"Got the 60 dollar part on here. UPS shipped to wrong address and customer service refunded my shipping and was excellent! would definetly use again!thanks
Parts Used:
-
Alex R from Randoff, NJ
-
Difficulty Level:Easy
-
Total Repair Time:Less than 15 mins
-
Tools:Nutdriver
1 person
found this instruction helpful.
Was this instruction helpful to you?
Thank you for voting!
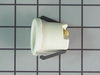
BASE OF BULB BROKE OFF & WELDED TO SOCKET
PULL RANGE OUT FROM WALL & ALSO REMOVED OVEN DOOR BY SLIDING UP. WORKING FROM INSIDE OVEN & ALSO BEHIND I REPLACED PART . ALWAYS " UNPLUG " RANGE BEFORE YOU START.
Parts Used:
-
NEIL from ROCKY POINT, NY
-
Difficulty Level:Easy
-
Total Repair Time:30 - 60 mins
-
Tools:Nutdriver, Pliers
1 person
found this instruction helpful.
Was this instruction helpful to you?
Thank you for voting!
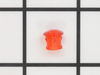
Hot burner light lens broke off.
Pull range away from back wall. Remove panel behind control knobs by removing the screws that hold it on. Find hot burner light that holds lens. Remove broken part of lens. Insert new lens into hole on front of control panel and into hot burner light receptacle. Replace back panel. Slide range back into place.
Parts Used:
-
Charles from NEKOOSA, WI
-
Difficulty Level:Easy
-
Total Repair Time:15 - 30 mins
-
Tools:Screw drivers
1 of 2 people
found this instruction helpful.
Was this instruction helpful to you?
Thank you for voting!
Change bulb

-
Louis from LEAGUE CITY, TX
-
Difficulty Level:Really Easy
-
Total Repair Time:30 - 60 mins
-
Tools:Nutdriver
3 of 8 people
found this instruction helpful.
Was this instruction helpful to you?
Thank you for voting!
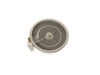
Heating element burned out
-
William from CONCORD, MA
-
Difficulty Level:Very Easy
-
Total Repair Time:30 - 60 mins
-
Tools:Pliers, Screw drivers
1 of 3 people
found this instruction helpful.
Was this instruction helpful to you?
Thank you for voting!
Water dumped over in in my overhead microwave, which dripped down on, & shorted out a burner switch.
My husband had already removed the back plate form the stove and detached the wires from the old burner switch because it was keeping the burner on. He unscrewed the old switch and removed it. He then popped in the new switch, attached the wires to the correct contacts, and put the back plate back on. We plugged in the stove, and that burner works good as new.
Parts Used:
-
Deanna from Buckeye, AZ
-
Difficulty Level:Really Easy
-
Total Repair Time:Less than 15 mins
-
Tools:Pliers, Screw drivers
1 of 3 people
found this instruction helpful.
Was this instruction helpful to you?
Thank you for voting!
light keep burning out in oven.
Remove the door. Just open a little and pull up. Removed racks. Removed 3 screws with nutdriver. Pulled out housing. Disconnected 2 wires. Assembled new housing with with bulb receptacle and gasket. Reconnected wires and crimped a little to make them snug. Pushed housing back into hole. Put 3 screws back in, inserted bulb and cover. Slid door back on and done. 30 minutes at most.
Parts Used:

-
john from Mc Kees Rocks, PA
-
Difficulty Level:Really Easy
-
Total Repair Time:30 - 60 mins
-
Tools:Nutdriver
2 of 8 people
found this instruction helpful.
Was this instruction helpful to you?
Thank you for voting!
Burner not heating.
Isolated to control switch.
Replaced
Replaced
Parts Used:
-
Jack from Greensboro, GA
-
Difficulty Level:Really Easy
-
Total Repair Time:30 - 60 mins
-
Tools:Screw drivers
1 of 5 people
found this instruction helpful.
Was this instruction helpful to you?
Thank you for voting!
eye wouldnt come on
removed the top section on stove and removed the wires off swtitch and put on new one then put new switch in
Parts Used:
-
daniel from valentines, VA
-
Difficulty Level:Really Easy
-
Total Repair Time:15 - 30 mins
-
Tools:Nutdriver
0 of 2 people
found this instruction helpful.
Was this instruction helpful to you?
Thank you for voting!
burner was inoperative
verified switch operation , checked continuity of burner element found open ordered new part and installed next day
after extremely fast
service from partselect thank you
after extremely fast
service from partselect thank you
Parts Used:
-
bryan from cocoa, FL
-
Difficulty Level:Really Easy
-
Total Repair Time:15 - 30 mins
-
Tools:Nutdriver, Pliers, Screw drivers
0 of 2 people
found this instruction helpful.
Was this instruction helpful to you?
Thank you for voting!
Replacment of burner control switches
I watched your video on the subject and followed it exactly. It explained everything I needed to know. The hardest part was CLEANING under the stove once I pulled it out from the wall!
Parts Used:
-
Judith from Keezletown, VA
-
Difficulty Level:Really Easy
-
Total Repair Time:15 - 30 mins
-
Tools:Nutdriver, Pliers, Screw drivers
Was this instruction helpful to you?
Thank you for voting!
Convection fan came loose from shaft
Convection fan came loose from the shaft with a lout rattle and grinding as the fan spun down. Had to remove four metal screws to remove the fan cover. Initially tried to just put the nut back on to hold the fan. However, I could not get the nut to start, so I assumed that threads were stripped on the nut or the shaft. Ordered the replacement nut, hoping that it was the nut that was the problem. However, I had the same problem with the new nut. I could see no damage on the shaft. It finally occurred to me that the nut and shaft had left-hand threads (counter-clockwise to tighten). At that point, it was extremely easy to put the nut back on and tighten it. I did not try using the old nut, since I had already received the new one, but I'm certain that if I had come to that realization earlier, I could have saved time and money. So, if you have the same problem, try putting the nut on "backwards."
Parts Used:
-
Thomas from Albuquerque, NM
-
Difficulty Level:Easy
-
Total Repair Time:15 - 30 mins
-
Tools:Socket set
Was this instruction helpful to you?
Thank you for voting!
one burner not working
Removed two screws to access burner. Removed three power clips from burner, reattached the clips to new burner, removed brace clips and attach to new burner, close lid and reattach stove cover.
Parts Used:
-
Edwin from HIGHLANDS RANCH, CO
-
Difficulty Level:Really Easy
-
Total Repair Time:15 - 30 mins
-
Tools:Socket set
Was this instruction helpful to you?
Thank you for voting!
Oven light wire broken, damaged socket
Remove light bail, glass cover held by two nut screws. Pull socket, removed clips in back, replaced wire connectors, placed new socket in, then glass cover and bail. Wire connected in back, cover plate replaced.
Parts Used:
-
Patricia from Brandenburg, KY
-
Difficulty Level:Really Easy
-
Total Repair Time:Less than 15 mins
-
Tools:Nutdriver, Pliers
Was this instruction helpful to you?
Thank you for voting!
Oven Sensor Replacement
The part was just like the old one and would have been an easy fix except our range suffered from a lighting hit. The clips had melted together. Called a dealer and asked about a new wiring harness. He said in those cases just cut the clip off and hard wire with wire clips,or firecrackers. We used wire nuts and taped all together and the oven works just great. Nothing is ever as easy as it should be.
Parts Used:
-
Barbara from Edwardsville, IL
-
Difficulty Level:A Bit Difficult
-
Total Repair Time:30 - 60 mins
-
Tools:Nutdriver
Was this instruction helpful to you?
Thank you for voting!