















JBP78GS3 General Electric Range - Instructions
Keep searches simple. Use keywords, e.g. "leaking", "pump", "broken" or "fit".
no burnt wire
-
Bernard from N CHARLESTON, SC
-
Difficulty Level:Very Easy
-
Total Repair Time:Less than 15 mins
-
Tools:Screw drivers
5 of 8 people
found this instruction helpful.
Was this instruction helpful to you?
Thank you for voting!
Oven/ No Heat
Partselect made this job a breeze. Due to the user friendly process to order and receive the part. I repaired the stove after turning off the breaker in the main box. There were two screws that held the baking unit in place, removed them and then replaced with new unit.
Parts Used:
-
A K from LITHIA SPRINGS, GA
-
Difficulty Level:Really Easy
-
Total Repair Time:Less than 15 mins
-
Tools:Nutdriver, Screw drivers
3 of 3 people
found this instruction helpful.
Was this instruction helpful to you?
Thank you for voting!
Still need an other nut to keep broiler support inplcae. Support bar did not come with new screws so I must locate one new one.
I took out the old broiler support bar, but it was being held by one screw. I did install the new bar with one screw, but I need to obtain a second screw. I still have not located a second screw, but it is inplace.
Parts Used:
-
Donna from Sinking Spring, PA
-
Difficulty Level:Easy
-
Total Repair Time:Less than 15 mins
-
Tools:Screw drivers
6 of 12 people
found this instruction helpful.
Was this instruction helpful to you?
Thank you for voting!
The bottom strip had become rusty and looking badly
I pulled the oven door off the hinges and took the bolts out of the bottom of the over that were holding the strip on. I then pulled the strip off and replaced it with the new on. I replaced the bolts and then replaced the door on the hinges.
Parts Used:
-
Carolyn from North Port, FL
-
Difficulty Level:Easy
-
Total Repair Time:15 - 30 mins
-
Tools:Nutdriver
5 of 9 people
found this instruction helpful.
Was this instruction helpful to you?
Thank you for voting!
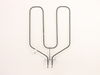
broil element burn into
turn off electricity to stove and simply remove the screws from the heating element and put new element back in place .put screws in and turn power back on and test.
Parts Used:
-
wayne from GARLAND, TX
-
Difficulty Level:Easy
-
Total Repair Time:30 - 60 mins
-
Tools:Nutdriver, Screw drivers
3 of 3 people
found this instruction helpful.
Was this instruction helpful to you?
Thank you for voting!
my door handle broke off.
My son repaired it. I ordered the parts thinking I could repair it but it was way beyond my ability.
Parts Used:
-
yvonne from CHESTERFIELD, VA
-
Difficulty Level:A Bit Difficult
-
Total Repair Time:1- 2 hours
-
Tools:Nutdriver, Screw drivers, Socket set
3 of 3 people
found this instruction helpful.
Was this instruction helpful to you?
Thank you for voting!
broiler element circuit broke
First removed oven door, according to Reader's Digest repair manual, then removed two screws holding element. Pulled element out several inches, then removed one side of bracket holding up front of element so that bad element could be pulled further out. Then disconnected two red wires from one side and two light blue wires from other side. Removed old Element. Attached two light blue wires to one side and two red wires to other pole, inserted element back into rear wall and attached with two screws, Re-attached bracket holding up front of element. Re-installed door. Tested and it worked fine.
Parts Used:
-
James from Lafayette, CO
-
Difficulty Level:Easy
-
Total Repair Time:30 - 60 mins
-
Tools:Nutdriver, Socket set
3 of 4 people
found this instruction helpful.
Was this instruction helpful to you?
Thank you for voting!
Oven door handle broke
Had to take back off of the door to get to screw that held the broken piece of handle before installing the new part. Then had to put the back on the door and slip the door into place.
Parts Used:
-
William from Bartlett, TN
-
Difficulty Level:Easy
-
Total Repair Time:15 - 30 mins
-
Tools:Pliers, Screw drivers
3 of 4 people
found this instruction helpful.
Was this instruction helpful to you?
Thank you for voting!
Bake element did not work
Got new part! Unplug range!!!
Remove oven door by opening and lifting up at the same time, set aside.
Remove two screws with a nutdriver or screwdriver.
Pull on element far enough to unhook wires and throw away old element and install the wires on the new element and reinstall!!
Remove oven door by opening and lifting up at the same time, set aside.
Remove two screws with a nutdriver or screwdriver.
Pull on element far enough to unhook wires and throw away old element and install the wires on the new element and reinstall!!
Parts Used:
-
Kenny from CALDWELL, ID
-
Difficulty Level:Really Easy
-
Total Repair Time:Less than 15 mins
-
Tools:Nutdriver, Screw drivers
3 of 4 people
found this instruction helpful.
Was this instruction helpful to you?
Thank you for voting!
lights blown out

-
Gerald from WINTERVILLE, GA
-
Difficulty Level:Very Easy
-
Total Repair Time:Less than 15 mins
6 of 14 people
found this instruction helpful.
Was this instruction helpful to you?
Thank you for voting!
Handle broke
Took off the inside ( this allowed me to clean the glass) panel. Removed the two end parts with a screw driver. Replace the parts and we were good to go.
Parts Used:
-
Dean from Harrisonburg, VA
-
Difficulty Level:Really Easy
-
Total Repair Time:15 - 30 mins
-
Tools:Screw drivers
2 of 2 people
found this instruction helpful.
Was this instruction helpful to you?
Thank you for voting!
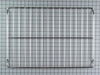
Bottom oven rack had been NUKED!
This is far to simple to even be a worthy story ,other than that the cause is a bit interesting. My wife had placed a plastic cutting board and some meat into the oven to get it away from my counter-cruising dog.
Later, without remembering the cutting board she turned the oven on to "broil." Hmmmm...
REPAIR:
Open oven door
Put in new rack
Close door
Later, without remembering the cutting board she turned the oven on to "broil." Hmmmm...
REPAIR:
Open oven door
Put in new rack
Close door
Parts Used:
-
Ronald from Thornton, CO
-
Difficulty Level:Really Easy
-
Total Repair Time:Less than 15 mins
3 of 5 people
found this instruction helpful.
Was this instruction helpful to you?
Thank you for voting!
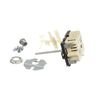
Burner wouldn't operate
Took Switch panel off range. Disconnected Infinite switch. Reinstalled infinite switch.. Replaced panel. Repair was very simple and self explainatory.
Knott County Housing Authority Maintenance Personnel
Knott County Housing Authority Maintenance Personnel
Parts Used:
-
Linda from Hindman, KY
-
Difficulty Level:Really Easy
-
Total Repair Time:15 - 30 mins
-
Tools:Nutdriver, Screw drivers
3 of 5 people
found this instruction helpful.
Was this instruction helpful to you?
Thank you for voting!
broke
just replace the end cap with a new one all that was involue was to screw the new one in took about ten minutes and job done better than buying a new stove when the stove is still just like new. thank you for your on line help.
Parts Used:
-
Barbara from Winston Salem, NC
-
Difficulty Level:Really Easy
-
Total Repair Time:15 - 30 mins
-
Tools:Screw drivers
2 of 2 people
found this instruction helpful.
Was this instruction helpful to you?
Thank you for voting!
the old screws were not correct so it took 1/2 hour for me to find screws that would. there should have been proper screws sent with the end cap.
I attached the end caps to my existing handle, but had to squeeze the parts together very hard to get them to mesh to the correct distance of the holes. I removed the screws holding outside frame of the oven door. I then opened the door fully, propping it up on my knee and removed the inside end cap screws. Placing the handle in position underneath the propped door, I attached the screws. Lastly I reassembled the door.
Parts Used:
-
anthony from Jacksonville, FL
-
Difficulty Level:A Bit Difficult
-
Total Repair Time:30 - 60 mins
-
Tools:Pliers, Screw drivers
2 of 2 people
found this instruction helpful.
Was this instruction helpful to you?
Thank you for voting!