















JBP26AY5 General Electric Range - Instructions
Keep searches simple. Use keywords, e.g. "leaking", "pump", "broken" or "fit".
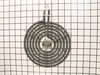
Electric stove 8" burner needed to be replaced
Installation took 30 seconds. Your website was easy to use & the part received was just as described. It arrived beautifully wrapped & in just a few days. ABSOLUTELY AWESOME!I will recommend your site to everyone.
Parts Used:
-
LISA from GLENDALE, CA
-
Difficulty Level:Really Easy
-
Total Repair Time:Less than 15 mins
0 of 1 people
found this instruction helpful.
Was this instruction helpful to you?
Thank you for voting!
Burner heating coil element would not get hot.
I pulled out the heating coil and pushed in the new coil. I turned the stove top on and heard a sound like "dzzzt". I immediately turned off the burner and waited for it to cool, then pulled it out. The part had a burn melt on one side of the end prong. It turns out that the part that the burner plugs into needs to be replaced. Actually, the stove top is over 20 years old and my landlord will have to replace the whole unit. So it turns out that I didn't need to order a surface element after all, but it was very easy to install!
Parts Used:
-
Jeannette from Haskell, NJ
-
Difficulty Level:Really Easy
-
Total Repair Time:Less than 15 mins
0 of 1 people
found this instruction helpful.
Was this instruction helpful to you?
Thank you for voting!
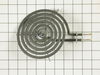
element broken at contact point
ordered new surface element and pushed in to conector turned on switch to test and works fine thanks
Parts Used:
-
MARLENE from EUGENE, OR
-
Difficulty Level:Really Easy
-
Total Repair Time:Less than 15 mins
0 of 1 people
found this instruction helpful.
Was this instruction helpful to you?
Thank you for voting!
Burner not working.
I pulled the old burner out and slid the new one in it's place. Turned on the eye to make sure it worked. Felt heat in a few seconds and turned off.
Parts Used:
-
Scott from Dallas, GA
-
Difficulty Level:Really Easy
-
Total Repair Time:Less than 15 mins
0 of 1 people
found this instruction helpful.
Was this instruction helpful to you?
Thank you for voting!
The burner stopped working
After checking at local appliance stores and unable to find the bunner I went online looking. I found this site and there it was. I ordered it, received it within two days, took the old one out and the new one in. As my granddaughter says, "easy peasy lemon squeeze". It took all of five seconds and I'm cooking again.
Parts Used:
-
Barbara from Chesapeake, VA
-
Difficulty Level:Really Easy
-
Total Repair Time:Less than 15 mins
0 of 2 people
found this instruction helpful.
Was this instruction helpful to you?
Thank you for voting!
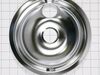
Existing drip pan was burned & beyond cleaning.
Unplugged the burner unit. Removed the existing drip pan. Installed new drip pan in place & re-plugged the burner unit.
Parts Used:
-
Janet from Frederick, MD
-
Difficulty Level:Really Easy
-
Total Repair Time:Less than 15 mins
0 of 2 people
found this instruction helpful.
Was this instruction helpful to you?
Thank you for voting!
Surface element burned out
Removed old burner, plugged in new burner. Turned on electric and everything worked fine. I was concerned that I would not be able to get the correct burner since my stove is approximately 30 years old and General Electric no longer stocks replacement parts. The new surface element was manufactured by General Electric and had the correct replacement number on the package. Thanks Part Select.
Parts Used:
-
Ann from San Antonio, TX
-
Difficulty Level:Really Easy
-
Total Repair Time:Less than 15 mins
0 of 2 people
found this instruction helpful.
Was this instruction helpful to you?
Thank you for voting!
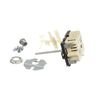
instructions could be better
it was hard to figure out the instructions from A switch to B switch to my switch. The first switch was no good the second one was good. prayer book didn't hurt.thank
Parts Used:
-
WILLARD from GLOVERSVILLE, NY
-
Difficulty Level:A Bit Difficult
-
Total Repair Time:30 - 60 mins
-
Tools:Pliers, Screw drivers
0 of 6 people
found this instruction helpful.
Was this instruction helpful to you?
Thank you for voting!
oven continued to get F2, F3 and F5 error messages when ovewn got hot
This repair was quite a bit more difficult then what had been described on the web site. First off, I have a double wall oven that is built in. Sliding it out of the cabinet was difficult and because oven was hard wired, I had to disconnect the actual wiring from the oven back. . Positioning the oven and allowing for it to rest on a support bench was the most difficult part The oven is heavy. Eventually, removing the back and top panels of the oven revealed the sensor connection. I was then able to feed it through the oven and reconnect all the wiring harnesses.. Getting the oven back in the cabinet was equally a challenge. But it did seem to fix the problem with over heating.
Parts Used:
-
Ralph from Redding, CA
-
Difficulty Level:Difficult
-
Total Repair Time:1- 2 hours
-
Tools:Nutdriver, Screw drivers, Socket set
Was this instruction helpful to you?
Thank you for voting!
R had ight front control made loud noise when contacts opened.
This is twin oven range with controls at side of upper oven. Control panel was fastened with screws at top and bottom. Range has built-in hood at top which had to be disassembled to reach top screw. Once had access to top screw, eaisly removed control panel and replaced control. New control had identical connections as old control so only had to install it, break shaft to correct length, and use proper shaft adapter for knob. Remounted control panel and range worked perfectly. This would have been a very quick job except for having to deal with the built-in range hood.
Parts Used:
-
James from Nashville, AR
-
Difficulty Level:A Bit Difficult
-
Total Repair Time:1- 2 hours
-
Tools:Nutdriver, Pliers, Screw drivers, Socket set, Wrench set
Was this instruction helpful to you?
Thank you for voting!
Shaft for burner control knob broke off
I flipped breaker off for electic and confirmed that power to the stove was off. I removed the 2 screws holding the control unit in place. Carefully removed all knobs and buttons and pryed the cover for the control unit off. I then removed old part, removed the wired and clipped wires to the new unit. Put cover back on - has some difficulty getting the panel back in place to line up the screws. But after a couple of attempts, was able to line up unit and put screws in place to secure. Replaced all knobs. Turn breaker back on and cooked lunch. Very easy job. Most difficult part was getting panel back in position. I would watch alignment more carefully before I removed in next time. Easy home repair for Women...not sure about my man?
Parts Used:
-
Carol from Hamilton, OH
-
Difficulty Level:Easy
-
Total Repair Time:30 - 60 mins
-
Tools:Pliers, Screw drivers
Was this instruction helpful to you?
Thank you for voting!
Took old handle off and replaced with new one.
Quite hard to do,had to take out screw that went thru oven door,stabilizing piece fell off .We had to get the two screws lined up and thru the door then screw the handle in.but we did it!
Parts Used:

-
Janice from West Warwick, RI
-
Difficulty Level:Difficult
-
Total Repair Time:30 - 60 mins
Was this instruction helpful to you?
Thank you for voting!
Burner constantly heated
-
Clifford from New smyrna beach, FL
-
Difficulty Level:Easy
-
Total Repair Time:30 - 60 mins
-
Tools:Nutdriver, Screw drivers
Was this instruction helpful to you?
Thank you for voting!
Front Burner,no control of.
The original controls were different for the small burners and the large burners. The replacement part fits all. Before removing wires, pay attention to writing on new and old control and replace 1 at a time. The hardest part was being sure to cut the knob stem to the correct length. Control works well.
Parts Used:
-
Joseph from Baden, PA
-
Difficulty Level:Easy
-
Total Repair Time:30 - 60 mins
-
Tools:Pliers, Screw drivers
Was this instruction helpful to you?
Thank you for voting!
Oven Sensor Replacement
The part was just like the old one and would have been an easy fix except our range suffered from a lighting hit. The clips had melted together. Called a dealer and asked about a new wiring harness. He said in those cases just cut the clip off and hard wire with wire clips,or firecrackers. We used wire nuts and taped all together and the oven works just great. Nothing is ever as easy as it should be.
Parts Used:
-
Barbara from Edwardsville, IL
-
Difficulty Level:A Bit Difficult
-
Total Repair Time:30 - 60 mins
-
Tools:Nutdriver
Was this instruction helpful to you?
Thank you for voting!