















JBP26AY5 General Electric Range - Instructions
Keep searches simple. Use keywords, e.g. "leaking", "pump", "broken" or "fit".
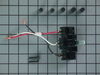
When moving the range, the 220 wire popped off the terminal and arced melting the plastic terminal
I looked for a new terminal locally, but no one had s terminal that would fit a 40-year old range. I went on line to PartSelect and could not find my model range, so I looked through all the terminals listed on the website (about 500) but found only one that was close to mine. Mounting holes did not match, but it had 3 connectors with 220 capability, so I ordered it. I requested express shipping by UPS and thought I paid for the extra charge. When I got notification of shipment. I saw it was via ground. It went from Louisville to Jacksonville to Clearwater, FL. I ordered it on Thursday night and received it the following Tuesday night. Meanwhile, we had no stove to cook on. When the part came, it took two days to get the contractor back to our condo. He drilled new holes on the mounting box and jerry-rigged the wiring to make it fit. The range is now working, but I was disappointed in the delay in shipping which I agreed to express shipping.
Parts Used:
-
Randall from ST PETERSBURG, FL
-
Difficulty Level:Difficult
-
Total Repair Time:30 - 60 mins
-
Tools:Nutdriver, Pliers, Screw drivers
1 person
found this instruction helpful.
Was this instruction helpful to you?
Thank you for voting!
Not enough knowledge.
Got it right, but the problem was with me not enough knowledge and strength, what it should've been 1 hour it took 2 . Getting the element in place it was harder for me .
Other than that it was a good experience and a great accomplishment.
Tonie williams .
Other than that it was a good experience and a great accomplishment.
Tonie williams .
Parts Used:

-
Antonette from Jamul, CA
-
Difficulty Level:Really Easy
-
Total Repair Time:30 - 60 mins
-
Tools:Socket set
1 person
found this instruction helpful.
Was this instruction helpful to you?
Thank you for voting!
Change bulb

-
Louis from LEAGUE CITY, TX
-
Difficulty Level:Really Easy
-
Total Repair Time:30 - 60 mins
-
Tools:Nutdriver
3 of 8 people
found this instruction helpful.
Was this instruction helpful to you?
Thank you for voting!
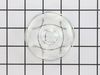
dropped & broke the oven light bulb cover
-
joseph from san jose, CA
-
Difficulty Level:Really Easy
-
Total Repair Time:Less than 15 mins
1 of 2 people
found this instruction helpful.
Was this instruction helpful to you?
Thank you for voting!
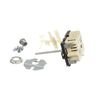
no power going to burner when switch is on, switch bad
I followed the easy instructions and everything went well. I had the new switch installed in about 30 minutes. My wires were different colors than on the instructions but it was still easy to figure out where the wires went on the new switch. Just do not be in a hurry and make sure you measure before you break off the extension bar. My knob fit on the new switch without any of the parts that came with the switch.
Parts Used:
-
Robert from Woolwich Twp., NJ
-
Difficulty Level:Easy
-
Total Repair Time:15 - 30 mins
-
Tools:Pliers, Screw drivers
2 of 5 people
found this instruction helpful.
Was this instruction helpful to you?
Thank you for voting!
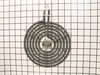
Surface Element/burner had to be replaced
First, I removed the burner from the box and plastic bag. Second, I pushed the burner into the socket and that was it.
I also want to comment on how easy the ordering process was. I ljust love this website. All you have to do is type in the model number and up comes all of the parts associated with the appliance. My order shipped the next day and I had unit within 2 days. Also, the part cost $42.00 with shipping. My local parts place was $48.00, so I wound up saving $6.00 and did not have to leave my home to buy it. I will definetly use this site again.
I also want to comment on how easy the ordering process was. I ljust love this website. All you have to do is type in the model number and up comes all of the parts associated with the appliance. My order shipped the next day and I had unit within 2 days. Also, the part cost $42.00 with shipping. My local parts place was $48.00, so I wound up saving $6.00 and did not have to leave my home to buy it. I will definetly use this site again.
Parts Used:
-
Natalie from Harleysville, PA
-
Difficulty Level:Really Easy
-
Total Repair Time:Less than 15 mins
1 of 2 people
found this instruction helpful.
Was this instruction helpful to you?
Thank you for voting!
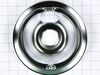
replaced the drip bowls
I am not going into a description. It is a very minor thing to do. I did appreciate the quick delivery of the parts and will purchase future appliance parts from you again.
Parts Used:

-
Barbara A from Riverhead, NY
-
Difficulty Level:Really Easy
-
Total Repair Time:Less than 15 mins
1 of 2 people
found this instruction helpful.
Was this instruction helpful to you?
Thank you for voting!
8" stove element stopped working
Everything was very easy: identifying the right part was very easy on the website, the part came quicker than I expected, and my wife replaced the stove element before I even got home from work. She just pulled the old one out like she would to clean the top of the stove, and put the new one back in. Have had several awesome cups of coffee since the replacement.
Parts Used:
-
Michael from Standish, ME
-
Difficulty Level:Really Easy
-
Total Repair Time:Less than 15 mins
1 of 2 people
found this instruction helpful.
Was this instruction helpful to you?
Thank you for voting!
Burner Would Not Heat
Did it By Hand
Your Shipment Time Excellant
Order it Mon. Received it Wed.
Thank You
Your Shipment Time Excellant
Order it Mon. Received it Wed.
Thank You
Parts Used:
-
Robert from La Crosse, WI
-
Difficulty Level:Really Easy
-
Total Repair Time:Less than 15 mins
1 of 2 people
found this instruction helpful.
Was this instruction helpful to you?
Thank you for voting!
Large burner quit working
I pulled out the old burner - put the new one in and I was done. No tools required.
The first burner I received from PartSelect was warped. I called on Friday morning to see about returning it and ordering a new one. The CSR was very helpful and I was totally surprised to have the replacement arrive the very next day since I didn't ask for a Saturday delivery. I will definitely use PartSelect again.
The first burner I received from PartSelect was warped. I called on Friday morning to see about returning it and ordering a new one. The CSR was very helpful and I was totally surprised to have the replacement arrive the very next day since I didn't ask for a Saturday delivery. I will definitely use PartSelect again.
Parts Used:
-
JoAnn from Fort Worth, TX
-
Difficulty Level:Really Easy
-
Total Repair Time:Less than 15 mins
1 of 2 people
found this instruction helpful.
Was this instruction helpful to you?
Thank you for voting!
Light burnt out.
Turned the wire protector to the side. Turned out the old bulb and replaced it with the new. Turned the wire protector back in place and I'm like new.
Parts Used:
-
Roscoe G from ROCHESTER, NY
-
Difficulty Level:Very Easy
-
Total Repair Time:Less than 15 mins
2 of 6 people
found this instruction helpful.
Was this instruction helpful to you?
Thank you for voting!
bowls were worn
Just removed the elements and inserted the new drip pans. Could not have been easier.
Parts Used:
-
Mary Ann from Orient, NY
-
Difficulty Level:Really Easy
-
Total Repair Time:15 - 30 mins
1 of 3 people
found this instruction helpful.
Was this instruction helpful to you?
Thank you for voting!
Burner only worked on High and very low temperature setting.
Your "virtual repairman" was fantastic. I would have purchased the wrong part without trhe diagnostic service. It said that 53% of the time the infinite switch was the problem. In my case it was 100%. Why I put up with this problem for 6 years I will never know.
Repair job was easy but longer than the 15 minutes that it said it would take.
Repair job was easy but longer than the 15 minutes that it said it would take.
Parts Used:
-
William from Duvall, WA
-
Difficulty Level:Easy
-
Total Repair Time:30 - 60 mins
-
Tools:Nutdriver, Pliers
2 of 6 people
found this instruction helpful.
Was this instruction helpful to you?
Thank you for voting!
Switch - and the connection wire to the burner
First of all I did this repair because the wire to the burner shorted out. I did the wire portion first - only then did I know I needed the switch kit. (The burner was operating while my old swithch was OFF). The first (wire replacement) repair took about 10 minutes - I followed the guidance on this web-site. The second repair (The switch) took about 20 minutes. The switch ws not the same as the original. Just be careful to mark each wire as you remove them from the old switch's posts. The posts on the switch are marked and you need to place them on the like-marked corresponding posts on the new switch. All is well, my burner is operational.
Parts Used:
-
andrew from langdon, ND
-
Difficulty Level:Easy
-
Total Repair Time:30 - 60 mins
-
Tools:Pliers
2 of 6 people
found this instruction helpful.
Was this instruction helpful to you?
Thank you for voting!
Burner not heating properly
1. The infinite switch had several knobs which would fit the switch shaft. Read the directions included with the switch in order to have the shaft fit the proper knob. You can break the shaft with two pairs of pliers. 2. Move the stove away from the wall and unplug it. 3. Remove the 1/4 screws from the back side of the stove and remove the back panel, exposing the switch. 4. Remove the wires one at a time and put them on the new switch. The terminals are L1, L2, P, H1 & H2. The Pilot (p) has a smaller terminal so you don't get it mixed up. Generally L1 is black, L1 is red, P is yellow, H1 and H2 can be blue, brown, yellow, orange or one of these colors striped on a white wire. 5. Remove the old switch from the stove and be sure to save the two mounting screws. 6. Position the new switch so that the side of the switch marked "top" is on top. 7. Install the screws on the new switch and put the knob on it. 8. Carefully test the burner. 9. Unplug the stove and put the back cover on.
Parts Used:
-
Stephen from Kokomo, IN
-
Difficulty Level:Easy
-
Total Repair Time:30 - 60 mins
-
Tools:Nutdriver, Pliers, Screw drivers
0 of 1 people
found this instruction helpful.
Was this instruction helpful to you?
Thank you for voting!