















JBC261N3 General Electric Range - Instructions
Keep searches simple. Use keywords, e.g. "leaking", "pump", "broken" or "fit".
needed to replace a receptacle
I had already removed the worn out part. The new part came with wire joint covers and connecting them was fine. The brace that came with the part did not actually fit onto the stove burner well; so I cleaned and used the older brace - but, when I went to put it back in place, the bearings on the original self locking bolt were stripped. So, I had to find a replacement bolt with a nut. Found that I had some of those on hand. Once the brace was firmly in place, the rest was easy!
Parts Used:

-
Mary Catherine from silver spring, MD
-
Difficulty Level:A Bit Difficult
-
Total Repair Time:1- 2 hours
-
Tools:Pliers, Screw drivers
5 of 11 people
found this instruction helpful.
Was this instruction helpful to you?
Thank you for voting!
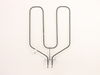
broiler element was broken
I looked on Youtube for a how to video. It was accurate but the screws in my oven were NOT phillips head screws, they turned out to be sheet metal screws. I used pliers at first which was a PAIN but then I borrowed a socket wrench from the neighbor that was MUCH better!! I had wanted to do it myself to prove to my husband and son that I could but I ended up needing their help because the screws were so tight.... But we did the repair ourselves!!!
Parts Used:
-
Milli from AURORA, CO
-
Difficulty Level:Difficult
-
Total Repair Time:More than 2 hours
-
Tools:Pliers, Screw drivers, Socket set
2 of 2 people
found this instruction helpful.
Was this instruction helpful to you?
Thank you for voting!
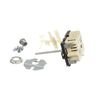
Burner wouldn't operate
Took Switch panel off range. Disconnected Infinite switch. Reinstalled infinite switch.. Replaced panel. Repair was very simple and self explainatory.
Knott County Housing Authority Maintenance Personnel
Knott County Housing Authority Maintenance Personnel
Parts Used:
-
Linda from Hindman, KY
-
Difficulty Level:Really Easy
-
Total Repair Time:15 - 30 mins
-
Tools:Nutdriver, Screw drivers
3 of 5 people
found this instruction helpful.
Was this instruction helpful to you?
Thank you for voting!
the items ordered replaced the worn out ones.
the replacement items fit really good. It was a matter of remove and replace,
Parts Used:

-
Carl from Morristown, N.J., NJ
-
Difficulty Level:Really Easy
-
Total Repair Time:Less than 15 mins
2 of 2 people
found this instruction helpful.
Was this instruction helpful to you?
Thank you for voting!
timer knobs broken off
I simply took the 3 new timer knobs and slid them on the metal shafts. It took less than 5 minutes to replace all 3 knobs. Now I can set the start, stop and time functions which have been inoperable for over 5 years. An easy and straight forward .
Parts Used:
-
Christy from Danville, CA
-
Difficulty Level:Really Easy
-
Total Repair Time:Less than 15 mins
3 of 5 people
found this instruction helpful.
Was this instruction helpful to you?
Thank you for voting!
old unit failing to heat all coils
I first removed the unit by pulling gently from connection. Replaced the new one in that same manner - simply inserting into connection.
Very easy, I'll probably try it again soon.
Very easy, I'll probably try it again soon.
Parts Used:
-
Emma from The VIllags, FL
-
Difficulty Level:Really Easy
-
Total Repair Time:Less than 15 mins
2 of 2 people
found this instruction helpful.
Was this instruction helpful to you?
Thank you for voting!
replacing rusted drip pans on a 30 year old stove.
Just lifted the electric components Remove drip plans and trim rings and replaced with new drip pans and trim. Your company was incredible in there delivery of the parts..One day. You made my husbands very happy.
Parts Used:
-
Dorothy-Anne from SHREWSBURY, MA
-
Difficulty Level:Very Easy
-
Total Repair Time:Less than 15 mins
2 of 2 people
found this instruction helpful.
Was this instruction helpful to you?
Thank you for voting!
lights blown out

-
Gerald from WINTERVILLE, GA
-
Difficulty Level:Very Easy
-
Total Repair Time:Less than 15 mins
6 of 14 people
found this instruction helpful.
Was this instruction helpful to you?
Thank you for voting!
Knobs were broken.
-
DeNise from FT WASHINGTON, MD
-
Difficulty Level:Very Easy
-
Total Repair Time:Less than 15 mins
2 of 2 people
found this instruction helpful.
Was this instruction helpful to you?
Thank you for voting!
Up to 1 hour for oven to preheat
Removed 2 nuts holding the baking unit to the oven back, removed 2 nuts holding wires in place, installed new unit following procedure backwards. It takes longer to get the tools,take the oven door off, and take racks out than it does to remove and replace the baking unit.
Parts Used:
-
Joel from Avon, OH
-
Difficulty Level:Really Easy
-
Total Repair Time:15 - 30 mins
-
Tools:Screw drivers, Socket set
2 of 2 people
found this instruction helpful.
Was this instruction helpful to you?
Thank you for voting!
Bake element began to spark and short out when I tried to use it.
When the part arrived, I used the diagram provided by the website to see what really needed to be done. Keep in mind, if you're doing it correctly and disconnect the range from the power source, it's going to be dark inside the oven. Get a good flashlight or electric lantern. There are two screws holding the element in. Mine were 8MM hex-head screws, but be prepared for anything. I removed the with a socket attachment/adapter to my cordless drill/screwdriver, and the part came right out. Some insulation will come as well - don't panic. Installation is similar, just in reverse order. Pay attention to the feet on the element. Make certain they are down. Don't lean on them when you think you're finished and discover that you installed it upside down like someone I know, and have to pull it out to correct this.
Parts Used:
-
Bill from MANHATTAN, KS
-
Difficulty Level:Really Easy
-
Total Repair Time:1- 2 hours
-
Tools:Screw drivers
2 of 2 people
found this instruction helpful.
Was this instruction helpful to you?
Thank you for voting!
terminal block not working
simple remove the old one, strip old wires to make longer, twist wires together, put on wire nuts.
Parts Used:
-
JAMES from SAN JOSE, CA
-
Difficulty Level:Really Easy
-
Total Repair Time:15 - 30 mins
2 of 2 people
found this instruction helpful.
Was this instruction helpful to you?
Thank you for voting!
Replace door gasket
Gasket sent did not match the profile of the original. Only after trimming off two long edges of the gasket did it come close to matching the original. I would not recommend using this replacement gasket for this oven model. 1-Remove door. 2-Loosen the 2 oven box attachment nuts on the back of the oven. (loosen only, about 3/8") 3-slide the oven box toward the front of the oven. 4-remove old gasket, and insert new. 5-Retighten 2 oven box attachment nuts. 6-Reinstall door. Took especially long because of incorrect gasket. Deep well socket required to loosen oven box attachment nuts. Recommend two people to do, one in back, for attachment nut and one in front to keep gasket in place while tightning nuts.
Parts Used:
-
DORIS from SARASOTA, FL
-
Difficulty Level:Very Difficult
-
Total Repair Time:More than 2 hours
-
Tools:Nutdriver, Pliers, Screw drivers, Socket set
2 of 3 people
found this instruction helpful.
Was this instruction helpful to you?
Thank you for voting!
Oven wouldn't hold temp - over/under
Unplugged the range, took old elements out, put new ones in. Couldn't have been easier and for the total cost of about $60; I have a working oven again. A LOT cheaper than a new $600 range!!
Parts Used:
-
Andor from Oxford, OH
-
Difficulty Level:A Bit Difficult
-
Total Repair Time:30 - 60 mins
-
Tools:Screw drivers, Socket set
2 of 3 people
found this instruction helpful.
Was this instruction helpful to you?
Thank you for voting!
Bake Element was bad and Drip bowls needed replaced
First I turned the breaker off the Range. Second I removed the two screws that held the element inplace. Then I pulled element front until I could get to the two screw which connected the wires and removed then. Removed old Bake element. Installed new element by connecting the two wires and then pushed the element into place and secured it by reinstalling the two screws. Turned the breaker back on and tested. This is a very easy item to replace and takes very little time.
Parts Used:
-
Randall from Lititz, PA
-
Difficulty Level:Really Easy
-
Total Repair Time:15 - 30 mins
-
Tools:Nutdriver
2 of 3 people
found this instruction helpful.
Was this instruction helpful to you?
Thank you for voting!