















JB860EJAES General Electric Range - Instructions
Keep searches simple. Use keywords, e.g. "leaking", "pump", "broken" or "fit".
F2 Error on Display
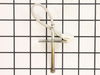
The repair was very easy to do. Our oven was showing the F2 error code, which is associated with an over-temperature fault. Upon inspection, the oven was warm, but definitely not beyond the temperature threshold. I researched the issue and found this temperature sensor.
Swapping the sensor was extremely easy. You take off the back panel of the oven, unhook a single wiring harness, and undo some bolts inside the oven, which allows you to pull off the old sensor. Simply hook up the new sensor to the harness, pull everything back through, replace the fasteners, and you're good to go.
Swapping the sensor was extremely easy. You take off the back panel of the oven, unhook a single wiring harness, and undo some bolts inside the oven, which allows you to pull off the old sensor. Simply hook up the new sensor to the harness, pull everything back through, replace the fasteners, and you're good to go.
Parts Used:
-
Tom from FORNEY, TX
-
Difficulty Level:Very Easy
-
Total Repair Time:Less than 15 mins
-
Tools:Nutdriver, Screw drivers
4 of 4 people
found this instruction helpful.
Was this instruction helpful to you?
Thank you for voting!
Oven Temp. went too high and the door locked. Burnt the food
This temperature sensor is very easy to replace. There are two screws inside the oven in the top middle of the back of the oven. Take these off. on the back of the stove there is a metal plate with 5 screws I believe. Take these off with a nut driver. Then you will see a white connector coming from the spot where you took the other screws off. Take the white connector apart and pull out the temperature sensor from the inside of the oven. Then put the new one in.
Parts Used:
-
Nathan from BILLINGS, MT
-
Difficulty Level:Very Easy
-
Total Repair Time:Less than 15 mins
-
Tools:Nutdriver, Screw drivers
4 of 4 people
found this instruction helpful.
Was this instruction helpful to you?
Thank you for voting!
wire connection to socket was bad
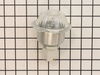
Disconnected the old socket ( 2 srews ) removed the two wires from the old socket, reconnected them to the new socket and reinstalled the lamp.
Parts Used:
-
David from Gansevoort, NY
-
Difficulty Level:A Bit Difficult
-
Total Repair Time:15 - 30 mins
-
Tools:Pliers, Screw drivers
6 of 10 people
found this instruction helpful.
Was this instruction helpful to you?
Thank you for voting!
Oven slow to heat.
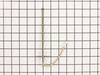
First I removed the 4 screws that hold the element in place. I then pulled the element out about 3 inches. I removed the sensor and disconnected the connector.
Parts Used:
-
Scott from Burleson, TX
-
Difficulty Level:Really Easy
-
Total Repair Time:Less than 15 mins
-
Tools:Nutdriver, Pliers, Screw drivers
6 of 10 people
found this instruction helpful.
Was this instruction helpful to you?
Thank you for voting!
I dropped something on the glass top stove, cracked the glass.
My husband and I watched a couple of videos we googled. Once we had a clue we took the top of the stove off. The glass is the whole top, not just glass, and doesn't come with the elements. We marked where each clip was and drew numbers on the elements in order to put them back exactly as they came out. Putting it back together, there are 2 plastic clips, one on each side that we had to get the upper part back on. It wasn't an easy job but we successfully repaired the stove back to new condition.
Parts Used:

-
Barbara from CLEVELAND, TN
-
Difficulty Level:Really Easy
-
Total Repair Time:30 - 60 mins
-
Tools:Screw drivers, Socket set
4 of 4 people
found this instruction helpful.
Was this instruction helpful to you?
Thank you for voting!
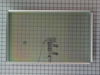
Broken inner window
-
randy from LORETTO, TN
-
Difficulty Level:Very Easy
-
Total Repair Time:15 - 30 mins
-
Tools:Nutdriver, Screw drivers
5 of 7 people
found this instruction helpful.
Was this instruction helpful to you?
Thank you for voting!
temp sensor in oven was failing.
I picked the least expensive and most likely issue with our oven that was not indicating a correct oven temperature. I am sure with a 15+ year appliance that the circuitry is on its way out but wanted to give this a try to avoid a new appliance purchase. Oven pre-heat setting takes much longer to finish with the age of the oven. However, after the new sensor the oven will maintain a more even temperature for the cycle.
Removal of the sensor from the inside of the oven is a bit awkward since it is located between the broiler elements at the back but a nut driver was the correct tool and worked fine. A bit stuck with the heating of the connection but pretty simple to replace. Must remove the back first to uncouple the connector. Simplest part of the repair.
At best a temporary fix for a an appliance this old.
Removal of the sensor from the inside of the oven is a bit awkward since it is located between the broiler elements at the back but a nut driver was the correct tool and worked fine. A bit stuck with the heating of the connection but pretty simple to replace. Must remove the back first to uncouple the connector. Simplest part of the repair.
At best a temporary fix for a an appliance this old.
Parts Used:
-
Chad from FRANKLIN, NC
-
Difficulty Level:Easy
-
Total Repair Time:15 - 30 mins
-
Tools:Nutdriver
4 of 4 people
found this instruction helpful.
Was this instruction helpful to you?
Thank you for voting!
Double oven, top oven would not heat on bake setting.
un plugged the electric cord. Took back panel off range.
disconnected the element wires. Opened the range door removed the rack, and removed the two screws holding the the bake unit in place and removed the old element. Installed the new element in reverse order above.
After reconnecting the power supply cord turned the range on and let it heat up to remove the newness order off the new element.
tools needed 1/4 inch nut driver or 1/4 inch socket.
disconnected the element wires. Opened the range door removed the rack, and removed the two screws holding the the bake unit in place and removed the old element. Installed the new element in reverse order above.
After reconnecting the power supply cord turned the range on and let it heat up to remove the newness order off the new element.
tools needed 1/4 inch nut driver or 1/4 inch socket.
Parts Used:

-
William from FRANKFORT, KY
-
Difficulty Level:Really Easy
-
Total Repair Time:15 - 30 mins
-
Tools:Nutdriver
4 of 4 people
found this instruction helpful.
Was this instruction helpful to you?
Thank you for voting!
oven not as hot as temp display said it was
pull out stove, unbolt old temp sensor inside stove with 1/4 nutdriver, go to back of stove and take off cover and unhook sensor and hook up new one, put all back together and slide stove back in place.
Parts Used:
-
John from HOT SPRINGS, AR
-
Difficulty Level:Really Easy
-
Total Repair Time:30 - 60 mins
-
Tools:Nutdriver
4 of 4 people
found this instruction helpful.
Was this instruction helpful to you?
Thank you for voting!
Burnt Smell
Unplugged the Range and removed the two screws holding down the cook top. You do not need to remove the vent chamber at the rear of the range since the top lifts up about 4 inches. This should be enough room to get your hand onto the plug going to the door switch. Pull off the plug and remove the swich. Pop in the new one, put on the plug, reinstall the two screws and you are done!
Read the thread on "burnt smell" and DO NOT assume it is a burned out element. Follow your nose!!
Read the thread on "burnt smell" and DO NOT assume it is a burned out element. Follow your nose!!
Parts Used:

-
Eugene from Hilton Head, SC
-
Difficulty Level:Really Easy
-
Total Repair Time:Less than 15 mins
-
Tools:Nutdriver
8 of 17 people
found this instruction helpful.
Was this instruction helpful to you?
Thank you for voting!
Replaced under hood surface light bulb
Very easy to replace. This replacement part is the perfect fit for my microwave since the original part has been discontinued. It does have the night light and bright light feature.
Parts Used:

-
Dottie from NEW MILFORD, CT
-
Difficulty Level:Very Easy
-
Total Repair Time:Less than 15 mins
-
Tools:Screw drivers
4 of 5 people
found this instruction helpful.
Was this instruction helpful to you?
Thank you for voting!
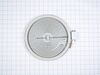
Burner burned out
YouTube to review, had 1 person hold stove top for ease. Simple repair
Parts Used:
-
John from TABERNACLE, NJ
-
Difficulty Level:Very Easy
-
Total Repair Time:Less than 15 mins
-
Tools:Screw drivers
4 of 5 people
found this instruction helpful.
Was this instruction helpful to you?
Thank you for voting!
F2 Warning - Oven overheating
I checked various sites on the net and decided that the temperature sensor was the problem. The GE price for the replacement part was about $105, most of the other sites offered the sensor in the $70 range. PartSelect $12.95 When the part arrived, I removed a small self taping screw, pulled the high temperature wire connector into the oven space, disconnected the quick disconnect fitting, attached the new temperature sensor, pushed the connecting wire into its hole, replaced the screw and that was it. I probably saved about $200 in parts and labor over what a local repairman would have charged. Oh yes!! I first disconnected the power at the breaker box. Very important.
Parts Used:
-
john from bend, OR
-
Difficulty Level:Really Easy
-
Total Repair Time:Less than 15 mins
-
Tools:Socket set
3 of 3 people
found this instruction helpful.
Was this instruction helpful to you?
Thank you for voting!
Incorrect oven temperature due to defective temperature sensor.
-
Anthony from FARMINGVILLE, NY
-
Difficulty Level:Really Easy
-
Total Repair Time:Less than 15 mins
-
Tools:Nutdriver
3 of 3 people
found this instruction helpful.
Was this instruction helpful to you?
Thank you for voting!
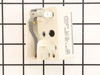
Switch was not turning off range indicator light
Pulled stove out and unplugged. At the rear of the range there were 4 faster. Used a nutdriver piece in an electric drill. Pulled off the cover and located the switch. At the front of the stove, I removed the knob and unscrewed two screws releasing the switch. I undid and replaced each wire connector one-by-one to avoid any wrong connections. Replaced and secured the switch and replace the back panel. All secured, power on and fixed! Easy repair, but something that had been put off for a year!
Also follow the installation videos from PartSelect - very helpful!
Also follow the installation videos from PartSelect - very helpful!
Parts Used:
-
Charles from PORTLAND, OR
-
Difficulty Level:Really Easy
-
Total Repair Time:Less than 15 mins
-
Tools:Nutdriver, Screw drivers
3 of 3 people
found this instruction helpful.
Was this instruction helpful to you?
Thank you for voting!