


















JB579GR2WH General Electric Range - Instructions
Keep searches simple. Use keywords, e.g. "leaking", "pump", "broken" or "fit".
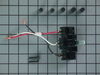
no burnt wire
-
Bernard from N CHARLESTON, SC
-
Difficulty Level:Very Easy
-
Total Repair Time:Less than 15 mins
-
Tools:Screw drivers
5 of 7 people
found this instruction helpful.
Was this instruction helpful to you?
Thank you for voting!
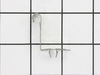
The old single heating element support clips came loose over time.
I ordered the replacement clips from this site and they arrived in a timely manner. The clips were perfect, but due to the age of the oven, the holes had elongated and the new clips kept falling out also. I modified the clips by widening the tips with a pair of pliers. They are holding just fine. I don't think the older clips could've withstood the modification.
Parts Used:
-
David from SALISBURY, CT
-
Difficulty Level:Easy
-
Total Repair Time:15 - 30 mins
-
Tools:Pliers
4 of 4 people
found this instruction helpful.
Was this instruction helpful to you?
Thank you for voting!
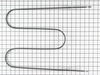
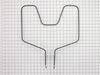
broiler element melted
pulled range out, unplugged unit, took out 7 screws, unplugged the elements, reinstalled elements, replugged, and completed with the 7 screws back in place. The 30 minute time was replacing both the broiler and bake elements. The parts were also delivered in a very timely manner. Could not have been more pleased and was very cost effective.
Parts Used:
-
Grady from Myrtle Beach, SC
-
Difficulty Level:Really Easy
-
Total Repair Time:15 - 30 mins
-
Tools:Nutdriver
5 of 8 people
found this instruction helpful.
Was this instruction helpful to you?
Thank you for voting!
Heating element had shorted out and broken.
Unscrewed the heating element from the inside back of the oven and removed the housing cover from the back of the stove to access the terminals. (The unit had arked and fused the terminal to the connector.) Installed the new unit and replaced the housing cover on the back and screwed the unit into the back of the oven. Works like a charm.
Parts Used:
-
Lisa from Lexington, KY
-
Difficulty Level:Easy
-
Total Repair Time:30 - 60 mins
-
Tools:Screw drivers, Socket set
4 of 5 people
found this instruction helpful.
Was this instruction helpful to you?
Thank you for voting!
heating element clap broke off
All I had to do was pop the clamp on the top part of the heating element and push the clamp into the hole.
Parts Used:
-
James from Hedgesville, WV
-
Difficulty Level:Really Easy
-
Total Repair Time:Less than 15 mins
4 of 5 people
found this instruction helpful.
Was this instruction helpful to you?
Thank you for voting!
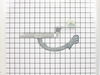
Oven door hinge roller deteriorated, oven door hard to open.
Open and slide door upward off of hinges. Removed bottom drawer to access hinge spring. Detached spring, noting proper hole in hinge for reinstallation. Removed three screws holding hinge and removed hinge. Compared new part to old...exact match. Inserted hinge, and reinstalled the three screws. Reattached spring in hinge hole. Slid door back down onto hinges. Done in four minutes flat!
Parts Used:
-
Craig from Kernersville, NC
-
Difficulty Level:Really Easy
-
Total Repair Time:Less than 15 mins
-
Tools:Screw drivers
3 of 3 people
found this instruction helpful.
Was this instruction helpful to you?
Thank you for voting!
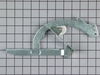
oven door jammed,could not open it
Removed old hinges and installed new hinges.
Hardest part was determining that worn hinges were the cause of problem, then ordering replacements. GE website hinge on exploded view did not look like hinges I removed.Thanks to Google I got on to PartSelect.com website where excellent pictures of hinges and one-inch grid confirmed they sold exactly what I wanted for my 13-year old range, the model number of which was not even on the GE website.
Hardest part was determining that worn hinges were the cause of problem, then ordering replacements. GE website hinge on exploded view did not look like hinges I removed.Thanks to Google I got on to PartSelect.com website where excellent pictures of hinges and one-inch grid confirmed they sold exactly what I wanted for my 13-year old range, the model number of which was not even on the GE website.
Parts Used:
-
Richard from Winchester, MA
-
Difficulty Level:A Bit Difficult
-
Total Repair Time:1- 2 hours
-
Tools:Screw drivers
3 of 3 people
found this instruction helpful.
Was this instruction helpful to you?
Thank you for voting!
remove and replace

-
Perry from Flushing, NY
-
Difficulty Level:Really Easy
-
Total Repair Time:Less than 15 mins
10 of 24 people
found this instruction helpful.
Was this instruction helpful to you?
Thank you for voting!
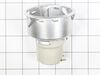
Replace the light bulb socket.
Alls well that ends well. General Electric changed the configuration of our Light bulb socket on our 1996 oven. It did not have a flange with two screws as the original. The new one, you will just connect it and twist it into place. It worked and we are very happy. Such wonderful people to deal with at this site. Our sincere thanks,
Richard and Shirley
Richard and Shirley
Parts Used:
-
RICHARD from SOUTHBRIDGE, MA
-
Difficulty Level:Really Easy
-
Total Repair Time:Less than 15 mins
-
Tools:Screw drivers
3 of 3 people
found this instruction helpful.
Was this instruction helpful to you?
Thank you for voting!
One coil of dual-coil burner didn't work
GE changed the design a little, moving a connector so the existing wires didn't reach. I texted the model number to an address provided with the part, and GE returned a URL for installation instructions. The instructions said there should be two jumpers to extend the wires, but there was only one, so I had to make a trip to the hardware store to get connectors to make my own jumper. Read the instructions carefully for where to connect the wires. My initial connection was wrong, but nothing bad happened, just the unit didn't heat. Two mounting tabs from the old unit need to be moved to the new. Heat shrink tubing is provided to cover the joints where the jumpers connect to the old wiring. If the jumper hadn't been missing, it would have been a quick, easy install.
When I ordered, nobody (19 different web sites) had the part in stock. GE took over 2 months to ship the part to PartSelect, but finally the stove is fully functional again.
When I ordered, nobody (19 different web sites) had the part in stock. GE took over 2 months to ship the part to PartSelect, but finally the stove is fully functional again.
Parts Used:

-
Robert from BEDFORD, MA
-
Difficulty Level:A Bit Difficult
-
Total Repair Time:1- 2 hours
-
Tools:Screw drivers
3 of 4 people
found this instruction helpful.
Was this instruction helpful to you?
Thank you for voting!
Broiler element would not work.
Removed the old element: removed clips holding the element, unscrewed the 2 screws that hold element in place. On the back of the range, removed casing to get to the connection wires, disconnected the element then removed the element. Reversed procedure to replace. Thanks for the speedy ordering and delivery.
Parts Used:
-
ANNE from FT. LAUDERDALE, FL
-
Difficulty Level:Really Easy
-
Total Repair Time:15 - 30 mins
-
Tools:Screw drivers, Socket set
4 of 7 people
found this instruction helpful.
Was this instruction helpful to you?
Thank you for voting!
The temperature indicator light on the oven was broken.
I removed the control panel by removing 7 screws and replaced the light indicator and lens.
Parts Used:
-
Jewel from Nacogdoches, TX
-
Difficulty Level:Really Easy
-
Total Repair Time:Less than 15 mins
-
Tools:Screw drivers
3 of 4 people
found this instruction helpful.
Was this instruction helpful to you?
Thank you for voting!
broil unit caught fire and burned all the way around it
My great and talented hubby did it. He can fix anything. It was easy for him.
I love this website to purchase parts. Both times I have ordered something from you, it has been at a reasonable price and I received it really quickly.
Thanks!
I love this website to purchase parts. Both times I have ordered something from you, it has been at a reasonable price and I received it really quickly.
Thanks!
Parts Used:
-
octavio from lake worth, FL
-
Difficulty Level:Really Easy
-
Total Repair Time:15 - 30 mins
4 of 7 people
found this instruction helpful.
Was this instruction helpful to you?
Thank you for voting!
The oven door would not open or close all the way. The plastic hinge roller guides broke on both sides.
Remove oven door from hinges, by pulling it straight up and off, (like you would do for closer access to clean inside). Remove the storage drawer. Lift up and away off the track, (like a file cabinet drawer). With the drawer out and away, you can see how the springs are easily detached from each hinge. Note the location of where the springs attach to the hinges, and bottom of stove. Remove each spring. Three screws on each side hold the hinges on. Unscrew, and set them aside. (The new hinges did not have new screws in package.) Place new hinge in place. Reinstall in reverse of disassembly. If any part of the door or face of the stove (where hinges mount) was bent slightly due to forcing door open, reform with light hammer taps and C-clamps. Enjoy for ANOTHER 10+ years, because it's a GE Profile Stove : )
Parts Used:
-
Russell from Brea, CA
-
Difficulty Level:Really Easy
-
Total Repair Time:Less than 15 mins
-
Tools:Screw drivers
3 of 5 people
found this instruction helpful.
Was this instruction helpful to you?
Thank you for voting!
broken heat element
It was very easy than i expect,
Just pullout the stove from the location to access rear side of stove,
unscrew 3 nuts with socket rench and disconnected wire. Opened front door of stove, unscrew 5 screwss , then pulled out broken element, replaced it with new one.
It is very very easy , Dont be affraid do it yourself.....
Just pullout the stove from the location to access rear side of stove,
unscrew 3 nuts with socket rench and disconnected wire. Opened front door of stove, unscrew 5 screwss , then pulled out broken element, replaced it with new one.
It is very very easy , Dont be affraid do it yourself.....
Parts Used:
-
Young from Oakland, NJ
-
Difficulty Level:Really Easy
-
Total Repair Time:15 - 30 mins
-
Tools:Socket set
2 of 2 people
found this instruction helpful.
Was this instruction helpful to you?
Thank you for voting!