















J2S968SH5SS General Electric Range - Instructions
Keep searches simple. Use keywords, e.g. "leaking", "pump", "broken" or "fit".
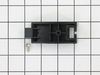
Hard to move drawer in and out because the rear drawer supports broke off.
Repair was very easy - less than a few minutes - just had to screw in 2 screws to the new drawer supports.
Parts Used:
-
Steven from Lansdale, PA
-
Difficulty Level:Really Easy
-
Total Repair Time:Less than 15 mins
-
Tools:Screw drivers
Was this instruction helpful to you?
Thank you for voting!
the grate foots came off
put it in but it keeps falling out. they're made narrower than my oven grate.
Parts Used:
-
Sandra from Watertown, MA
-
Difficulty Level:Really Easy
-
Total Repair Time:Less than 15 mins
Was this instruction helpful to you?
Thank you for voting!
so easy
the repair takes 10 sec, as long as you choose the right model...... great service from partselect... delivery within 48 hours.....
Parts Used:
-
Fadel from Visalia, CA
-
Difficulty Level:Really Easy
-
Total Repair Time:Less than 15 mins
Was this instruction helpful to you?
Thank you for voting!
Our bottom drawer support broke and the bottom drawer was canted
Simply removed drawer and lined up the newsupports. Made sure the guide pin was lined up and installed with single screw
Parts Used:
-
Robert from Woodinville, WA
-
Difficulty Level:Really Easy
-
Total Repair Time:Less than 15 mins
-
Tools:Screw drivers
Was this instruction helpful to you?
Thank you for voting!
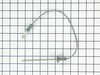
Oven Probe broke
-
Kathleen from Munt Laurel, NJ
-
Difficulty Level:Really Easy
-
Total Repair Time:Less than 15 mins
Was this instruction helpful to you?
Thank you for voting!
gasket replacement
Took about 15 minutes to take the old one off and put the new one on. Not difficult at all.
Parts Used:
-
Marilyn from Auburn, WA
-
Difficulty Level:Easy
-
Total Repair Time:15 - 30 mins
-
Tools:Screw drivers
Was this instruction helpful to you?
Thank you for voting!
Convection fan came loose from shaft
Convection fan came loose from the shaft with a lout rattle and grinding as the fan spun down. Had to remove four metal screws to remove the fan cover. Initially tried to just put the nut back on to hold the fan. However, I could not get the nut to start, so I assumed that threads were stripped on the nut or the shaft. Ordered the replacement nut, hoping that it was the nut that was the problem. However, I had the same problem with the new nut. I could see no damage on the shaft. It finally occurred to me that the nut and shaft had left-hand threads (counter-clockwise to tighten). At that point, it was extremely easy to put the nut back on and tighten it. I did not try using the old nut, since I had already received the new one, but I'm certain that if I had come to that realization earlier, I could have saved time and money. So, if you have the same problem, try putting the nut on "backwards."
Parts Used:
-
Thomas from Albuquerque, NM
-
Difficulty Level:Easy
-
Total Repair Time:15 - 30 mins
-
Tools:Socket set
Was this instruction helpful to you?
Thank you for voting!