















J2S968SH5SS General Electric Range - Instructions
Keep searches simple. Use keywords, e.g. "leaking", "pump", "broken" or "fit".
Broiler Element Repair
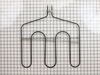
I was attempting to replace the broiler element on the oven, but I discovered that the wiring may be the actual problem. I suggest before you order parts for a broiler repair, that you test the wires to ensure that you have continuity. I will have to trace the wires back to the source (the other element works fine) and see if I can find the problem with the current. I will keep the broiler element I ordered until I can confirm that the old element works.
Parts Used:
-
Robert from SANTA MARIA, CA
-
Difficulty Level:Easy
-
Total Repair Time:15 - 30 mins
-
Tools:Nutdriver
Was this instruction helpful to you?
Thank you for voting!
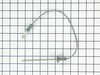
missing meat thermistor
-
John R from Asheville, NC
-
Difficulty Level:Really Easy
-
Total Repair Time:Less than 15 mins
Was this instruction helpful to you?
Thank you for voting!
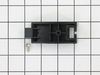
Plastic slide for storage drawer broken.
Took part out of package, looked at instructions and followed them. Required a screwdriver to screw part on to the drawer.
Parts Used:
-
James from Stuart, VA
-
Difficulty Level:Really Easy
-
Total Repair Time:Less than 15 mins
-
Tools:Screw drivers
Was this instruction helpful to you?
Thank you for voting!
Broiler Element burnt out
The actual repair was relatively easy but access to the area in the oven made it a little difficult. Just unscrew 5 screws with a nut driver, unplug the old element, plug in the new element and reinstall the 5 screws. The only thing that made this repair difficult was being able to reach the connectors where you plug in the new element. They are loose wire connectors that don't reach very far out of the element receptacle. It was difficult to hold the end of the connector and plug in the new element because the oven door is in your way. Maybe it is easier if you take the oven door off first?
Parts Used:
-
Cherri from Katy, TX
-
Difficulty Level:A Bit Difficult
-
Total Repair Time:30 - 60 mins
-
Tools:Nutdriver
Was this instruction helpful to you?
Thank you for voting!
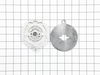
burner flame out of control
-
tom from san pedro, CA
-
Difficulty Level:Really Easy
-
Total Repair Time:30 - 60 mins
-
Tools:Nutdriver, Pliers, Wrench (Adjustable)
Was this instruction helpful to you?
Thank you for voting!
Broil element on top oven was not working
Shut the power off at the electric box.Disconnected coil from roof clips.Pulled wire connection from back wall. Disconnected wire clips, connected new unit.Clipped to roof and turned on" Working fine".
Parts Used:
-
andrew from pittstown, NJ
-
Difficulty Level:Easy
-
Total Repair Time:30 - 60 mins
-
Tools:Socket set
Was this instruction helpful to you?
Thank you for voting!
oven temp. was not what setting called for
turned oven off, pulled oven out from wall, removed back of oven, unscrewed sensor from oven replaced with new sensor, put back on, turned power to oven on, tried oven at 425, my temp. gage and the oven temp matched. a very easy fix.
Parts Used:
-
John from Acme, WA
-
Difficulty Level:Easy
-
Total Repair Time:1- 2 hours
-
Tools:Nutdriver
Was this instruction helpful to you?
Thank you for voting!
The spark module would constantly spark
I ordered the spark module and replaced it which was veru simple, plugged it in and it sparked only now and again. I finally said forget it and it has now stopped sparking but for how long I do not know.
Parts Used:
-
Douglas from Knoxville, TN
-
Difficulty Level:Really Easy
-
Total Repair Time:Less than 15 mins
-
Tools:Screw drivers
Was this instruction helpful to you?
Thank you for voting!
rear drawer supports broke
Directtions were by diagram only, no written instructions. Drawing was small and difficult to follow but the repair itself was easy.
Parts Used:
-
TERRY from RICHMOND, VA
-
Difficulty Level:Really Easy
-
Total Repair Time:15 - 30 mins
-
Tools:Socket set
Was this instruction helpful to you?
Thank you for voting!
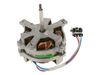
Convection motor making loud clunking noise
Turned off power to range, slid range out from counter, removed convection fan cover, removed convection fan blade, removed back of range panel over convection motor, removed motor, put in new motor, put range panel back on, put new fan blade on front of motor, replaced fan cover, turned power on. No more clunking noise from motor.
Parts Used:
-
Lynette from Rapid City, SD
-
Difficulty Level:Easy
-
Total Repair Time:30 - 60 mins
-
Tools:Nutdriver, Socket set
Was this instruction helpful to you?
Thank you for voting!
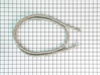
defective oven door seal
pull out defective seal with pliers clean area and press new seal into place making sure the spring clips on seal are completely inserted into door slots push ends of seal into holes in bottom of door
Parts Used:
-
Brenda from Cave Creek, AZ
-
Difficulty Level:Really Easy
-
Total Repair Time:Less than 15 mins
-
Tools:Pliers
Was this instruction helpful to you?
Thank you for voting!
Stove drawer rear guides broken
-
Robert from Shakopee, MN
-
Difficulty Level:Really Easy
-
Total Repair Time:Less than 15 mins
-
Tools:Nutdriver
Was this instruction helpful to you?
Thank you for voting!
Range lower drawer would not stay on track.
-
Richard from Newark, DE
-
Difficulty Level:Really Easy
-
Total Repair Time:Less than 15 mins
-
Tools:Nutdriver
Was this instruction helpful to you?
Thank you for voting!
Broken drawer support
Followed the example picture on the part bag. Anyone could do this, incredibly easy. Took about 4 minutes to install both sides.
Parts Used:
-
Mario from Deer Park, WA
-
Difficulty Level:Really Easy
-
Total Repair Time:Less than 15 mins
-
Tools:Nutdriver
Was this instruction helpful to you?
Thank you for voting!
Oven temperature was low when reading was correct
First of all, the sensor had the proper ohm reading...at ambient temperatures. I suspected the sensor because it would jump in large degree increments over 200°F. From what I read online, the only other part that would cause this was a faulty circuit board. I opted to try the $20 part first vs. the $200 part. It worked. One screw on the back top of the inside is all that holds the sensor in. Pull the wires out and you will find a quick-disconnect. New part had the same connector (thank you). Thread the wires back through the hole and replace the screw. Works like a champion (verified with an independent thermometer. That is all she wrote. I only wish I purchased two, since they don't last that long... 4 years...or so. I just bought the house built in 2007 and empty for a year... and it took 45 minutes to cook a pizza, and even then the bottom dough was light. A house without an oven is like a hot dog without mustard!
Parts Used:
-
Orion from Vancouver, WA
-
Difficulty Level:Really Easy
-
Total Repair Time:Less than 15 mins
-
Tools:Nutdriver
Was this instruction helpful to you?
Thank you for voting!