















IVP85800 Inglis Range - Instructions
Keep searches simple. Use keywords, e.g. "leaking", "pump", "broken" or "fit".
cleaner
just needed clearner for the top of my glass top, the operator was very helpful I received my clearniner in 7 days thank you
Parts Used:
-
Mary from Duarte, CA
-
Difficulty Level:Really Easy
-
Total Repair Time:Less than 15 mins
2 of 5 people
found this instruction helpful.
Was this instruction helpful to you?
Thank you for voting!
I snapped a bolt on the main power terminal block when connecting the pigtail.
Removed the small metal panel covering the main power terminal in back of the electric range. Removed the nuts holding the red, white and black electrical wires from the range using the appropriate socket (there will be two nuts on each bolt end). Removed the two screws holding the main power terminal block with appropriate screw driver. Connect the new main power terminal block to the range using the two screws. Reconnect the red, black and white electrical wires coming from the range using one nut for each wire. IMPORTANT: do no over tighten the nuts because the bolts could snap. Reconnect the pigtail and secure the small metal panel covering the main power panel.
Parts Used:

-
Frank from Palm Coast, FL
-
Difficulty Level:Easy
-
Total Repair Time:15 - 30 mins
-
Tools:Screw drivers, Socket set
3 of 8 people
found this instruction helpful.
Was this instruction helpful to you?
Thank you for voting!
Light would not light

-
Frank from LEBANON, VA
-
Difficulty Level:Easy
-
Total Repair Time:15 - 30 mins
-
Tools:Pliers
1 of 2 people
found this instruction helpful.
Was this instruction helpful to you?
Thank you for voting!
slides on lower drawer were broken
I used a phillips screwdriver and replaced the part with one screw.Very easy and replaced my lower drawer under my oven,it tool about three to five minutes at the most and my drawer works fine now.Thanks for the instruction video on line, it really helped.
Parts Used:

-
Leona R from Louisville, KY
-
Difficulty Level:Really Easy
-
Total Repair Time:Less than 15 mins
-
Tools:Screw drivers
1 of 3 people
found this instruction helpful.
Was this instruction helpful to you?
Thank you for voting!
burned oven bulb
The hardest part was taking out original light bulb because screws on shield where hard to unscrew after all this years . The old bulb vent out leaving neck in socket. It took narrow electrical pliers to get neck out .The generic appliance bulb did not fit and had aluminum neck ,not recommended for brass sockets in ovens.Putting new light bulb in was not the problem.
Parts Used:

-
Ivanka from Atlantra, GA
-
Difficulty Level:Really Easy
-
Total Repair Time:30 - 60 mins
-
Tools:Pliers, Screw drivers
3 of 9 people
found this instruction helpful.
Was this instruction helpful to you?
Thank you for voting!
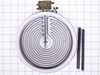
the burner didn't work and digital part too
I used the digital multimeter for measure the voltage in the burner and in the digital part,I saw the electric cables
Parts Used:
-
Eduardo from Lenexa, KS
-
Difficulty Level:Easy
-
Total Repair Time:30 - 60 mins
-
Tools:Wrench set
8 of 24 people
found this instruction helpful.
Was this instruction helpful to you?
Thank you for voting!
oven light not working
replaced light socket but did not repair problem. must have burned the motherboard.
pleased with service from your company.
pleased with service from your company.
Parts Used:
-
Richard from Gaylord, MI
-
Difficulty Level:A Bit Difficult
-
Total Repair Time:30 - 60 mins
-
Tools:Nutdriver, Screw drivers
2 of 6 people
found this instruction helpful.
Was this instruction helpful to you?
Thank you for voting!
Trim piece on the botom of the oven was chipped in three places
I used the allen wrenches to block the hinges, removed the oven door and used the kitchen counter for a work station. I removed the trim piece at the bottom which released the side trim and oven glass front, and then reversed the procedure. It took more time to clean things than to do the exchange. My only issue is with Fed Ex who delived the first trim piece bent in the middle inside a crushed box. Part Select had another part sent the same day after I called them.
Parts Used:

-
Terry from Maple Valley, WA
-
Difficulty Level:Easy
-
Total Repair Time:30 - 60 mins
-
Tools:Screw drivers
0 of 1 people
found this instruction helpful.
Was this instruction helpful to you?
Thank you for voting!
door glide broken
-
David from Port Orange, FL
-
Difficulty Level:Really Easy
-
Total Repair Time:Less than 15 mins
-
Tools:Screw drivers
0 of 1 people
found this instruction helpful.
Was this instruction helpful to you?
Thank you for voting!
oven light burnt out
1. Unscrewed glass cover on bulb
2. Removed old bulb
3. Screwed in new bulb
4. Replaced glass cover
5. Mixed drink & baked cupcakes
2. Removed old bulb
3. Screwed in new bulb
4. Replaced glass cover
5. Mixed drink & baked cupcakes
Parts Used:
-
William from Schwenksville, PA
-
Difficulty Level:Easy
-
Total Repair Time:Less than 15 mins
3 of 10 people
found this instruction helpful.
Was this instruction helpful to you?
Thank you for voting!
light bulb went out in my oven
My husband took the plastic cover off and took out old bulb and screwed in the new one. Then put the cover back on.
Parts Used:
-
Janet from Ada, MI
-
Difficulty Level:Really Easy
-
Total Repair Time:Less than 15 mins
2 of 7 people
found this instruction helpful.
Was this instruction helpful to you?
Thank you for voting!
replaced oven lightbulb
-
peggy ann from forest city, NC
-
Difficulty Level:Really Easy
-
Total Repair Time:Less than 15 mins
0 of 1 people
found this instruction helpful.
Was this instruction helpful to you?
Thank you for voting!
Oven not heating properly
Unplug the oven, pull it out and empty the inside of the oven. The bottom heating element just unscrews from the back of the oven with two screws. Pull it out from the back of the oven and gently pull off the electrical connections. Reattach them to the new heating element, put it back into the oven and reattach the screws. Turn the oven on and check to make sure that the new heating element is working. Put everything back in the oven and you're done!
Parts Used:

-
Matthew from Greenville, OH
-
Difficulty Level:Really Easy
-
Total Repair Time:Less than 15 mins
-
Tools:Screw drivers
0 of 1 people
found this instruction helpful.
Was this instruction helpful to you?
Thank you for voting!
Light burned out in upper oven
-
Shirley from Las Vegas, NV
-
Difficulty Level:Really Easy
-
Total Repair Time:Less than 15 mins
0 of 1 people
found this instruction helpful.
Was this instruction helpful to you?
Thank you for voting!
Inside Light would not work
Turned off CB for the oven,Remove the oven from the cabinet , remove the back of the oven, replaced the light Assembly. turned on CB for the oven, tested the light. and truned off the CB and replace the back and reinstalled the oven in the cabinet.
Parts Used:
-
Dan from Caddo Mills, TX
-
Difficulty Level:Really Easy
-
Total Repair Time:15 - 30 mins
-
Tools:Nutdriver
2 of 7 people
found this instruction helpful.
Was this instruction helpful to you?
Thank you for voting!