















IVE82303 Inglis Range - Instructions
Keep searches simple. Use keywords, e.g. "leaking", "pump", "broken" or "fit".
Both outside door handles turned very beige
Everything worked perfectly---thanks to the suggestion of your call center agent. She suggested that since the replacement door handles were no longer available, I should consider repainting them--it worked like a charm. Please tell her she was a life saver. We rent that house in Fl and my returning tenants had complained about the discoloring refer handles. Thank you
Parts Used:
-
Howard from Boynton Beach, FL
-
Difficulty Level:Easy
-
Total Repair Time:30 - 60 mins
-
Tools:Nutdriver
23 of 72 people
found this instruction helpful.
Was this instruction helpful to you?
Thank you for voting!
Damaged Socket When Removing Bulb Base
This is a built-in oven, so the biggest problem was figuring out how to remove it from the cabinet. The solution turned out to be removing the cooktop above it and unscrewing two screws that connected the oven to the inside of the cabinet. The other problem was removing BOTH metal backs from the oven. The first one was easy. The second one wasn't. The old socket was recessed behind the second back, making it virtually impossible to access the metal "wings" that hold it in place, so I ended up pulling out the socket assembly from inside the oven with pliers.
Parts Used:

-
Charles from Oceanside, CA
-
Difficulty Level:A Bit Difficult
-
Total Repair Time:30 - 60 mins
-
Tools:Pliers, Screw drivers
Was this instruction helpful to you?
Thank you for voting!
The original trim rusted
I did the repair by myself. I used masking tape to hold the side trim in place. It was pretty easy and it looks great.
Parts Used:

-
Diane from Elyria, OH
-
Difficulty Level:Easy
-
Total Repair Time:30 - 60 mins
-
Tools:Screw drivers
Was this instruction helpful to you?
Thank you for voting!
Broil heater exploded. The corner was burned/ corroded.
Unplug power. Remove panel on the back. Unplug heater.From front remove 3 screws and remove heater. Installed new heater. On the back restored connections - squized the lugs to have better connection. Put panel back. Plug the power and see if the coil get red. It looked good. Used oven few times it works fine. Difficoult part is to clean oven all around from accumulated grease. First repair for this stove, most of the time spend on figuring out what to open, no instructions.
Parts Used:

-
Amadeusz from Simi Valley, CA
-
Difficulty Level:Really Easy
-
Total Repair Time:30 - 60 mins
-
Tools:Pliers, Screw drivers
Was this instruction helpful to you?
Thank you for voting!
Bake element replacement
Keep in mind that I am a 65 year old woman who has replaced bake elements on a much older range that was hard wired. I viewed the video so I knew what to expect. The job would have taken no more than 15 minutes if the retaining screws had not been stuck. After several doses of WD40, I finally managed to get them loose but only then after I had tried every screw driver in the house. I clamped the leads with vise grips to keep them from slipping back in the stove. Unplugging the old broken element and plugging in the new one took maybe a couple of minutes. The retaining screws went back in without a problem.
Parts Used:

-
Mary from Odenville, AL
-
Difficulty Level:A Bit Difficult
-
Total Repair Time:30 - 60 mins
-
Tools:Pliers, Screw drivers
Was this instruction helpful to you?
Thank you for voting!
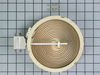
Small Surface Burner Was not Working
Repair video was very helpful. I have removed the screws on both sides of the appliance under the surface plate, in the front. The Owen door has to be open for that. Then I have pulled the surface plate for a little space to disconnect the two connectors. Turned the surface plate over on the kitchen table, removed the 6 screws. Turned the burners assembly over and removed the small burner by disengaging the two clips. I have removed the 2 clops from the burned burner and assembled it to the new burner. I have placed the burner and engaged the 2 clips with a crownose players. I have removed one electrical connecter at a time and connected to the new burner. I have turned over the assembly over the glass plate and assembled the back cover with 6 screws. Put the surface plate on the range and connected the 2 connectors, pushed back, lined it up with the 2 screw holes in front of the range on bot sides and put the 2 screws in and Finished.
Parts Used:
-
Tevfik from Naugatuck, CT
-
Difficulty Level:Really Easy
-
Total Repair Time:15 - 30 mins
-
Tools:Screw drivers
Was this instruction helpful to you?
Thank you for voting!
"Hot burner" Light always On
It's easier with two people.
1 - Turn the breaker for the range to OFF
2 - Verify power is off by testing the burners and lights
3 - Remove front two screws above oven door jamb
4 - Lift the top and prop it up with the spoon, or have your helper hold it.
5 - Loosen the screw at the rear of the bracket that holds the elements against the glass top (front and rear are held by the same retainer)
6 - Remove the bad element by sliding it sideways from the retainer. Do not disconnect things yet.
7 - The burner has numbers around the edge. Move brackets from old element to new one, matching the numbers. Then move wiring to new element. New burner may have a single connector where old one had 2 and a jumper. If so, ignore jumper.
8 - Slide new element under bracket and reinstall the screw.
9 - Lower the range top and re-install the screws.
10 - Turn on power and test.
1 - Turn the breaker for the range to OFF
2 - Verify power is off by testing the burners and lights
3 - Remove front two screws above oven door jamb
4 - Lift the top and prop it up with the spoon, or have your helper hold it.
5 - Loosen the screw at the rear of the bracket that holds the elements against the glass top (front and rear are held by the same retainer)
6 - Remove the bad element by sliding it sideways from the retainer. Do not disconnect things yet.
7 - The burner has numbers around the edge. Move brackets from old element to new one, matching the numbers. Then move wiring to new element. New burner may have a single connector where old one had 2 and a jumper. If so, ignore jumper.
8 - Slide new element under bracket and reinstall the screw.
9 - Lower the range top and re-install the screws.
10 - Turn on power and test.
Parts Used:
-
Stephanie from Phoenix, AZ
-
Difficulty Level:Easy
-
Total Repair Time:15 - 30 mins
-
Tools:Screw drivers
Was this instruction helpful to you?
Thank you for voting!
E-2 F-3 codes..Oven inop w/trying to bake.Beeps @ start attempt.
Contrary to instructions(go thru front of oven) I had to pull out the range, remove two (2) screws from back chassis. At this point you pull out the connector, snap in new, reverse proceedure. Very simple. Hardest part is cleaning up debris generated by moving range.
Parts Used:

-
Dave from Titusville, FL
-
Difficulty Level:Really Easy
-
Total Repair Time:15 - 30 mins
-
Tools:Screw drivers
Was this instruction helpful to you?
Thank you for voting!
1200 watt r/rear burner element has an opening in the elementg
Shut off 220 volt power to range. Removed two screws for cooktop element access. Used needle-nose pliers to remove power (2) and control (2) lugs and wires. Remove defective cooking element module, replaced. Reverse steps for new unit.
Parts Used:
-
Jayson from Cape Coral, FL
-
Difficulty Level:Really Easy
-
Total Repair Time:15 - 30 mins
-
Tools:Pliers, Screw drivers
Was this instruction helpful to you?
Thank you for voting!
Surface element with limiter 6", 1200W was burned out
Removed the two screws, on both sides of the oven wall corner. Gently lift the front end of the glass top and pull towards me and disconnect the two electrical sockets. Carried the glass top assembly on the kitchen table and turned upside down. Removed the six screws. Removed the assembly from the glass top. Turn the top burners assembly over and disengaged the two clips of the burned out burner from the assembly plate. Transferred the two clips to the new burner on the exact locations like the old ones were. I have placed the new burner on the location and snapped the clips on the slots. Removed the connectors one piece at a time and connected to the new burner. Reversed the previous disassembly and all was done Works like a charm. Thank you all for assisting me in providing the necessary parts and video instructions. It was a lot cheaper than to buy a new range.
Parts Used:
-
Tevfik from Naugatuck, CT
-
Difficulty Level:Really Easy
-
Total Repair Time:15 - 30 mins
-
Tools:Pliers, Screw drivers
Was this instruction helpful to you?
Thank you for voting!
no problem
-
clarence from norwalk, CT
-
Difficulty Level:Really Easy
-
Total Repair Time:15 - 30 mins
-
Tools:Pliers, Screw drivers
Was this instruction helpful to you?
Thank you for voting!
The left rear burner had stopped heating.
1. I ordered a replacement heater element from Parts Select, which arrived in just 3 days at my home. 2. I turned off the main circuit breaker to the range. 3. There are two small sheet metal screws inside the top left and right side of the oven door frame which need to be removed first in order to lift and remove the burner top from the range. 4. After lifting and pulling the burner top toward me about 6 inches, I unplugged the left and right burner assembly wiring harness connectors. 5. I lifted the burner top assembly off the stove and turned it upside down an a table. 6. There are six sheet metal screws that need to be removed to allow the sheet metal panel holding the heater assemblies to be lifted off and then also set upside down on a table top. All five burner elements are now visible. 7. Disconnect the slip-on electrical connectors to the specific heater assembly that is defective. 8. Unscrew the three small sheet metal screws from the three spring clips that support the heater assembly on the sheet metal panel; re-attach the spring clips to the new heater assembly. NOTE: Either memorize or record the position numbers that are cast into the ceramic housing of the burner to replace the new burner in exactly the same position. 9. Insert the three spring clips back into the sheet metal panel where the old, defective burner assembly had been removed. 10. Re-connect the slip-on wire clips to the new heater assembly in the same position as they were removed from the defective heater assembly. 11. Turn over the sheet metal panel with the burner assemblies attached and replace the sheet metal screws holding the panel to the stove top. 12. Turn over the stove top assembly and set back onto the range allowing space to reach to the back and re-connect the polarized connectors to the left and right side burners. 13. Slide the stove top back to the rear and carefully lower the front edge back down with the two metal tabs inserted back into the oven door frame. 14. Re-install the two sheet metal screws that hold down the stove top. 15. Turn on the main circuit breaker to the range. 16. Carefully test the new heater assembly by turning the range control knob to LO heat and watch for the stove top burner to momentarily turn red with heat. 17. Turn off the range control knob. 18. You are finished. It was a very easy installation.
Parts Used:
-
Louis from Morgan, TX
-
Difficulty Level:Easy
-
Total Repair Time:15 - 30 mins
-
Tools:Screw drivers
Was this instruction helpful to you?
Thank you for voting!
Side trim broke
take the 2 screws that hold the handle on out...watch the glass front and the side trims because the handle holds them on. Take the glass out then remove the side trims. Replace the side trims holding the glass in place with 2 pieces of masking tape om each side then install the handle with the 2 screws and remove the masking tape.
Parts Used:
-
Paul from Adamsville, TN
-
Difficulty Level:Easy
-
Total Repair Time:15 - 30 mins
-
Tools:Screw drivers
Was this instruction helpful to you?
Thank you for voting!
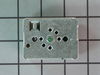
8 Inch electric burner not getting hot
I determined the problem by swapping the 8 inch burner with a 6 inch burner. the 8 inch got hot when connected to the 6 inch wire harness. This told me that the 8 inch burner was good. The 6 inch failed to get hot so I determined the next logical thing was the power to the 8 inch burner. I used a multi meter to determine that power was getting into the control unit but no voltage was getting out. The controller was bad. I ordered a new controller and after unplugging the stove, replaced the controller in about 10 minutes. (Critical part of repair is to unplug unit from wall -220 volts!)
Parts Used:
-
John from Dover, NJ
-
Difficulty Level:Easy
-
Total Repair Time:15 - 30 mins
-
Tools:Pliers, Screw drivers
Was this instruction helpful to you?
Thank you for voting!
oven element burnt out
unscrew two screws..took old element out, put perfect fit new element in,screw two screws back in.
Parts Used:
-
JoAnne from Harrison, AR
-
Difficulty Level:Really Easy
-
Total Repair Time:15 - 30 mins
-
Tools:Screw drivers
Was this instruction helpful to you?
Thank you for voting!