















IVE82302 Inglis Range - Instructions
Keep searches simple. Use keywords, e.g. "leaking", "pump", "broken" or "fit".
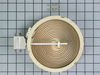
Element burn. Not working.
Element was sent by buyer, As they recommended, when model of stove given to them. It was upper right rear. When element came. First took off old element. ...Match both element , new element did not look exactly the same, small variation. It did not come on.. I moved old element from left side to right side . Old element worked on both side .. tried new element on left side also.. still didn't work.. so I called right away and explained.. new element did not work.. not defective, but, just wasn't the right one.. I had a specialist came and check it out also. I was told wrong element.
Parts Used:
-
Marc from SUNRISE, FL
-
Difficulty Level:Really Easy
-
Total Repair Time:Less than 15 mins
-
Tools:Pliers, Screw drivers
2 of 2 people
found this instruction helpful.
Was this instruction helpful to you?
Thank you for voting!
Sparks flying out of the oven, broiler element melting
First Things first, unplug unit, remove rear cover with Phillips head screwdriver, disconnect, wires from broiler element which is the top, one, open oven, unscrew top screws first, then two at the back, wiggle out element, then reverse Steps , test repair before putting cover back on. Then ta-da, you saved yourself a $300. Service call to the appliance repair guy.
Parts Used:

-
corey from SHAKER HEIGHTS, OH
-
Difficulty Level:Really Easy
-
Total Repair Time:15 - 30 mins
-
Tools:Screw drivers
2 of 2 people
found this instruction helpful.
Was this instruction helpful to you?
Thank you for voting!
Dual burner would go to highn heat.
Watched video & did just guy in video did. Very easy job & the burner works like new.
Parts Used:

-
LOUIS C from GRAND JCT, CO
-
Difficulty Level:Really Easy
-
Total Repair Time:15 - 30 mins
-
Tools:Screw drivers
2 of 2 people
found this instruction helpful.
Was this instruction helpful to you?
Thank you for voting!
Paint peeling from strip

-
Myron from Punta Gorda, FL
-
Difficulty Level:Easy
-
Total Repair Time:15 - 30 mins
-
Tools:Nutdriver
3 of 5 people
found this instruction helpful.
Was this instruction helpful to you?
Thank you for voting!
Bake element was broken
Remove the old part and install the new part.
Parts Used:

-
Alexander from LINCOLN, NE
-
Difficulty Level:Really Easy
-
Total Repair Time:30 - 60 mins
-
Tools:Pliers, Screw drivers
2 of 2 people
found this instruction helpful.
Was this instruction helpful to you?
Thank you for voting!
Bottom element stopped working
Unplug the stove from outlet so no power going to appliance. Had to use wd on screws to help loosen
Little bit of effort to loosen. Took new element from package. Replaced screws just tight donot over tighten. Plug stove into outlet turned on. Did a automatic clean. Oven clean and baked cake later I am back in business and 63 years. Was quote 240.00 to from a local repair person. When using wd make sure you wipe any drip from before turning on oven.
Little bit of effort to loosen. Took new element from package. Replaced screws just tight donot over tighten. Plug stove into outlet turned on. Did a automatic clean. Oven clean and baked cake later I am back in business and 63 years. Was quote 240.00 to from a local repair person. When using wd make sure you wipe any drip from before turning on oven.
Parts Used:
-
ArLinda from ALTON, IL
-
Difficulty Level:Really Easy
-
Total Repair Time:30 - 60 mins
-
Tools:Screw drivers
2 of 2 people
found this instruction helpful.
Was this instruction helpful to you?
Thank you for voting!
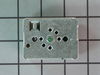
Burner did not always reduce heat when temp. Was lowered.
My husband unscrewed the bad switch and replaced with the new one.
Parts Used:
-
Annie S from RIDGEVILLE, SC
-
Difficulty Level:Really Easy
-
Total Repair Time:15 - 30 mins
-
Tools:Screw drivers
2 of 3 people
found this instruction helpful.
Was this instruction helpful to you?
Thank you for voting!
the oven temperature was not working right. I installed a new oven sensor. Works get now

-
Rosalind from APOLLO, PA
-
Difficulty Level:Very Easy
-
Total Repair Time:15 - 30 mins
-
Tools:Screw drivers
3 of 6 people
found this instruction helpful.
Was this instruction helpful to you?
Thank you for voting!
temp level uneven
-
Paul from HARMONY, MN
-
Difficulty Level:Very Easy
-
Total Repair Time:15 - 30 mins
2 of 3 people
found this instruction helpful.
Was this instruction helpful to you?
Thank you for voting!
Oven would not heat up.
Unplugged the range. Opened the oven door and took out the shelves. Took the right screw out, but had trouble getting the left one out do to the age of the range. Unhooked the two wires and took the element out. Put the new one in and hooked up the two wires. Attached the two screws and checked to see that the element laid flat and then tighten screws. Closed the door and plugged the range back in and turned the oven on and it worked perfect.
Parts Used:
-
Johnie from PARKERSBURG, WV
-
Difficulty Level:Really Easy
-
Total Repair Time:15 - 30 mins
-
Tools:Screw drivers
1 person
found this instruction helpful.
Was this instruction helpful to you?
Thank you for voting!
Coil shorted out.
Removed cooktop, wiring and coil. Marked where wires went on limiter
tabs. Ordered coil 1200 Watt, received a 1500 one. Sent back to PS with prepaid shipping label {great}. New one had a different limiter tab arrangement. The instructions included warned this but doesn't tell you where to put the wiring. Instructions say to remove the old limiter and put it on the new coil but this can not be physically be done plus who would want an old limiter on a new coil.
Found a YOU TUBE video on how to test and place wires on limiter switches which shows the number letter sequence on the ceramic part. Maybe PS will put that info in their instructions. Coil works great !!
tabs. Ordered coil 1200 Watt, received a 1500 one. Sent back to PS with prepaid shipping label {great}. New one had a different limiter tab arrangement. The instructions included warned this but doesn't tell you where to put the wiring. Instructions say to remove the old limiter and put it on the new coil but this can not be physically be done plus who would want an old limiter on a new coil.
Found a YOU TUBE video on how to test and place wires on limiter switches which shows the number letter sequence on the ceramic part. Maybe PS will put that info in their instructions. Coil works great !!
Parts Used:
-
James from HILTON, NY
-
Difficulty Level:A Bit Difficult
-
Total Repair Time:15 - 30 mins
-
Tools:Nutdriver, Pliers
1 person
found this instruction helpful.
Was this instruction helpful to you?
Thank you for voting!
element not working properly
Remove 2 screws inside oven holding element . Remove screws holding back panel. Plug wires (2) into new element.Install back panel . Done.
Parts Used:
-
PHILIP from NORTH PORT, FL
-
Difficulty Level:Really Easy
-
Total Repair Time:15 - 30 mins
-
Tools:Screw drivers
1 person
found this instruction helpful.
Was this instruction helpful to you?
Thank you for voting!
oven light kept burning out instantly
Replaced the oven light with a new one but it burnt out as soon as I turned it on. Therefore I decided a new socket may help.
My whirlpool apparently has the old style socket which is pictured in partselect part #PS12584564. The old style socket has to two metal arms that retain it against the metal reflector.
The part that will come (#PS12584564) however is the new style that whirlpool has changed to, apparently. It is not as pictured. The socket and the reflector have different retention devices.
I used screw drivers to bend the two metal arms away to release the socket. Then I had to use allen wrenches to bend the reflector's retention tabs away.
Once I had the old socket, reflector, and lens replaced I just followed the video on partselect for part #PS12584564
My whirlpool apparently has the old style socket which is pictured in partselect part #PS12584564. The old style socket has to two metal arms that retain it against the metal reflector.
The part that will come (#PS12584564) however is the new style that whirlpool has changed to, apparently. It is not as pictured. The socket and the reflector have different retention devices.
I used screw drivers to bend the two metal arms away to release the socket. Then I had to use allen wrenches to bend the reflector's retention tabs away.
Once I had the old socket, reflector, and lens replaced I just followed the video on partselect for part #PS12584564
Parts Used:

-
David from ENID, OK
-
Difficulty Level:Easy
-
Total Repair Time:15 - 30 mins
-
Tools:Screw drivers
1 person
found this instruction helpful.
Was this instruction helpful to you?
Thank you for voting!
Element had burned out, and the drawer glides were broken .

-
Allen from ASHLAND, PA
-
Difficulty Level:Very Easy
-
Total Repair Time:15 - 30 mins
-
Tools:Screw drivers
1 person
found this instruction helpful.
Was this instruction helpful to you?
Thank you for voting!
Back left burner went out
I found on youtube Also we marked each wire with masking tape 1A and 1B, 2A and 2B. The wires were the same color.
Parts Used:
-
Jane from BRYAN, TX
-
Difficulty Level:Really Easy
-
Total Repair Time:30 - 60 mins
-
Tools:Socket set
1 person
found this instruction helpful.
Was this instruction helpful to you?
Thank you for voting!