















HTT18EBMDRWW Hotpoint Refrigerator - Instructions
Keep searches simple. Use keywords, e.g. "leaking", "pump", "broken" or "fit".
Interior Light did not go on due to faulty switch
I ordered two switches, replaced both with a knife in 10 minutes. Interior light works, thanks.
Parts Used:

-
Robert from Coto de Caza, CA
-
Difficulty Level:Really Easy
-
Total Repair Time:Less than 15 mins
4 of 6 people
found this instruction helpful.
Was this instruction helpful to you?
Thank you for voting!
The unit cycles but does not achieve proper temperature
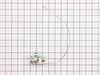
Remove power from the unit. With short length #2 Phillips loosen and remove the two(2) screws on the control panel located center top of the refrigeration area. Slide the control panel back about 1/2 inch and allow it to dangle from its wiring harness. Pinch the locking tab on the harness connector with one hand and use the other hand to separate the two sides. A little force is required. Remove the control panel from the refrigerator and shut the refrigerator door. Examine and note the routing of the temperature probe (Silver colored flexible wire) take a picture for later reference. Remove the old and replace with new unit. route temperature probe like the replaced unit. Reverse the steps and reinstall the control panel. It is a good idea to also purchase and replace the defrost timer.
Parts Used:
-
Anthony from COVINGTON, LA
-
Difficulty Level:Very Easy
-
Total Repair Time:Less than 15 mins
-
Tools:Screw drivers
3 of 3 people
found this instruction helpful.
Was this instruction helpful to you?
Thank you for voting!
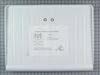
The bottom shelf that covers the crisper drawers was cracked.
This was so easy. Got the model number off the refrigerator door. Internet searched and found this website. Ordered the part. Waited maybe 3-4 days for it to arrive. Opened the box, open refrigerator door remove old broken part, install new part and reinstall the drawers. Piece of cake!! So glad I didn’t have to replace a perfectly good refrigerator. Thank you.
Parts Used:
-
Joseph from BRENTWOOD, CA
-
Difficulty Level:Very Easy
-
Total Repair Time:Less than 15 mins
3 of 3 people
found this instruction helpful.
Was this instruction helpful to you?
Thank you for voting!
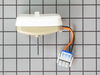
Fan not working
Took out old put new in. Watched a u tube, no problems
Parts Used:

-
joan from STERLING HTS, MI
-
Difficulty Level:Easy
-
Total Repair Time:1- 2 hours
-
Tools:Screw drivers, Socket set
3 of 3 people
found this instruction helpful.
Was this instruction helpful to you?
Thank you for voting!
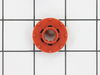
intermittent loud screeching,,humming sound
removed food from freezer section removed fan guard, partially remove ice maker, remove back panel, then fan assembly,disaasembled fan motor from brackets, fan from motor, grommet from bracket. assembled grommet in bracket, fan blade on motor, motor in bracket, fan assembly back in compartment, installed back panel,then ice maker, replaced fan guard and food. no more noise.
Parts Used:
-
LARRY. T from KNOXVILLE, TN
-
Difficulty Level:Easy
-
Total Repair Time:30 - 60 mins
-
Tools:Nutdriver, Pliers, Screw drivers
3 of 3 people
found this instruction helpful.
Was this instruction helpful to you?
Thank you for voting!
Compressor would randomly not turn on. Fridge too warm sometimes.
Replace temperature control. That fixed it. Also, removed plastic bag obstructing air vent in freezer which added performance. Fridge works good now.
Parts Used:
-
Mackenzie from Williston, ND
-
Difficulty Level:Really Easy
-
Total Repair Time:30 - 60 mins
-
Tools:Screw drivers
3 of 4 people
found this instruction helpful.
Was this instruction helpful to you?
Thank you for voting!
switchlight on my refrigerator was not working
I found instructions on the web about how to do this repair, so I ordered the part with confidence. But the instructions simply said "pull out the old switchlight". That was actually somewhat difficult as the clip on the side intended to hold the part in was stubborn. I eventually used a utility to slice off the clip. From that point, it was just a matter of plugging in the new switchlight , which was very simple.
Parts Used:
-
Eileen from Coto de Caza, CA
-
Difficulty Level:A Bit Difficult
-
Total Repair Time:30 - 60 mins
-
Tools:Pliers
5 of 10 people
found this instruction helpful.
Was this instruction helpful to you?
Thank you for voting!
Fridge never cuts off.freeze everything inside of fridge.
To remove the temp sensor.2 Phillip head screws not remove the cover inside fridge .the temp control knob cover.removed that and unplugged switch.installed new switch.reinstalled cover.
Parts Used:
-
Henry from DOUGLASVILLE, GA
-
Difficulty Level:Very Easy
-
Total Repair Time:Less than 15 mins
-
Tools:Screw drivers
3 of 4 people
found this instruction helpful.
Was this instruction helpful to you?
Thank you for voting!
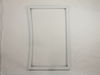
Replace the door gasket on the freezer door of my top-freezer refrigerator
Removed the door by removing the two screws holding it on. Do not try to do this repair with the door attached. Easily removed the old gasket. Getting the new one on the door was EXTREMELY difficult. I couldn't do it. After 90 minutes, I gave up and called my appliance repairman. When he arrived, he and I worked together to get the new gasket on the door. It took 2 sets of hands to do this. It still took us about 40 minutes. My repairman had a few choice words about the design of the system holding the gasket on the door. Ditto for me. So the cost of my repair was doubled because I had to pay the repairman to help me attach the new gasket. I should have just bought a new fridge.
Parts Used:
-
Scott from NAPLES, FL
-
Difficulty Level:Very Difficult
-
Total Repair Time:1- 2 hours
-
Tools:Socket set
3 of 4 people
found this instruction helpful.
Was this instruction helpful to you?
Thank you for voting!
Old cover was cracked and needed replaced
The repair only required removing nthe old cover and installing the new one. What I was really surprised about is the time for delevery. I ordered the part on Friday morning around 11 AM and it was delevered by Fed Ex at 8:30 AM on Saturday morning. I am not sure how many locations they have, but this must have been close to Harrisburg, Pa.
Parts Used:
-
Richard from Harrisburg, PA
-
Difficulty Level:Really Easy
-
Total Repair Time:Less than 15 mins
3 of 4 people
found this instruction helpful.
Was this instruction helpful to you?
Thank you for voting!
Could not adjust temperature
-
Boyd from Blaine, WA
-
Difficulty Level:Really Easy
-
Total Repair Time:15 - 30 mins
-
Tools:Pliers, Screw drivers
3 of 4 people
found this instruction helpful.
Was this instruction helpful to you?
Thank you for voting!
Freezer was not freezing food.
Inspected freezer because food was not freezing, getting cold, but not freezing. Noticed fan was not blowing air, but making a little motor noise, like it's trying to turn. Removed cover panel, and found the fan blade rubbing on the panel, fan shaft was worn out and very loose, wobley. That told me the fan needed to be replaced. Found part on the GE Partselect website and ordered the parts via the website order process. This was easy. The parts were shipped quickley and were at my front door the next day. Couldn't believe it. The actual process was very easy: Remove cover, remove bracket holding fan motor, remove and replace motor, re-assemble parts. About 20-25 minutes from start to finish. Freezer is working like it's suppose to.
Parts Used:
-
Steve from Ridgecrest, CA
-
Difficulty Level:Really Easy
-
Total Repair Time:15 - 30 mins
-
Tools:Nutdriver, Screw drivers
3 of 4 people
found this instruction helpful.
Was this instruction helpful to you?
Thank you for voting!
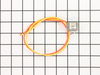
Freezer is too hot
Open the freezer panel which attached with screwws and locate the defrost thermmostate behind the back pannel. Cut off the old thermostat wires and connect the new wires.
Parts Used:
-
David from New York, NY
-
Difficulty Level:Really Easy
-
Total Repair Time:15 - 30 mins
-
Tools:Screw drivers
4 of 8 people
found this instruction helpful.
Was this instruction helpful to you?
Thank you for voting!
The light inside the oven had burned out
0. As a safety precaution, unplug the range or hit the relevant fuse breaker before you start. You might also want to grab a flashlight. Definitely do not try to do this while the oven is hot.
1. Pinch the wire over the light bulb cap to remove it. This is inside the oven at the back.
2. Pop off the hemispherical glass cap.
3. Unscrew the old light bulb, and screw the new light bulb in its place.
4. Put the cap back.
5. Secure the cap by putting the wire back in its slots on the cap.
No tools needed, the cap is just held in place with pressure from the wire.
1. Pinch the wire over the light bulb cap to remove it. This is inside the oven at the back.
2. Pop off the hemispherical glass cap.
3. Unscrew the old light bulb, and screw the new light bulb in its place.
4. Put the cap back.
5. Secure the cap by putting the wire back in its slots on the cap.
No tools needed, the cap is just held in place with pressure from the wire.
Parts Used:

-
Catherine from SEATTLE, WA
-
Difficulty Level:Very Easy
-
Total Repair Time:Less than 15 mins
3 of 5 people
found this instruction helpful.
Was this instruction helpful to you?
Thank you for voting!
Change out evaporator fan motor
Very easy. Bought a 6-1 screw driver for 1/4” and 5/16” nut drivers ends. 4 screws to remove panel that covers evaporator coil and motor. Remove the foam piece 2 screws, unplug wire plastic clip and motor come off. 2 screws to remove from bracket, replace motor. Put back together and reinstall. Watch video - it helped but very easy to do even if you don’t watch common sense is all you need.
Parts Used:
-
David from BELLFLOWER, CA
-
Difficulty Level:Really Easy
-
Total Repair Time:15 - 30 mins
-
Tools:Nutdriver, Pliers, Screw drivers
2 of 2 people
found this instruction helpful.
Was this instruction helpful to you?
Thank you for voting!