















GX2FHDXVT00 Whirlpool Refrigerator - Instructions
Keep searches simple. Use keywords, e.g. "leaking", "pump", "broken" or "fit".
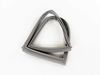
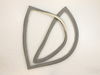
Door gaskets coming apart
Wife did it all by herself & I'am proud of her!!!!
Parts Used:
-
Edward from GRAND FORKS, ND
-
Difficulty Level:Easy
-
Total Repair Time:15 - 30 mins
-
Tools:Nutdriver, Screw drivers
12 of 12 people
found this instruction helpful.
Was this instruction helpful to you?
Thank you for voting!
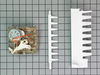
The ice maker stopped working
First I unplugged the unit, then I popped off the cover to the icemaker electronics. Removed 4 screws, pulled out the broken electronic panel, and replaced with the new one. Returned the screws and cover. The next moring the ice bin was full.
This must have saved me $300, and the inconvernience of waiting around for the repair man. He would have made two trips since he would never have had this part with him.
This must have saved me $300, and the inconvernience of waiting around for the repair man. He would have made two trips since he would never have had this part with him.
Parts Used:
-
Duncan from Larchmont, NY
-
Difficulty Level:Really Easy
-
Total Repair Time:Less than 15 mins
-
Tools:Screw drivers
16 of 25 people
found this instruction helpful.
Was this instruction helpful to you?
Thank you for voting!
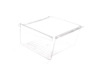
didn't shut crisper pan and cracked pan with refrig door
-
Karen from Ontario, NY
-
Difficulty Level:Really Easy
-
Total Repair Time:Less than 15 mins
13 of 16 people
found this instruction helpful.
Was this instruction helpful to you?
Thank you for voting!
Replace freezer door gasket
Removed door from slide bars with small nutdriver, pulled old gasket out of retaining slot, cleaned slot & area around it, pressed new gasket into place with fingers, relatively easy. Used hair dryer to make sure gasket was formed properly and contacted fridge unit eavenly.
Parts Used:

-
Thaddeus from PHILA, PA
-
Difficulty Level:Easy
-
Total Repair Time:30 - 60 mins
-
Tools:Nutdriver
12 of 13 people
found this instruction helpful.
Was this instruction helpful to you?
Thank you for voting!
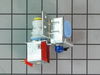
Leaking water inlet valve
This would have been a less-than-5-minute repair except for one item. The water intake nossle was 180 degrees from the original part. As a result, the copper water inlet tube would not fit in the old space and still allow me to reattach the valve to the freezer chassie. I ended up leaving the valve hanging loose under the freezer. I spent most of my time trying to fit the valve into the old space.
Unplug freezer. Disconnect electrical connections (pull apart). Remove one screw holding the valve to the chassie. disconnect water inlet pipe and water outlet pipe from old valve.
Reconnect electrical connection to new valve. Reconnect in and out water hoses. Reconnect valve to chassie. Plug freezer back in. Finished
Everything works just fine !
Unplug freezer. Disconnect electrical connections (pull apart). Remove one screw holding the valve to the chassie. disconnect water inlet pipe and water outlet pipe from old valve.
Reconnect electrical connection to new valve. Reconnect in and out water hoses. Reconnect valve to chassie. Plug freezer back in. Finished
Everything works just fine !
Parts Used:
-
Steven S. from Kerrville, TX
-
Difficulty Level:A Bit Difficult
-
Total Repair Time:15 - 30 mins
-
Tools:Nutdriver, Wrench (Adjustable)
14 of 19 people
found this instruction helpful.
Was this instruction helpful to you?
Thank you for voting!
Refrigerator section wasn't getting cold.
To keep from having to pay the appliance repairman $100.00 for a diagnostic fee I just started replacing parts that were known for causing this problem. First I replaced the compressor switch and capacitor that didn't work so then I replaced the damper controller then I replaced the control board then I saw that the evaporator fan wasn't spinning so I replaced the evaporator fan motor and the bimetal defrost thermostat. That was the problem I wish I would have checked that first. But it works like new now.
Parts Used:

-
Edward from Muncie, IN
-
Difficulty Level:A Bit Difficult
-
Total Repair Time:1- 2 hours
-
Tools:Nutdriver, Pliers, Screw drivers, Socket set
12 of 15 people
found this instruction helpful.
Was this instruction helpful to you?
Thank you for voting!
Old gasket frayed & torn
Laid gasket in direct sunlight for an hour, heat made it very pliable. Removed existing gasket from door groove, which came out with little effort. Pressed new gasket in door groove with minimal effort as it was pliable from sunlight heat. Gasket seated correctly and resulted in tight seal.
Parts Used:
-
Carl from HARPSWELL, ME
-
Difficulty Level:Really Easy
-
Total Repair Time:30 - 60 mins
10 of 10 people
found this instruction helpful.
Was this instruction helpful to you?
Thank you for voting!
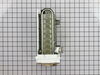
Refrigerator Ice Maker stopped making ice.
(1) Removed the three screws which attached the ice maker to the freezing compartmnet wall in refrigerator; (2) Disconnected the power to the old ice maker; (3) Removed the old ice maker from the freezing compartment of the refrigerator; (4) Took the white front cover off of the old ice maker; (5) Disconnected the wiring harness from the old ice maker; (6) Removed the "ice making-stop arm" from the old ice maker; (7) Placed the items taken from old ice maker on to the new ice maker; (8) Reconnected the new ice maker to the power; (9) Placed the new ice maker in the proper position in freezing compartment of refrigerator and replaced the three screws. JOB DONE!
Parts Used:
-
Harold from Oakton, VA
-
Difficulty Level:Really Easy
-
Total Repair Time:15 - 30 mins
-
Tools:Nutdriver
18 of 34 people
found this instruction helpful.
Was this instruction helpful to you?
Thank you for voting!
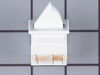
Light switch in freezer side got broken
Took a putty knife and
Removed the old switch removed the spade terminals from the old switch and replaced them on the new switch and just pushed the new switch back in place
Removed the old switch removed the spade terminals from the old switch and replaced them on the new switch and just pushed the new switch back in place
Parts Used:
-
Doug from PLEASANT VIEW, TN
-
Difficulty Level:Really Easy
-
Total Repair Time:Less than 15 mins
10 of 10 people
found this instruction helpful.
Was this instruction helpful to you?
Thank you for voting!
Refrigerator not defrosting properly. Evaporator froze on three different occasions.
I watched the video provided on-line in your website, which was excellent. The information provided gave me everything I needed to change the board. I already had experience handling control boards and was aware of the static precautions; however, your paperwork was very good detailing how to program the new board. The only small problem I had was reinstalling the temp sensor in its bracket. The lead was very short. Other than that, all went well! The project took between 20 and 30 minutes.
Parts Used:

-
John from GREENSBURG, PA
-
Difficulty Level:Really Easy
-
Total Repair Time:30 - 60 mins
-
Tools:Screw drivers
10 of 11 people
found this instruction helpful.
Was this instruction helpful to you?
Thank you for voting!
Right side door gasket split open
First, selecting the right part is more difficult than the repair. My Kenmore is an outdated model actually manufactured by Whirlpool.
Once I got the part I relaxed the gasket with a hair dryer - an important step suggested by PS. I then took old of the old gasket and removed it. The new one fits in the channel. Just press and make it is completely installed and flush.
Once I got the part I relaxed the gasket with a hair dryer - an important step suggested by PS. I then took old of the old gasket and removed it. The new one fits in the channel. Just press and make it is completely installed and flush.
Parts Used:
-
Thomas from SPRINGFIELD, MO
-
Difficulty Level:Very Easy
-
Total Repair Time:Less than 15 mins
9 of 9 people
found this instruction helpful.
Was this instruction helpful to you?
Thank you for voting!
Needed to replace a broken light switch
Popping out the broken switch was easy once I was able to see how the new switch part was engineered. The switch was made to be replaced, having a simple tension hook on the bottom of the switch which needed to be depressed to pull the switch out of the cabinet. Once pulled out, there were modular plugs for the power line that were easy to pull off the broken switch and plug into the new switch. Pop the new switch back in and VOILA, the lights worked again! Thanks to part select's good diagrams of the actual model of my refrigerator, it was very easy to hone in on the exact part I needed. I did notice one problem with the order as the correct series for the part was displayed earlier in the process, but had the wrong series later in the process. However,. I trusted the system and the part is for the right series and fit well (an exact match, down to the color). Thanks Part Select, I would definitely use you again.
Parts Used:

-
Ethan from Fort Collins, CO
-
Difficulty Level:Really Easy
-
Total Repair Time:Less than 15 mins
-
Tools:Screw drivers
12 of 18 people
found this instruction helpful.
Was this instruction helpful to you?
Thank you for voting!
frig would not get cold
I watched video for repair and it went just like it showed. piece of cake
Parts Used:
-
dennis j from TOMAHAWK, WI
-
Difficulty Level:Very Easy
-
Total Repair Time:15 - 30 mins
-
Tools:Screw drivers
10 of 12 people
found this instruction helpful.
Was this instruction helpful to you?
Thank you for voting!
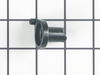
Right hand door would not auto close.
Removed the top door hinge cover.
Remover the four 12mm hex screws.
Lifted empty door off bottem hinge support.
Removed old door closure.
Put some silicon lub on the new closure and installed.
Reversed the removal steps.
But this did not fix the problem. Will have to remove the door and inspect the inside of the door's lower hinge assembly.
Remover the four 12mm hex screws.
Lifted empty door off bottem hinge support.
Removed old door closure.
Put some silicon lub on the new closure and installed.
Reversed the removal steps.
But this did not fix the problem. Will have to remove the door and inspect the inside of the door's lower hinge assembly.
Parts Used:
-
Bill from Murphy, NC
-
Difficulty Level:Easy
-
Total Repair Time:Less than 15 mins
-
Tools:Nutdriver
16 of 31 people
found this instruction helpful.
Was this instruction helpful to you?
Thank you for voting!
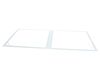
I was cleaning the fridge and I broke the shelf into ten million pieces
Your service is wonderful! I found the part on my mobile phone with a very quick and simple search, then I called in to order. The ordering process took less than 3 minutes, and I had my new shelf in three days. I dreaded ordering, because I just knew that the replacement shelf would be super expensive, but the whole thing cost much less than I expected--less than a dinner out. Thank you so much for your efficient and friendly service!
Parts Used:
-
Sarah from Fayetteville, AR
-
Difficulty Level:Really Easy
-
Total Repair Time:Less than 15 mins
9 of 10 people
found this instruction helpful.
Was this instruction helpful to you?
Thank you for voting!