















GTS17JBWERCC General Electric Refrigerator - Instructions
Keep searches simple. Use keywords, e.g. "leaking", "pump", "broken" or "fit".
Howling motor
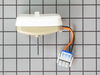
Open freezer, remove rack....this got a little complicated because I had to remove the door, that required the offset screwdriver because I had a clearance issues preventing the door from opening all the way. Remove the panel covering the fan, unplug the fan, remove it from bracket, install new fan, plug in, replace panel, replace rack, replace door...bam all done!
Parts Used:
-
Gregg from COEUR D ALENE, ID
-
Difficulty Level:A Bit Difficult
-
Total Repair Time:15 - 30 mins
-
Tools:Nutdriver
4 of 4 people
found this instruction helpful.
Was this instruction helpful to you?
Thank you for voting!
missing a shelf
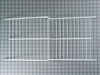
My repair was simple. Just put the shelf in the holes in the freezer. The AMAZING thing was how quickly I recieved the part after placing my order. I placed the order at about 3:30 pm on a friday checked the box for ground shipping and the part was at my door the next morning. I think that was a mistake, but I was impressed.
Parts Used:
-
Joseph from Rome, NY
-
Difficulty Level:Really Easy
-
Total Repair Time:Less than 15 mins
6 of 10 people
found this instruction helpful.
Was this instruction helpful to you?
Thank you for voting!
noise from fan blade hitting refrigerator interior panel.
The hardest part of the repair was emptying the freezer, next was getting the fan off of the motor shaft, The only reason the job was difficult is because i am 67 years old and not as flexible as i used to be.I had a tough time getting the fan off of the motor shaft, but i got it off with the use of a vise, and had to use the hammer and a socket to install a new fan blade.
Parts Used:

-
Dennis from LEHIGHTON, PA
-
Difficulty Level:A Bit Difficult
-
Total Repair Time:1- 2 hours
-
Tools:Nutdriver, Pliers, Screw drivers, Socket set
4 of 4 people
found this instruction helpful.
Was this instruction helpful to you?
Thank you for voting!
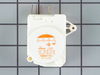
Bad defrost timer
Parts Select made this an effortless process. From finding the part, ordering, to the online diagrams.
I'll be back...
I'll be back...
Parts Used:
-
Bruce from Silver Spring, MD
-
Difficulty Level:Really Easy
-
Total Repair Time:15 - 30 mins
-
Tools:Screw drivers
5 of 7 people
found this instruction helpful.
Was this instruction helpful to you?
Thank you for voting!
top freezer working, bottom section of the fridge not cooling
First I removed the two screws, the fan and unpluged the electrical connection. Then, plugged in the new part and then screw it back together.
Parts Used:
-
Michael from Jamaica, NY
-
Difficulty Level:Easy
-
Total Repair Time:15 - 30 mins
-
Tools:Screw drivers
6 of 10 people
found this instruction helpful.
Was this instruction helpful to you?
Thank you for voting!
freezer cold but refrigerator warm, would not cycle the defrost on freezer
two screws and a connector were removed to replace the timer.
Timer was located on the top front of fridge
Timer was located on the top front of fridge
Parts Used:
-
MATT from OAKLAND, MI
-
Difficulty Level:Really Easy
-
Total Repair Time:Less than 15 mins
-
Tools:Screw drivers
4 of 4 people
found this instruction helpful.
Was this instruction helpful to you?
Thank you for voting!
Refrigerator light wouldn't come on.
After replacing the light bulb and still no light I manually pushed the light switch button. Intermittently the light would come on then go out. I removed the power plug from the power source then replaced the light switch. I plugged the refrigerator back in and now I open the door the light comes on and stays on until the door is closed.
Parts Used:

-
Daniel from Crown Point, IN
-
Difficulty Level:Easy
-
Total Repair Time:15 - 30 mins
-
Tools:Pliers, Screw drivers
4 of 5 people
found this instruction helpful.
Was this instruction helpful to you?
Thank you for voting!
Difficulty in removing the old switch
The old switch was hard to remove. Thinking that I may have to loosen the wires I used a socket wrench to remove a clamp. This was unnecessary. In the end the switch did come out using a large size screwdriver. The problem was that the expanding plastic tongue is not visible from the ouside so you have to try to feel your way around. If i had ordered the replacement before and not afterwards I would have seen this before hand.
Parts Used:
-
James from Federal Way, AL
-
Difficulty Level:A Bit Difficult
-
Total Repair Time:30 - 60 mins
-
Tools:Screw drivers, Socket set
5 of 8 people
found this instruction helpful.
Was this instruction helpful to you?
Thank you for voting!
Old timer quit working.
-
John from Mesa, AZ
-
Difficulty Level:Easy
-
Total Repair Time:Less than 15 mins
-
Tools:Nutdriver, Screw drivers
7 of 14 people
found this instruction helpful.
Was this instruction helpful to you?
Thank you for voting!
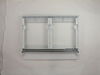
Broken vegetable pan cover
The part was delivered promptly. Then, to quote Raymond from Georgia:
I pulled the old one out, and put the new one in.
I pulled the old one out, and put the new one in.
Parts Used:
-
Luis from Washington, DC
-
Difficulty Level:Really Easy
-
Total Repair Time:Less than 15 mins
4 of 5 people
found this instruction helpful.
Was this instruction helpful to you?
Thank you for voting!
intermittent loud screeching,,humming sound
removed food from freezer section removed fan guard, partially remove ice maker, remove back panel, then fan assembly,disaasembled fan motor from brackets, fan from motor, grommet from bracket. assembled grommet in bracket, fan blade on motor, motor in bracket, fan assembly back in compartment, installed back panel,then ice maker, replaced fan guard and food. no more noise.
Parts Used:
-
LARRY. T from KNOXVILLE, TN
-
Difficulty Level:Easy
-
Total Repair Time:30 - 60 mins
-
Tools:Nutdriver, Pliers, Screw drivers
3 of 3 people
found this instruction helpful.
Was this instruction helpful to you?
Thank you for voting!
Plastic bracket broke so vegetable drawer would no longer stay in place
Pipes out the glass from existing shelf while in place inside refrigerator. Remove broken shelf. Install new shelf. Clean and replace glass. Easy job thanks to finding the correct part from Part Select!
Parts Used:
-
jim from CORNING, NY
-
Difficulty Level:Really Easy
-
Total Repair Time:30 - 60 mins
3 of 3 people
found this instruction helpful.
Was this instruction helpful to you?
Thank you for voting!
Fan not working
Took out old put new in. Watched a u tube, no problems
Parts Used:
-
joan from STERLING HTS, MI
-
Difficulty Level:Easy
-
Total Repair Time:1- 2 hours
-
Tools:Screw drivers, Socket set
3 of 3 people
found this instruction helpful.
Was this instruction helpful to you?
Thank you for voting!
Interior Light did not go on due to faulty switch
I ordered two switches, replaced both with a knife in 10 minutes. Interior light works, thanks.
Parts Used:
-
Robert from Coto de Caza, CA
-
Difficulty Level:Really Easy
-
Total Repair Time:Less than 15 mins
4 of 6 people
found this instruction helpful.
Was this instruction helpful to you?
Thank you for voting!
noisy fan
removed cover over fan, four screws. removed two screws ,that holds fan in place,removed two more screws that holds fan in bracket,then reinstalled
Parts Used:
-
ronald from springfield, VT
-
Difficulty Level:Easy
-
Total Repair Time:30 - 60 mins
-
Tools:Nutdriver, Screw drivers
4 of 6 people
found this instruction helpful.
Was this instruction helpful to you?
Thank you for voting!