















GTS17BCSLW General Electric Refrigerator - Instructions
Keep searches simple. Use keywords, e.g. "leaking", "pump", "broken" or "fit".
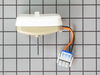
the evaporator fan motor was making noise sometimes, but not all the time during the cooling cycle
after watching how easy it was to get to the evaporator fan motor on u-tube, I took out the motor to inspect it......the motor had about 1/8 inch shaft end play and a slight amount of play on the shaft, the rubber grommets looked OK.....I then put it back together......since the motor was the only moving part in this location I figured it had to be the part making the noise, so I ordered a motor and 2 grommets …...the replacement motor also had 1/8 inch end play on the shaft, but no play on the shaft....I installed the new parts and it has been a week now and no noise.....SUCCESS!...….the shaft on the motor protrudes from the motor, and the fan is mounted about 1 1/4 inch away from the bearing in the motor and the fan is unsupported, so I ASSUME that the slight amount of play on the shaft caused some harmonics which caused it to make noise some of the time, but not all of the time......
Parts Used:
-
Kenneth from SEATTLE, WA
-
Difficulty Level:Really Easy
-
Total Repair Time:15 - 30 mins
-
Tools:Socket set
3 of 3 people
found this instruction helpful.
Was this instruction helpful to you?
Thank you for voting!
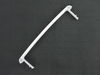
Broken freezer door shelf
-
Chris from E NORTHPORT, NY
-
Difficulty Level:Very Easy
-
Total Repair Time:Less than 15 mins
3 of 3 people
found this instruction helpful.
Was this instruction helpful to you?
Thank you for voting!
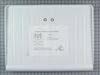
The bottom shelf that covers the crisper drawers was cracked.
This was so easy. Got the model number off the refrigerator door. Internet searched and found this website. Ordered the part. Waited maybe 3-4 days for it to arrive. Opened the box, open refrigerator door remove old broken part, install new part and reinstall the drawers. Piece of cake!! So glad I didn’t have to replace a perfectly good refrigerator. Thank you.
Parts Used:
-
Joseph from BRENTWOOD, CA
-
Difficulty Level:Very Easy
-
Total Repair Time:Less than 15 mins
3 of 3 people
found this instruction helpful.
Was this instruction helpful to you?
Thank you for voting!
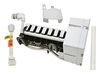
Made ice would not eject from ice holder bin
removed broken bin , slid new ice bin in closed door. I bought the complete part.
Parts Used:
-
Lynn from MOUNTAIN HOME, ID
-
Difficulty Level:Very Easy
-
Total Repair Time:Less than 15 mins
3 of 3 people
found this instruction helpful.
Was this instruction helpful to you?
Thank you for voting!
broken outlet valve
All the repair people was on the money . I read them all .1--- NO paper work with new valve (.no instructions) ..2--- bracket is not the same .. I reversed my braket and it worked fine .you do not have to bend bracket.3--- It will take a day or so to start making ice..4--- the plastic nut is no longer needed on the new type outlet valve ....5--- the new outlet valve looks a little different from the old valve. WORKS GREAT ..
Parts Used:

-
KEITH from WINDER, GA
-
Difficulty Level:Really Easy
-
Total Repair Time:Less than 15 mins
-
Tools:Pliers, Screw drivers
5 of 9 people
found this instruction helpful.
Was this instruction helpful to you?
Thank you for voting!
Ice maker arm disconnected from frame causing problems.
The icemaker arm disconnected from the metal frame. This caused the icemaker to cycle and the heater to come on and stay on until the plastic parts melted causing a mess and stink. This action melted the ice and then the water fell through the frozen items in the freezer and refreezed in the lower portion. OK, I remover the dead icemaker and tossed it away. I installed the new icemaker and the wiring harness didn't fit right (way to long). I retrieved the old icemaker and removed the wiring harness from it. I removerd the new ice maker and installed the old wiring harness to the new icemaker. I then installed the new icemaker, plugged it in and turned on the power. No water, I ordered the dual solenoid water valve, installed it with difficulty (another story) the turned on the power. I reinstalled the ice bin and found it didn't fit. The icemaker was to low and couldn't be adjusted, 1/4" higher would have been great. I shoved in the bin anyway, I was out of ice for my scotch, and it started making ice.
Parts Used:
-
Kenneth from Callaway, FL
-
Difficulty Level:A Bit Difficult
-
Total Repair Time:1- 2 hours
-
Tools:Pliers, Screw drivers, Wrench (Adjustable)
5 of 10 people
found this instruction helpful.
Was this instruction helpful to you?
Thank you for voting!
Broken freezee door shelf
-
Sophie from WASHINGTON, DC
-
Difficulty Level:Very Easy
-
Total Repair Time:Less than 15 mins
3 of 4 people
found this instruction helpful.
Was this instruction helpful to you?
Thank you for voting!
Ice maker didn't work.
Replaced icemaker assembly. Only 3 Phillips screws to remove the old assembly. Pretty much an exact swap. Was easy to replace but the connecting cable on the new replacement assembly wasn't very easy to make fit. Had to force it into a location that would be out of the way and allow everything to operate properly. That connecting cable should be more flexible and adapt to the fridge a little more friendly.
Parts Used:
-
Amanda from New Albany, MS
-
Difficulty Level:Easy
-
Total Repair Time:15 - 30 mins
-
Tools:Screw drivers
3 of 4 people
found this instruction helpful.
Was this instruction helpful to you?
Thank you for voting!
Freezer shelf bracket broke. .
Took the bracket out of box and install it like the video showed me..very easy to install..
Parts Used:
-
George from Elkhart, IN
-
Difficulty Level:Really Easy
-
Total Repair Time:30 - 60 mins
3 of 4 people
found this instruction helpful.
Was this instruction helpful to you?
Thank you for voting!
Freezer was not freezing food.
Inspected freezer because food was not freezing, getting cold, but not freezing. Noticed fan was not blowing air, but making a little motor noise, like it's trying to turn. Removed cover panel, and found the fan blade rubbing on the panel, fan shaft was worn out and very loose, wobley. That told me the fan needed to be replaced. Found part on the GE Partselect website and ordered the parts via the website order process. This was easy. The parts were shipped quickley and were at my front door the next day. Couldn't believe it. The actual process was very easy: Remove cover, remove bracket holding fan motor, remove and replace motor, re-assemble parts. About 20-25 minutes from start to finish. Freezer is working like it's suppose to.
Parts Used:

-
Steve from Ridgecrest, CA
-
Difficulty Level:Really Easy
-
Total Repair Time:15 - 30 mins
-
Tools:Nutdriver, Screw drivers
3 of 4 people
found this instruction helpful.
Was this instruction helpful to you?
Thank you for voting!
icemaker stripper fall a part
instalation was very easy - but the part was 3/4 inch to long and a 1/32 inch to wide.Trimmed it with the "faithfull"
Dremel and it works!The instalation part of the "job" was less then 10 min.
Dremel and it works!The instalation part of the "job" was less then 10 min.
Parts Used:
-
Ted from Harrisonburg, VA
-
Difficulty Level:Easy
-
Total Repair Time:15 - 30 mins
-
Tools:Screw drivers
3 of 4 people
found this instruction helpful.
Was this instruction helpful to you?
Thank you for voting!
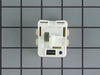
During Hurricane Ike, frig. saw several inched of saltwater and sand underneath. AFter cleaning up, I tried to run and only the blower fan worked. It must have been just above the water. The compressor did not kick on. I looked at the lowest elec. connections and saw corrsion on the overload protect
This was after sitting idle for 9 mos. I simply pulled the part, ordered the same part and installed. Nothing more than a couple of screws and 2 wire connections. It now works great.
Parts Used:
-
ken from fulshear, TX
-
Difficulty Level:Really Easy
-
Total Repair Time:Less than 15 mins
-
Tools:Screw drivers
3 of 4 people
found this instruction helpful.
Was this instruction helpful to you?
Thank you for voting!
Old cover was cracked and needed replaced
The repair only required removing nthe old cover and installing the new one. What I was really surprised about is the time for delevery. I ordered the part on Friday morning around 11 AM and it was delevered by Fed Ex at 8:30 AM on Saturday morning. I am not sure how many locations they have, but this must have been close to Harrisburg, Pa.
Parts Used:
-
Richard from Harrisburg, PA
-
Difficulty Level:Really Easy
-
Total Repair Time:Less than 15 mins
3 of 4 people
found this instruction helpful.
Was this instruction helpful to you?
Thank you for voting!
missing part
I order the small part and installed it myself, it was very easy with "part select". I will refer them and use them in the future. Thanks parts select.
Parts Used:
-
james from humble, TX
-
Difficulty Level:Really Easy
-
Total Repair Time:Less than 15 mins
3 of 4 people
found this instruction helpful.
Was this instruction helpful to you?
Thank you for voting!
I never had Door shelving
Just popped them in their slots. Very easy and it made my refrigerator brand new again.. Thank you
Parts Used:
-
Jennifer from TEXARKANA, AR
-
Difficulty Level:Very Easy
-
Total Repair Time:Less than 15 mins
3 of 4 people
found this instruction helpful.
Was this instruction helpful to you?
Thank you for voting!