















GTH18KBXARCC General Electric Refrigerator - Instructions
Keep searches simple. Use keywords, e.g. "leaking", "pump", "broken" or "fit".
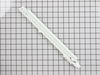
Broken Snack Pan Slide
-
Raymond from San Marcos, TX
-
Difficulty Level:Really Easy
-
Total Repair Time:Less than 15 mins
-
Tools:Screw drivers
Was this instruction helpful to you?
Thank you for voting!
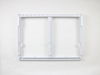
Shelf above vegetable drawers cracked in middle
Take out both vegetable drawers. Lift back of shelf first then front until you hear the click from both front sides. The shelf should now be loose and you can take fully out. Remove the glass shelf from the plastic frame by turning the shelf over and pulling back and up from the rear part of the glass. Put the glass into the new plastic frame by doing the same technique. Then put the shelf back into the fridge by the resting the shelf down in the correct position and pushing the front of the shelf until you hear the click again on each side. slide the drawers back into place and you are done!
Parts Used:
-
Carole from Oak Ridge, NJ
-
Difficulty Level:Really Easy
-
Total Repair Time:Less than 15 mins
Was this instruction helpful to you?
Thank you for voting!
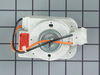
Fan motor noisy
Turn off refrigerator. Remove the plastic air flow cover, styrofoam channel and metal panel inside freezer compartment, remove hex nuts holding motor mount, unplug connector, remove old grommets, remove compression ring, (note 1/4 inch extension of shaft through fan) carefully pull fan blade off motor shaft and put on new motor shaft, leaving 1/4 inch of shaft extending through, replace compression ring. If your new fan motor has a female snap connector and the old motor has a male connector (as mine did) you will have to cut the wires on both new and old motors, splice and solder the male connector onto the wires of new motor, wrap carefully with premium electrical tape (or shrink tubing). Replace the 2 grommets, Reconnect the fan and bolt back into place. Make sure all the bolts around the mount are tight. Replace the metal panel. Manually spin the fan making sure it is free of the shroud. If it binds in the shroud, physically move the motor and mount till it rotates freely. Turn on refrigerator and test fan operation. If it's all good, replace the styrofoam and plastic cover.
Parts Used:
-
David from PIONEERTOWN, CA
-
Difficulty Level:A Bit Difficult
-
Total Repair Time:15 - 30 mins
-
Tools:Nutdriver, Pliers, Screw drivers
Was this instruction helpful to you?
Thank you for voting!
frig door kept slamming into cabinet

-
Anthony from Riverview, FL
-
Difficulty Level:Really Easy
-
Total Repair Time:15 - 30 mins
-
Tools:Nutdriver, Screw drivers
Was this instruction helpful to you?
Thank you for voting!
broking slide
-
Anthony from Painter, VA
-
Difficulty Level:Easy
-
Total Repair Time:15 - 30 mins
Was this instruction helpful to you?
Thank you for voting!
install second set pan sliders
Because the kit did not include fasteners, had to use wood screws and superglue.
Parts Used:
-
William from Rockville, MD
-
Difficulty Level:A Bit Difficult
-
Total Repair Time:30 - 60 mins
-
Tools:Screw drivers
Was this instruction helpful to you?
Thank you for voting!
Unusual noise from freezer.
Replaced above parts and the noise problem was not resolved. Ordered a new motor, fan blade and another set of grommets from PartSelect. The parts were delivered the next day. Took me about 15 minutes to swap the new parts in. It's been 3 days since the repair and the noise has not returned.
Parts Used:

-
Vincent from Lyndhurst, NJ
-
Difficulty Level:Easy
-
Total Repair Time:30 - 60 mins
-
Tools:Nutdriver, Screw drivers
Was this instruction helpful to you?
Thank you for voting!
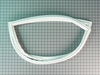
The Gasket arount the door was coming apart and the door would not close properly.
I came home to find a mess near the refridgetor. My teenage daughter or son had made themselves a peterbutter and strawberry homemade jam sandwhich. The strawberry jam was all over the inside of the door and on the floor. What a mess, so I was waiting for my husband to change the gasket around the door anyways. So I though to myself I just change it myself. The old one just came off and I pulled the new one out of the box and I went right on with not much effort. ( I wiped down the area after I put off the old gasket) Thank you very much for making the parts so easily avaiable on your website without having to buy a new refrigator. Thanks again Sue and Ed
Parts Used:
-
Susan L from Hagerstown, MD
-
Difficulty Level:Really Easy
-
Total Repair Time:Less than 15 mins
Was this instruction helpful to you?
Thank you for voting!
new refrigator purchased had no freezer shelf
-
Dwight from Indianapolis, IN
-
Difficulty Level:Really Easy
-
Total Repair Time:Less than 15 mins
Was this instruction helpful to you?
Thank you for voting!
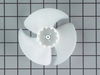
The refrigerator made a humming/grinding sound
I used the socket set to remove pannel that allowed me to have access to the evaporator fan. Once the fan and it's container was visible, I removed the entire fan container using the socket set. I took the fan out of the container, removed the damage blade and the damaged fan grommets. I then replace the old blade with the new blade and put the fan and the compartment back together. I am not very handy so if I am able to do this, anybody can. Ps. I was very very pleased with the services I received from PartSelect and would encourage others to use them - must admit I was very suspicious at first.
Parts Used:
-
Glenroy from Martinsburg, WV
-
Difficulty Level:Easy
-
Total Repair Time:15 - 30 mins
-
Tools:Screw drivers, Socket set
Was this instruction helpful to you?
Thank you for voting!
light switch quit working

-
David from Simpsonville, SC
-
Difficulty Level:Easy
-
Total Repair Time:Less than 15 mins
-
Tools:Screw drivers
Was this instruction helpful to you?
Thank you for voting!
sticky switch
easy pry out, disconnect wiring, connect on new switch and press in switch.
Parts Used:
-
ANTHONY from NEW EGYPT, NJ
-
Difficulty Level:Really Easy
-
Total Repair Time:Less than 15 mins
-
Tools:Pliers, Screw drivers
Was this instruction helpful to you?
Thank you for voting!
Plastic slide for snack pan right side cracked/broke
Only took a screwdriver to take two screws out & install new slide with the two existing screws. Very easy. Took less than 5 minutes. Great website I found on Google right away, just by searching for refridgerator parts. After ordering part, only took a few days to come in.
Parts Used:
-
Penny from Gilbert, AZ
-
Difficulty Level:Really Easy
-
Total Repair Time:Less than 15 mins
-
Tools:Screw drivers
Was this instruction helpful to you?
Thank you for voting!
Broken frame for crisper bins
Using Google search engine I was able to quickly locate the replacement rack for the refrigerator. When it arrived, I installed it by attaching it to the interior frame of the refrigerator.
Parts Used:
-
Cynthia from Clayton, NC
-
Difficulty Level:Really Easy
-
Total Repair Time:Less than 15 mins
Was this instruction helpful to you?
Thank you for voting!
switch wouldn't come out anymore and turn light on
Gently pry out switch in door jam with screwdriver and pull both connectors off and put connectors on new switch then push switch back into the hole. Looked it up on the internet and video showed how to and also had link to new part, ordered and less than a week later the fridge is bright again. I have an older freezer also and it seems that they all use the same switches. Very Very easy
Parts Used:
-
Cynthia from Seatac, WA
-
Difficulty Level:Really Easy
-
Total Repair Time:Less than 15 mins
-
Tools:Screw drivers
Was this instruction helpful to you?
Thank you for voting!