















GTH18DBMALCC General Electric Refrigerator - Instructions
Keep searches simple. Use keywords, e.g. "leaking", "pump", "broken" or "fit".
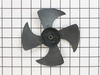
Broke fan blade cleaning unit
Ordered part came in 3 days. Removed plug and rear cover. Pulled off old fan . Installed new fan by pushing it on to shaft. Plugged unit back in to check operation, installed rear cover. Done. Part fit perfect. Thanks to this site you folks are great !
Parts Used:
-
Mark from DEPEW, NY
-
Difficulty Level:Really Easy
-
Total Repair Time:15 - 30 mins
-
Tools:Nutdriver, Pliers
1 person
found this instruction helpful.
Was this instruction helpful to you?
Thank you for voting!
40 year old refrigerator brittle light switch fell apart
with a jewelry screwdriver I pried the lock tab in and pulled switch down carefully, the hardest part was that the power wire connector was stuck on good but the pliers and the jewelry screwdriver was its match for a bout 5 minute for one connection a simple pull off prong connection. After the wire connected back to switch it popped back in SNAPP
Parts Used:

-
Loren from EL PASO, TX
-
Difficulty Level:Really Easy
-
Total Repair Time:Less than 15 mins
-
Tools:Pliers, Screw drivers
1 person
found this instruction helpful.
Was this instruction helpful to you?
Thank you for voting!
Light went out in refrigerator
Pop out switch, pull wires, attach wires to new switch and pop back in. Easy smeasy!
Parts Used:
-
Gary from EAST JORDAN, MI
-
Difficulty Level:Really Easy
-
Total Repair Time:Less than 15 mins
-
Tools:Pliers, Screw drivers
1 person
found this instruction helpful.
Was this instruction helpful to you?
Thank you for voting!
Noisy Freezer Evaporator
Find a video on youtube. Remove 6 screws. Pull the Styrofoam part up before removing the panel. Unplug and Remove the fan assembly.
You will need a NUT DRIVER to take the bracket off the backing plate.
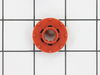
I ordered the red grommet and the red bumper. You need TWO of the red grommets if that is the problem. My freezer was about 8 years old, and the grommets were worn and compressed, the bumper was not. Replacing these parts DID NOT FIX the problem. I needed a new motor.
I probably disassembled and reassembled this stuff about 7 times before I got all the parts and tools. Each time I had to unload the freezer.
You will need a NUT DRIVER to take the bracket off the backing plate.
I ordered the red grommet and the red bumper. You need TWO of the red grommets if that is the problem. My freezer was about 8 years old, and the grommets were worn and compressed, the bumper was not. Replacing these parts DID NOT FIX the problem. I needed a new motor.
I probably disassembled and reassembled this stuff about 7 times before I got all the parts and tools. Each time I had to unload the freezer.
Parts Used:

-
Brian from BOZEMAN, MT
-
Difficulty Level:A Bit Difficult
-
Total Repair Time:15 - 30 mins
-
Tools:Nutdriver, Screw drivers
1 person
found this instruction helpful.
Was this instruction helpful to you?
Thank you for voting!
Light would stay on when door closed
Extremely easy repair, the hardest part was getting the old switch out. I used a pair of needle nose pliers to squeeze the tabs in and it came right out.
Parts Used:
-
James from Glendale Heights, IL
-
Difficulty Level:Really Easy
-
Total Repair Time:Less than 15 mins
-
Tools:Nutdriver, Pliers
3 of 7 people
found this instruction helpful.
Was this instruction helpful to you?
Thank you for voting!
light switch freezer door
put the gratefruit knife behind the old switch pooped it out pluged the new one in piece of cake 5min.even vacumed the dust off the coil
Parts Used:
-
Sumlorq from Cleveland, OH
-
Difficulty Level:Really Easy
-
Total Repair Time:Less than 15 mins
3 of 7 people
found this instruction helpful.
Was this instruction helpful to you?
Thank you for voting!
Light was flicking
-
Stephanie from KEARNY, NJ
-
Difficulty Level:Really Easy
-
Total Repair Time:Less than 15 mins
-
Tools:Screw drivers
1 of 2 people
found this instruction helpful.
Was this instruction helpful to you?
Thank you for voting!
Change bulb

-
Louis from LEAGUE CITY, TX
-
Difficulty Level:Really Easy
-
Total Repair Time:30 - 60 mins
-
Tools:Nutdriver
3 of 8 people
found this instruction helpful.
Was this instruction helpful to you?
Thank you for voting!
Broken light switch
took a little more effort than the video show to remove old module and replace new. Works fine now.
Parts Used:
-
Ted from SANDWICH, IL
-
Difficulty Level:Easy
-
Total Repair Time:15 - 30 mins
-
Tools:Screw drivers
1 of 2 people
found this instruction helpful.
Was this instruction helpful to you?
Thank you for voting!
The door activated light switch was missing.
Pulled the two wires out from the access hole in the lower part of the refrigerator. Put them in the spade connectors on the new switch, and pushed the switch into place.
Parts Used:
-
Don from Eugene, OR
-
Difficulty Level:Really Easy
-
Total Repair Time:Less than 15 mins
1 of 3 people
found this instruction helpful.
Was this instruction helpful to you?
Thank you for voting!
The cover veggie pan cracked
The repair was simple. I simply applied pressure slowly and carefully (from underside of cover pushing upward) to remove the old damaged cover veggie pan. I had to be careful so that I wouldn't ruin the two support posts that supported the cover. They seemed to be a little weak. I applied pressure until the cover was separated from support posts. Next, I slid the new cover into place, and applied pressure (pushing from top side downward) until teeth snapped into place to latch onto support posts. The repair was then done, and I restocked my fridge.
Parts Used:

-
Andre from Westerville, OH
-
Difficulty Level:Really Easy
-
Total Repair Time:Less than 15 mins
0 of 1 people
found this instruction helpful.
Was this instruction helpful to you?
Thank you for voting!
Vegetable Pan cover had cracked
Simply removed the old cover and snapped the new one in place. Note that I had ordered this part from a local appliance service center and the part had been "backordered from the factory" for almost a month. I order the part from PartsSelect on a Saturday and received it the following Tuesday. ----excellent service!!
Parts Used:
-
Timothy from Athens, AL
-
Difficulty Level:Really Easy
-
Total Repair Time:Less than 15 mins
0 of 1 people
found this instruction helpful.
Was this instruction helpful to you?
Thank you for voting!
Bad switch for door prevented interior light from coming on
Just as your video described, although due to the age of the fridge, it took a bit longer to remove the defective switch. Your video made this so simple, I can't imagine why we lived with a dark fridge for so long! I was ready to buy a whole new fridge, as repairmen are often nonexistent for small repairs. I am the biggest fan of your company & it's repair video. THANK YOU SO MUCH
Parts Used:
-
Patricia from Sylva, NC
-
Difficulty Level:A Bit Difficult
-
Total Repair Time:15 - 30 mins
-
Tools:Pliers, Screw drivers
0 of 1 people
found this instruction helpful.
Was this instruction helpful to you?
Thank you for voting!
The evaporator fan in the freezer compartment began making a loud noise.
I found a replacement evaporator fan motor and 2 mounting bracket grommets at PartSelect.com at a reasonable price. I watched the installation video provided and installed the new parts as shown in the video start to finish installation time 22 minutes.i
Parts Used:
-
Boyd from Rapid City, SD
-
Difficulty Level:Really Easy
-
Total Repair Time:15 - 30 mins
-
Tools:Nutdriver, Pliers, Screw drivers
0 of 1 people
found this instruction helpful.
Was this instruction helpful to you?
Thank you for voting!
The cover on the Veg. pan was broken so the Veg. drawers would not work or stay in place since the tracks were broken on the sides and the center guide was broken also, had to replace both parts
Simple just remove the old veg. cover and the center track and replace both parts. Removed the rubber seals from the old veg. cover and installed on the new cover.
One problem I found out the drawers were not interchangable, the drawers have to go in a certain way and should not be sewitched from one side to another. I found that moving the drawers to the right position corrected the problem. The left drawer was bumping and did not work corectly until I swithche the drawers around. Also the GE Service man was here for a repair when we first moved in and the fridge was new and he gave me a tip about the drawers. He said to put a little cooking oil on your finger tip and rub it on the drawer slides, it makes them slide smoothly and freely.
One problem I found out the drawers were not interchangable, the drawers have to go in a certain way and should not be sewitched from one side to another. I found that moving the drawers to the right position corrected the problem. The left drawer was bumping and did not work corectly until I swithche the drawers around. Also the GE Service man was here for a repair when we first moved in and the fridge was new and he gave me a tip about the drawers. He said to put a little cooking oil on your finger tip and rub it on the drawer slides, it makes them slide smoothly and freely.
Parts Used:
-
Harvey from Harrisonburg, VA
-
Difficulty Level:Really Easy
-
Total Repair Time:15 - 30 mins
0 of 1 people
found this instruction helpful.
Was this instruction helpful to you?
Thank you for voting!