















GT1SHTXMB01 Whirlpool Refrigerator - Instructions
Keep searches simple. Use keywords, e.g. "leaking", "pump", "broken" or "fit".
Freezer compartment iced over, food thawing,
I deenergized the refigerator, removed the storage tray, three screws that hold the ice maker, two screws that hold the lower portion of the freezer, two screws tjhat hold the back portion of the freezer. Removed the ice maker and disconnected the wire connector and ground, Removed lower portion of the freezer which allowed the back portion to be lifted out. Once the back was out the bimetal defrost thermostat was located in the upper right corner clipped to a copper line. Using an ohm meter, I found the bimetal defrost thermostat to be electrically open, ordered part from information found on part, Once part arrived I deenergized the refrigerator and replaced bimetal thermostat by cutting the old thermostat wires (pink and brown), stripping the wires back about 5/8 inch and wire nutting the replacement parts like colored wires, clipped the bimetal part on the copper tube, replaced the covers in reverse order, and reenergized the refrigerator. Testing and replacing the part took about 15 minutes, waiting for the ice build up to thaw took considerably longer.
Parts Used:

-
Lawrence from New Bern, NC
-
Difficulty Level:Easy
-
Total Repair Time:Less than 15 mins
-
Tools:Nutdriver
12 of 13 people
found this instruction helpful.
Was this instruction helpful to you?
Thank you for voting!
water was leaking down from freezer section to bottom part of unit
First, unplugged the refrigerator. Then removed bottom plastic liner of the freezer, 2 screws with 5/16 nut driver. At this point the ice maker had to be removed 3 screws, two on the upper part and the other under the ice maker. Now the back wall of the freezer section was removed by unscrewing 2 screws with the nut driver. This gave me access to remove the defective clip-on Bimetal defrost thermostat. It was located in the upper right corner on the back wall of the freezer. Cut off the 2 wires from the bad part( one pink the other brown)then used wire nut to replace with the new part and matched wires from freezer to new part( pink to pink and brown to brown) and clipped the part in one section of the coil. ( where the bad part was located) Put all back in place. And so far no more water leak inside the fridge.
Parts Used:
-
Eric from miami, FL
-
Difficulty Level:Easy
-
Total Repair Time:15 - 30 mins
-
Tools:Nutdriver, Pliers, Screw drivers
13 of 16 people
found this instruction helpful.
Was this instruction helpful to you?
Thank you for voting!
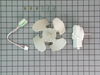
Dead condenser fan/motor
Replaced the entire unit (fan and motor). Would have rated this repair as "Really Easy", but found it a little difficult because of large hands.
Parts Used:
-
Drew from mountville, PA
-
Difficulty Level:Easy
-
Total Repair Time:15 - 30 mins
-
Tools:Pliers, Socket set
13 of 17 people
found this instruction helpful.
Was this instruction helpful to you?
Thank you for voting!
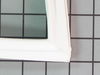
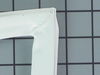
Replaced Freezer Door and Refrigerator Door Gaskets
!st removed the doors from the unit, then laid them on the floor. Next, on a long side of the door, cut through the gasket so I could pull it off the door in one piece without separating the door liner from the outer door. Then, starting at a corner, started pushing the stiff black part of the replacement gasket between the liner and outer door, making sure to push it completely under as I went. Used a thick flat bladed screwdriver to carefully help push the final corner section in. Repeated on both doors, rehung, plugged in and done!
Parts Used:
-
Robin from VENICE, FL
-
Difficulty Level:Really Easy
-
Total Repair Time:15 - 30 mins
-
Tools:Screw drivers
11 of 13 people
found this instruction helpful.
Was this instruction helpful to you?
Thank you for voting!
Loud noise
There was a loud noise coming from the fridge - we ordered the new part it came a lot sooner than we excepted and we replaced it in about 20 minutes- the hardest part was my husband getting his hand in there to put the screws in- but a very easy fix.
Parts Used:
-
Britney from Wilmington, OH
-
Difficulty Level:Easy
-
Total Repair Time:15 - 30 mins
-
Tools:Socket set
11 of 13 people
found this instruction helpful.
Was this instruction helpful to you?
Thank you for voting!
No water to the ice maker
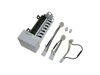
At age 65 I have never attempted to repair a refrigerator, until now. It took longer than needed because I did not read these articles carefully. Please note that when you open the door and the light blinks twice, waits a second and blinks again, the optics are working fine. I ordered an emitter and receiver when I didn't need to. I sent it back, the money was refunded, and ordered the ice maker. I replaced the old icemaker by removing three screws and slipping it out of its holder.
Here is how I found out I needed the new ice maker. I took the supply line apart that runs down the back of the refrigerator. I blew through it without any trouble. This told me that the line was not frozen within the refrigerator. I put the supply line back together, and jumped the solenoid that was connected to the supply line at the bottom right of the refrigerator. My model is the side by side, so it has two solenoids. The solenoid that runs the water to the dispenser in the door was always running, so I knew if there was a problem it would be with the ice maker solenoid. So, how did I jump the solenoid. Kids, don't try this at home. I disconnected the wiring harness to the solenoid by pulling it straight out. Then I took the female end of an extension chord and placed a twelve two electrical wire with the ends stripped into the positive and negative slots. I then jumped the solenoid. Water ran to the ice maker, but there still wasn't any ice made. Since the optics and the solenoid were working it seemed to me that the ice maker wasn't doing it's part. There are easier ways to check the solenoid in this forum, but this worked for me. I saved a lot of money and the parts got here quickly.
Here is how I found out I needed the new ice maker. I took the supply line apart that runs down the back of the refrigerator. I blew through it without any trouble. This told me that the line was not frozen within the refrigerator. I put the supply line back together, and jumped the solenoid that was connected to the supply line at the bottom right of the refrigerator. My model is the side by side, so it has two solenoids. The solenoid that runs the water to the dispenser in the door was always running, so I knew if there was a problem it would be with the ice maker solenoid. So, how did I jump the solenoid. Kids, don't try this at home. I disconnected the wiring harness to the solenoid by pulling it straight out. Then I took the female end of an extension chord and placed a twelve two electrical wire with the ends stripped into the positive and negative slots. I then jumped the solenoid. Water ran to the ice maker, but there still wasn't any ice made. Since the optics and the solenoid were working it seemed to me that the ice maker wasn't doing it's part. There are easier ways to check the solenoid in this forum, but this worked for me. I saved a lot of money and the parts got here quickly.
Parts Used:
-
Ron from Ferndale, WA
-
Difficulty Level:Really Easy
-
Total Repair Time:15 - 30 mins
-
Tools:Nutdriver
11 of 13 people
found this instruction helpful.
Was this instruction helpful to you?
Thank you for voting!
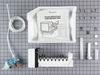
installed ice maker
From the time I started to finish I worked 3 hours, this included installing the new ice maker, cutting into the cold water line in the basement and installing a t with a 6inch piece of pipe with a compression valve to connect to the small cooper tube, this is worth your time to do it this way, its a lot better connection than the small pierce valves that come with the kit, they will leak over time. I installed the filter in the waterline in the basement for easy access
Parts Used:
-
Dennis from Spring Valley, MN
-
Difficulty Level:Easy
-
Total Repair Time:15 - 30 mins
-
Tools:Nutdriver, Pliers, Screw drivers, Wrench set
13 of 19 people
found this instruction helpful.
Was this instruction helpful to you?
Thank you for voting!
Wrong electrical connector.
I bought a new Whirlpool Refrigerator that didn't have an ice maker.
I wanted to install an ice maker. I searched your web site and found the model ice maker model it said I needed. WPW10715709. This one was a 4 wire 8 terminal. I needed a 4 wire flat connector. WPW10715708. You approved the return. It cost me $50 to return it. I believe you should refund me the cost of this postage. Your web site gave me the wrong model number.
Thank you
I wanted to install an ice maker. I searched your web site and found the model ice maker model it said I needed. WPW10715709. This one was a 4 wire 8 terminal. I needed a 4 wire flat connector. WPW10715708. You approved the return. It cost me $50 to return it. I believe you should refund me the cost of this postage. Your web site gave me the wrong model number.
Thank you
Parts Used:
-
ROBERT from BUENA PARK, CA
-
Difficulty Level:Very Difficult
-
Total Repair Time:More than 2 hours
11 of 14 people
found this instruction helpful.
Was this instruction helpful to you?
Thank you for voting!
Didn't know if I needed Left or Right.
The item is listed as R, meaning right hand side. If you need it for the left hand side, simple turn it over. It is designed to work on both sides of the door.
Parts Used:

-
Joyce from Kerrville, TX
-
Difficulty Level:Really Easy
-
Total Repair Time:Less than 15 mins
11 of 14 people
found this instruction helpful.
Was this instruction helpful to you?
Thank you for voting!
Freezer was working fine but refrigerator would not go below 45 degrees
Removed back panel inside freezer replaced fan motor reinstalled panel and was done in about 40 minutes the video on part select explains the repair very accurately
Parts Used:

-
Christopher from CASTAIC, CA
-
Difficulty Level:Easy
-
Total Repair Time:30 - 60 mins
-
Tools:Nutdriver, Pliers, Screw drivers
9 of 9 people
found this instruction helpful.
Was this instruction helpful to you?
Thank you for voting!
socket melted with bulb in it.
-
martin l. from JACKSONVILLE,, IL
-
Difficulty Level:Really Easy
-
Total Repair Time:Less than 15 mins
12 of 18 people
found this instruction helpful.
Was this instruction helpful to you?
Thank you for voting!
Freezer working, not cold enough in fridge area.
Top freezer, remove fan cover on back panel in side top freezer, remove back panel inside top freezer, remove fan and fan motor, unplug electric from fan (PS unplug fridge first). Install new motor, replace ever thing in reverse. works great.
Parts Used:
-
Ralph from ALVORD, TX
-
Difficulty Level:Easy
-
Total Repair Time:30 - 60 mins
-
Tools:Nutdriver, Pliers
9 of 10 people
found this instruction helpful.
Was this instruction helpful to you?
Thank you for voting!
There was no light on in refrig area
Just replaced the switch, but unfortunately that was not the problem; nor was it the bulb....so I am back to square one.
But Parts Select is a great place to order from. Thank you.
But Parts Select is a great place to order from. Thank you.
Parts Used:

-
Lori from Chuluota, FL
-
Difficulty Level:Easy
-
Total Repair Time:Less than 15 mins
-
Tools:Screw drivers
12 of 19 people
found this instruction helpful.
Was this instruction helpful to you?
Thank you for voting!
Broken parts in refrigerator
Replaced with new parts
Parts Used:


-
Harald from Cape Coral, FL
-
Difficulty Level:Really Easy
-
Total Repair Time:Less than 15 mins
11 of 16 people
found this instruction helpful.
Was this instruction helpful to you?
Thank you for voting!
I cracked mine :D
-
Lisa from Fort Myers, FL
-
Difficulty Level:Really Easy
-
Total Repair Time:Less than 15 mins
11 of 16 people
found this instruction helpful.
Was this instruction helpful to you?
Thank you for voting!