















GSS20DBTNWW General Electric Refrigerator - Instructions
Keep searches simple. Use keywords, e.g. "leaking", "pump", "broken" or "fit".
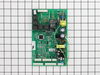
Clicking noice from the motherboard
After advise from the expert, he was adamant the motherboard was the (via symptoms)problem. After receiving the replacement board (via FEDEX), I followed the easy to understand instructions. I did number the electrical plugs and mapped the connections on paper. The key to the rapid fix was to carefully read all of the instructions to verify which (if any) wires needed elimination, which in my case was none. I will definitely use this service in the future as the expense was affordable and after research, I estimate a savings between 55% to 60%.
Parts Used:
-
John from Greer, SC
-
Difficulty Level:Really Easy
-
Total Repair Time:Less than 15 mins
-
Tools:Pliers, Screw drivers
56 of 60 people
found this instruction helpful.
Was this instruction helpful to you?
Thank you for voting!
refrigerator/freezer defrosting completely for no reason
Unplugged refrigerator and used a screwdriver to remove access panel on rear of refrigerator to expose "mother board". Unplugged connectors (6 total) and using needle nose pliers released two retainers to remove mother board. Installed new mother board snapping it onto the two retainers and plugged the connectors onto the new mother board. Plugged refrigerator into outlet, refrigerator came back on, automatically reset it's temperature settings and has been working fine since. Total time, less than 15 minutes. Money saved, hundreds of dollars!
Parts Used:
-
John from Yucca Valley, CA
-
Difficulty Level:Really Easy
-
Total Repair Time:Less than 15 mins
-
Tools:Screw drivers
53 of 55 people
found this instruction helpful.
Was this instruction helpful to you?
Thank you for voting!
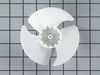
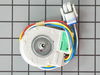
Fan motor making noise due to broken fan blade
1) Unplugged fridge and removed cover over light in freezer.
2)Removed screws holding cover over motor.
3) Removed screws on bracket holding motor in place.
4) Un plugged motor and used razor blade to cut grommet holding wires in place.
5) Plugged in new motor and routed wires through grommet. Then used zip ties to hold grommet together.
5) Re-attached motor bracket and installed new fan.
6) Reinstalled cover over motor.
2)Removed screws holding cover over motor.
3) Removed screws on bracket holding motor in place.
4) Un plugged motor and used razor blade to cut grommet holding wires in place.
5) Plugged in new motor and routed wires through grommet. Then used zip ties to hold grommet together.
5) Re-attached motor bracket and installed new fan.
6) Reinstalled cover over motor.
Parts Used:
-
James from Gainesville, VA
-
Difficulty Level:Easy
-
Total Repair Time:15 - 30 mins
-
Tools:Nutdriver
64 of 93 people
found this instruction helpful.
Was this instruction helpful to you?
Thank you for voting!
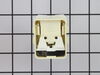
Fridge smelled like something electronic was burning
Removed the back cover of the fridge with it still pluged in. The next time the compressor tried to kick on, a small piece of black plastic next to the black tank caught fire, and then went out. I unpluged the fridge, unpluged the two wires feeding the black box. Then the box unpluged from the tank. I searched on the internet for the part using the model #. It ended up being a overload/ptc or relay. There was a smaller black box attached with I think is some sort of an overload. I unplugged the overload and it plugged right into the new relay I had overnighted. Although the new relay was white (not black) and the plug attachments were in different locations, it work great.
Parts Used:
-
BENJAMIN from LAKESIDE, CA
-
Difficulty Level:Easy
-
Total Repair Time:15 - 30 mins
-
Tools:Nutdriver
50 of 59 people
found this instruction helpful.
Was this instruction helpful to you?
Thank you for voting!
fridge side freezes some items
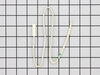
went to your website and viewed exploded view to find the sensor( there are two I just picked one to replace for now), pried the cover off carfully and pulled out the sensor. I snipped the wire in the middle leaving plenty to work with. I shortened the wire on the new piece, spliced the wires together and with some 3M rubberized, tape wrapped them up, replaced the sensor back into the cover and snapped in place.
Parts Used:
-
Anthony from Murfreesboro, TN
-
Difficulty Level:Really Easy
-
Total Repair Time:Less than 15 mins
-
Tools:Screw drivers
55 of 77 people
found this instruction helpful.
Was this instruction helpful to you?
Thank you for voting!
freezer cold / fridge warm
put fridge into test mode, failed One sensor. Took it out, Tested it, Ordered part also picked up splice kit from electric store spliced it truned on and good to go
Parts Used:
-
Mark from Mancos, CO
-
Difficulty Level:Easy
-
Total Repair Time:30 - 60 mins
-
Tools:Screw drivers
46 of 54 people
found this instruction helpful.
Was this instruction helpful to you?
Thank you for voting!
Freezer Temp Warm
Freezer would not defrost and ice would accumulate on the coils. After the GE repairman quoted me a price to defrost and repair it – which was ridiculous – I decided to tackle the problem myself. I am posting this comment as I found other comments very helpful with trouble shooting my problem. After reviewing other home owner repair comments I decided to first replace the upper sensor, thermostat and heater bracket assy. The longest task to do this was defrosting the coils. What a mess that turned out to be. The items were fairly easy to replace. The sensor and thermostat needed to be spliced and I used good techniques and sealed the splices with electrical tape. Defrost thru repair was about 3.5 hours. Unfortunately, this did not solve the problem and the temperature started rising after the coils froze over again. I decided to go one step further and replace the main board. One repair comment said that it is important to completely remove all of the frost before engaging the new main board – which made sense to me. The defrosting was easier and faster the second time as I plugged the drain below the coils, used hot water and then my shop wet vacuum to remove all the defrost water. Then I reversed the air flow to completely dry the coils. The main board installation instructions were fairly easy to follow. I took a picture with my camera just to ensure all the wires were installed properly. However, that was not necessary the plugs are unique and will only fit one way. The only problem was plugging in the power connector as it was in a different location on the board. With a little careful nudging it was successfully installed. Overall, a good experience and I am thankful for these repair comments by other!
Parts Used:
-
Richard from Chandler, AZ
-
Difficulty Level:A Bit Difficult
-
Total Repair Time:More than 2 hours
-
Tools:Nutdriver, Pliers, Screw drivers
42 of 47 people
found this instruction helpful.
Was this instruction helpful to you?
Thank you for voting!
Ice maker wouldn't work and the fan was making a clicking noise.
First, I must say that I was told that the mother board might be the problem. I called my husband to tell him what I was told the problem might have been and how much the part was. A little expensive, but still cheaper than calling a repair man. He told me to order the less expensive part first to see if that fixed it. The fan motor. We hung up the phone and for kicks I scrolled down the page to see if it might give any more information on the part and what it controlled, etc. I don't usually read comments, but was amazed at the ones I read. The second comment on the page said that his refrigerator made a whooing sound like a ghost. Our Frig has done this since the day we bought it! He replaced the mother board and the "ghost" moved out! The third comment was that his refirg made a clicking noise and the ice maker doesn't work! I immediately called my husband back and told him I was ordering the part! It arrived the next day. So extremely easy to put in! I removed 3 screws from the cover, disconnected a couple of wires, a few plastic clips; pushed the new part on the clips rehooked the wires and put the cover back on. I bet it took less than 10 minutes! My husband thinks I'm a genius!! Thank you so much for all of your help!
Parts Used:
-
Debra from Keystone Heights, FL
-
Difficulty Level:Really Easy
-
Total Repair Time:Less than 15 mins
-
Tools:Nutdriver
40 of 43 people
found this instruction helpful.
Was this instruction helpful to you?
Thank you for voting!
The freezer was whining and growling like a baby
I replaced the motor that runs the fan in the freezer compartment. Had to remove a number of shields to get to the fan and then some wires and screws to get at the motor. It came with a plug with 4 wires in it and I was supposed to pull 2 wires out of the old plug and place them in the new plug. Long story short the pins would not extract from the plug and the wiring harness was molded in solid plastic, so I ended up cutting the 4 wires to the motor and splicing in the new one and taping them with electrical tape. So far no more moaning and the ice cream is still hard, so I think we nailed it.
Parts Used:
-
James from Madison, CT
-
Difficulty Level:A Bit Difficult
-
Total Repair Time:1- 2 hours
-
Tools:Nutdriver
43 of 54 people
found this instruction helpful.
Was this instruction helpful to you?
Thank you for voting!
frost builds up in freezer section and refrigerator stops working slowly. manually defrost for 24-48 hours and starts working perfect. Goes through the cycle again after a week.
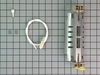
As advised by the forum just replaced the defrost heater assembly now the refrigerator works perfect. did not have to replace the thermostat.
My nephew had exactly same problem on ge refrigerator - replaced the defrost heater assembly and the problem is solved. Just remove the back panel in the freezer compartment, disconnect the cable, remove the nuts and replace the assemble. It is very simple. Bought both assembly from parts select.com - got next day delivery. they are great. would do business in future.
My nephew had exactly same problem on ge refrigerator - replaced the defrost heater assembly and the problem is solved. Just remove the back panel in the freezer compartment, disconnect the cable, remove the nuts and replace the assemble. It is very simple. Bought both assembly from parts select.com - got next day delivery. they are great. would do business in future.
Parts Used:
-
David from West Palm Beach, FL
-
Difficulty Level:Really Easy
-
Total Repair Time:15 - 30 mins
-
Tools:Nutdriver
34 of 35 people
found this instruction helpful.
Was this instruction helpful to you?
Thank you for voting!
Unit would not run.
I found if I would put pressure on one connector on the board the unit would come on. So the board had a short. I ordered it, it came in 24 hours and I installed it and problem was solved.
Parts Used:
-
Robert from Battle Creek, MI
-
Difficulty Level:Easy
-
Total Repair Time:15 - 30 mins
-
Tools:Pliers, Screw drivers
34 of 36 people
found this instruction helpful.
Was this instruction helpful to you?
Thank you for voting!
Freezer Was Not Cold Enough To Keep Food Frozen Or Make Ice
I am a single mom of two with limited funds. I had a repairman come out and find the problem and give an estimate. We were told that it was the evaporator fan motor and and the main control board. The repair would cost $400 and no guarantee. So I checked the cost of parts and it was $200 so for no guarantee I figured why not try it myself and possibly save $200. So I ordered the parts from partselect. Even though I paid the cheapest postage they arrived the next day. So from what I read and saw this would be a piece of cake. Well let me just say if the freezer section was gutted to begin with it might not have been that big of a deal. As it was getting to the top screws of the panel that covers the evaporator fan required the removal of the icemaker and all. I am not a tall woman nor am I a thin woman and fitting my body in that small freezer section was not easy. There were times that I had to have my teenagers reach a long arm in and hold a part up for me. After that I discovered that the fan I had purchased only had 4 wires. The one from my old fan had 6. I discovered that 2 of the wires went to some sort of sensor. Long story short I rigged it. I was able to remove the 2 prongs for the sensor and insert them into the empty holes on the new fan harness. It wasnt easy. I have limited tools too and I wont even get into how I did it. They did not fit the greatest so I used the electrical tape to cover the whole connection. I put the whole thing back together and debated on trying it without putting in the main board but I decided to trust the repairman this time and go for it. Getting to the main board was no big deal. But what disturbed me was the main board I held in my hands did not look exactly like the main board I was about to take out. I watched the video 3 times my how easy it looked. I then read the directions that came with it. It talked about removing a pin and cutting a wire. Well I about had a stroke worrying. I finally found the serial # on my frig and thankfully mine was not on the list. However the directions did still say something about if there wasnt a wire in pin 2 proceed to step 3. Well I had a wire in pin 2. So it was confusing. My serial # wasnt one of the models #'s given but I did have a wire in pin 2. I just took a chance and trusted the serial #'s and ignored the rest of it. I plugged the wires on the new board one at a time. Put the cover back on and prayed as I plugged it in. A soft purr began. It was running. The freezer was around 60 degrees. I put a room thermometer in to make sure it was going down. It kept going down. Around 3 hours after I finished there was a loud noise from the freezer. It had made ice something it had not done in months. I stayed awake most of the night watching and listening to it. It got down in the single digits I was afraid that maybe it would never shut off. It finally shut off as I was making the kids breakfast the next morning. Of course I was worried that it would not restart. So I opened the freezer and fanned in room air. It worked. Since then we have purchased no more dry ice or regular ice. We bought a tub of ice cream and more than one day of school lunch stuff at a time. Bottom line it works. Thanks to everyones post and to partselect for the video. I hope that I never have to do it again though.
Parts Used:
-
MARCELLA from FAIRDALE, KY
-
Difficulty Level:A Bit Difficult
-
Total Repair Time:More than 2 hours
-
Tools:Nutdriver, Screw drivers
39 of 55 people
found this instruction helpful.
Was this instruction helpful to you?
Thank you for voting!
Freezer would not defrost correctly
Took panel off back of inside of freezer section, took off old sensor from the evaporator, spliced new sensor into the existing wires, waterproofed spliced connections, snapped sensor back onto evaporator, then put panel back on the inside of the freezer. Really, it took only 10 minutes to fix. Now refrigerator defrosts like it used to, and temps have settled in at specified temps.
Parts Used:
-
Michael from Milton, FL
-
Difficulty Level:Really Easy
-
Total Repair Time:Less than 15 mins
-
Tools:Pliers
32 of 34 people
found this instruction helpful.
Was this instruction helpful to you?
Thank you for voting!
Icemaker would not dispense cubes or crushed ice
Cause: Failed relays on main circuit board. Fix: Main circuit board replacement: Unplugged refrigerator. Removed 10 screws securing main circuit board metal cover (located on back of refrigerator) using a nutdriver. Disconnected 7 multi-pin electrical connectors from the circuit-board by firmly pulling each connector from the circuitboard sockets using a needlenose plyers. Depressed the small locking prong on each of the 4 plastic circuit board mounting pegs while pulling the board off the mounting pegs.
Pressed new board in place over mounting pegs. Re-plugged in all connectors (no confusion because each connector has unique pin counts). Replaced all mounting cover bolts, making sure to pin green ground wire to last bolt. Plugged in refrigerator. Done.
Note: I determined the main circuit board was bad by removing the auger motor assembly from the freezer and testing the auger motor harness power pins. AC voltage should jump when ice demand lever is pushed (while pressing the internal door light off switch). If no voltage jump, then auger motor relays on main circuit board have failed, indicating board replacement is needed.
Another check would be connecting an extension cord to the auger motor terminals and plugging it in. Motor should run. If it does, then motor is good and main circuit board is bad. If it doesn’t then auger motor is bad and needs replacement.
Pressed new board in place over mounting pegs. Re-plugged in all connectors (no confusion because each connector has unique pin counts). Replaced all mounting cover bolts, making sure to pin green ground wire to last bolt. Plugged in refrigerator. Done.
Note: I determined the main circuit board was bad by removing the auger motor assembly from the freezer and testing the auger motor harness power pins. AC voltage should jump when ice demand lever is pushed (while pressing the internal door light off switch). If no voltage jump, then auger motor relays on main circuit board have failed, indicating board replacement is needed.
Another check would be connecting an extension cord to the auger motor terminals and plugging it in. Motor should run. If it does, then motor is good and main circuit board is bad. If it doesn’t then auger motor is bad and needs replacement.
Parts Used:
-
Jeffrey from Highlands Ranch, CO
-
Difficulty Level:A Bit Difficult
-
Total Repair Time:15 - 30 mins
-
Tools:Nutdriver, Pliers
33 of 38 people
found this instruction helpful.
Was this instruction helpful to you?
Thank you for voting!
No water or ice and a constant ticking sound from the control panel
Very easy repair to do. Read instruction sheet before starting! Unplug unit prior to removing panel cover.
Remove three hex head screws holding control panel cover in place and reveal the circuit board.
Remove all the wiring harnesses by gently pulling them from the sockets on the board. Do not pull the wires - make sure you pull on the plastic socket so that the wires aren't damaged. If plugs seem tight use needle nose pliers to gently wiggle them out. Remove earth (green) wire from spade connection on fridge chassis. The new board has a slightly different connection for the earth wire.(No spade connector - wire now has a ring connector that attaches between panel cover and fridge chassis using one of the hex head panel screws when the cover is replaced.
Using needle nose pliers locate four plastic mounting tabs holding the board in place and squeeze in the end of each tab whilst gently pulling the board off it. Repeat for all four tabs and remove old circuit board.
Making sure the new board is the right way round locate it on the plastic tabs and push gently until you hear the tabs click. Gently pull the circuit board to ensure it is locked in place.
Re-install all the wiring harnesses. Put a hex head screw through the cover panel and slip the earth wire ring over it and screw panel to chassis. Replace two remaining hex head screws and plug fridge back in.
Voila!! No more ticking sounds and a plentiful supply of ice and water!!
Remove three hex head screws holding control panel cover in place and reveal the circuit board.
Remove all the wiring harnesses by gently pulling them from the sockets on the board. Do not pull the wires - make sure you pull on the plastic socket so that the wires aren't damaged. If plugs seem tight use needle nose pliers to gently wiggle them out. Remove earth (green) wire from spade connection on fridge chassis. The new board has a slightly different connection for the earth wire.(No spade connector - wire now has a ring connector that attaches between panel cover and fridge chassis using one of the hex head panel screws when the cover is replaced.
Using needle nose pliers locate four plastic mounting tabs holding the board in place and squeeze in the end of each tab whilst gently pulling the board off it. Repeat for all four tabs and remove old circuit board.
Making sure the new board is the right way round locate it on the plastic tabs and push gently until you hear the tabs click. Gently pull the circuit board to ensure it is locked in place.
Re-install all the wiring harnesses. Put a hex head screw through the cover panel and slip the earth wire ring over it and screw panel to chassis. Replace two remaining hex head screws and plug fridge back in.
Voila!! No more ticking sounds and a plentiful supply of ice and water!!
Parts Used:
-
john from waxahachie, TX
-
Difficulty Level:Really Easy
-
Total Repair Time:Less than 15 mins
-
Tools:Nutdriver, Pliers
32 of 39 people
found this instruction helpful.
Was this instruction helpful to you?
Thank you for voting!