















GRT21PRAD2 Gibson Refrigerator - Instructions
Keep searches simple. Use keywords, e.g. "leaking", "pump", "broken" or "fit".
Repaired Oven Range Light Bulb
The bulb has a plastic clear cover. That cover can just be carefully removed using a screwdriver. It's held in by a metal bracket. After you remove the cover. You'll just need to replace the bulb and then re-install the cover and bracket.
Parts Used:

-
Alan from SAN MATEO, CA
-
Difficulty Level:Very Easy
-
Total Repair Time:Less than 15 mins
-
Tools:Screw drivers
3 of 3 people
found this instruction helpful.
Was this instruction helpful to you?
Thank you for voting!
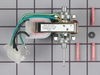
Motor squeal
I didn’t do the repair because the new motor had a female pigtail connector while the original motor has male connection. It came with wire clamps but didn’t want to cut wires to make repair. The pictures online show a male connection. Put the old motor back in and now it works fine.
Parts Used:
-
Mark from Partlow, VA
-
Difficulty Level:Very Difficult
-
Total Repair Time:30 - 60 mins
-
Tools:Socket set
3 of 3 people
found this instruction helpful.
Was this instruction helpful to you?
Thank you for voting!
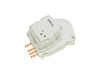
defrost heater not working; defrost timer not rotating so coils ice up
Checked for continuity in heater, defrost thermostat and defrost timer. Heater good; not sure about thermostat or timer. Replaced thermostat - no change. Replaced timer - rotating and heater working.
Parts Used:
-
James from VOLANT, PA
-
Difficulty Level:Easy
-
Total Repair Time:1- 2 hours
-
Tools:Nutdriver, Screw drivers
3 of 3 people
found this instruction helpful.
Was this instruction helpful to you?
Thank you for voting!
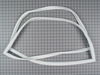
Water Was Leaking out of Refrigerator
Our old gasket was shot to hell, so we figured we'd replace it to see if that would solve the problem. We followed the instructions of another customer. We realized it was better if we removed the entire door in order to attach the gasket. That took a little doing, but it was totally the way to go. Miracle of Miracles, the leaking has stopped, the food is super cold, and I couldn't be happier.
Parts Used:
-
Julie from Douglaston, NY
-
Difficulty Level:A Bit Difficult
-
Total Repair Time:30 - 60 mins
-
Tools:Nutdriver, Screw drivers, Socket set
3 of 4 people
found this instruction helpful.
Was this instruction helpful to you?
Thank you for voting!
gasket was deformed; water condensed inside
-
Thomas from Pittsburgh, PA
-
Difficulty Level:Easy
-
Total Repair Time:15 - 30 mins
-
Tools:Screw drivers
4 of 7 people
found this instruction helpful.
Was this instruction helpful to you?
Thank you for voting!
The refrigerator wasn't cold enough.
I removed the plastic shroud on the ceiling of the refigerator, unscrewed and unplugged the old defrost timer, and replaced it with the new one. I reinstalled the shroud with the new timer installed.
Parts Used:
-
John from San Diego, CA
-
Difficulty Level:Really Easy
-
Total Repair Time:Less than 15 mins
-
Tools:Screw drivers
3 of 4 people
found this instruction helpful.
Was this instruction helpful to you?
Thank you for voting!
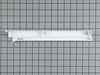
the drawer was broken because of carelessness
I followed the directions, which were very simple and easy to follow. The whole process was easy and fast. Couldn't be happier.
Parts Used:
-
Christina from Newtown Square, PA
-
Difficulty Level:Really Easy
-
Total Repair Time:Less than 15 mins
-
Tools:Screw drivers
2 of 2 people
found this instruction helpful.
Was this instruction helpful to you?
Thank you for voting!
4 broken drawer cover supports
Followed someone before me instructions. very simple and easy
Parts Used:
-
Chester from STOCKTON, CA
-
Difficulty Level:Very Easy
-
Total Repair Time:Less than 15 mins
-
Tools:Screw drivers
2 of 2 people
found this instruction helpful.
Was this instruction helpful to you?
Thank you for voting!
The rack was broken and the meat drawer would fall down when pulled out. Had to use one hand to steady drawer while selecting meat/cheese.
Just like the very helpful video. Took the drawer out. Lifted the glass cover out. Took 2 screws out and extracted broken rail. Placed the new rail in with 2 screws. Voila! Easy-peasy.
Parts Used:
-
RENEE from SALESVILLE, OH
-
Difficulty Level:Really Easy
-
Total Repair Time:Less than 15 mins
-
Tools:Screw drivers
2 of 2 people
found this instruction helpful.
Was this instruction helpful to you?
Thank you for voting!
The original fan motor began masking a noise and finally stoped working.
Followed video instruction and completed the replacement. I had to join the wires since the connector was a male plug to a make plug.
Parts Used:
-
Justin from FRANKLIN, TN
-
Difficulty Level:Easy
-
Total Repair Time:30 - 60 mins
-
Tools:Nutdriver
2 of 2 people
found this instruction helpful.
Was this instruction helpful to you?
Thank you for voting!
Freezer wasn't cooling - compressor not engaging
Ordered the Capacitor and the Thermostat Control. Parts were received in a matter of a few days, easy to install, but did not fix the problem. Had to call a repairman to fix the problem (compressor relay - this part not available to order for this model number with Parts Select). Will continue to use Parts Select in the future for other parts, but not happy that the actual part I needed was not available - had to use other methods.
Parts Used:
-
Judy from ROYSE CITY, TX
-
Difficulty Level:Really Easy
-
Total Repair Time:30 - 60 mins
2 of 2 people
found this instruction helpful.
Was this instruction helpful to you?
Thank you for voting!
Freezer was freezing but refridgerator was warm. Checked fan and it was not turning.
Unplug fridge. Removed 2 nuts to get the vent plate off and two more nuts to get the motor mount off. Removed fan blade and then the fan motor. I put the new motor in and put everything back as it was. It was very easy. I had items in the freezer, so I didn't turn the fridge off other than to replace the part. It took about 6 hours for the fridge to reach optional temps because I didn't get to defrost and the fridge had to work it out on it's own. If you don't need the freezer then you should turn the refridgerator off for at least an hour and open the doors so the coils can defrost and any ice blockage between the freezer and fridge portion can melt away as well.
Parts Used:
-
Jerry from PHOENIX, AZ
-
Difficulty Level:Really Easy
-
Total Repair Time:15 - 30 mins
-
Tools:Socket set
2 of 2 people
found this instruction helpful.
Was this instruction helpful to you?
Thank you for voting!
the freezer would stick in defrost and not come out
Removed the vent cover at the bottom. Removed the screws. disconected the harnes and put the new timer in. This was a very easy fix. Thank You!
Parts Used:
-
carol from woodland, WA
-
Difficulty Level:Really Easy
-
Total Repair Time:Less than 15 mins
-
Tools:Screw drivers
2 of 3 people
found this instruction helpful.
Was this instruction helpful to you?
Thank you for voting!
The original support was broken, tried epoxy and it only held for a few months before breaking again
All I had to do was remove the original support that was on the inside wall of the refrigerator, which I had to use pliers since there were broken pieces, and then I just snapped the new one into the three holes provided for this support. The crisper drawer works fine now. It literally only took about 1 minute.
Parts Used:
-
Arand from Yorktown, IN
-
Difficulty Level:Really Easy
-
Total Repair Time:Less than 15 mins
-
Tools:Pliers
2 of 3 people
found this instruction helpful.
Was this instruction helpful to you?
Thank you for voting!
refrigerator shelf guard kept falling off, causing everything to come crashing down
Simply popped the new end caps into place with the old guard and now it is tight and secure. Easy Peasy. Of course all this is after the operator at PartSelect ordered the right part for me; I had ordered the freezer door end cap, not what I wanted. I received the correct part the very next morning. Returning the wrong part was a breeze too.
Parts Used:
-
Kathryn from Anadarko, OK
-
Difficulty Level:Really Easy
-
Total Repair Time:Less than 15 mins
2 of 3 people
found this instruction helpful.
Was this instruction helpful to you?
Thank you for voting!